D
IRECTION FR091521, REVISION 1 VIVID S60N/VIVID S70N BASIC SERVICE MANUAL
8-150 Section 8-6 - Mechanical Platform Components - Replacement Procedures
PRELIMINARY
8-6-5 LCD Arm Alton 21.5in Wide Replacement Procedure
8-6-5-1 Tools
Use the appropriate flat and Phillips type screwdrivers, side cutting pliers and a 5mm Allen key.
8-6-5-2 Time Required
60 min
8-6-5-3 Preparation
1.) Shut down the Vivid™ S60/Vivid™ S70 ultrasound unit, as described in Power Shut Down on page
4 - 7.
2.) Remove the 21.5in Monitor as described in Remove the 21.5 inch Monitor on page 8 - 31.
8-6-5-4 LCD Arm Alton 21.5in Wide Monitor Removal Procedure
1.) Remove the two screws then remove the two Upper Service Covers, one on each side of the upper
part of the LCD Arm.
2.) Remove the Vertical Service Cover. It is clipped on, so it can be removed by applying some force.
Refer to Table 9-5 on page 9-3 - LCD Arm Alton 21.5in Wide
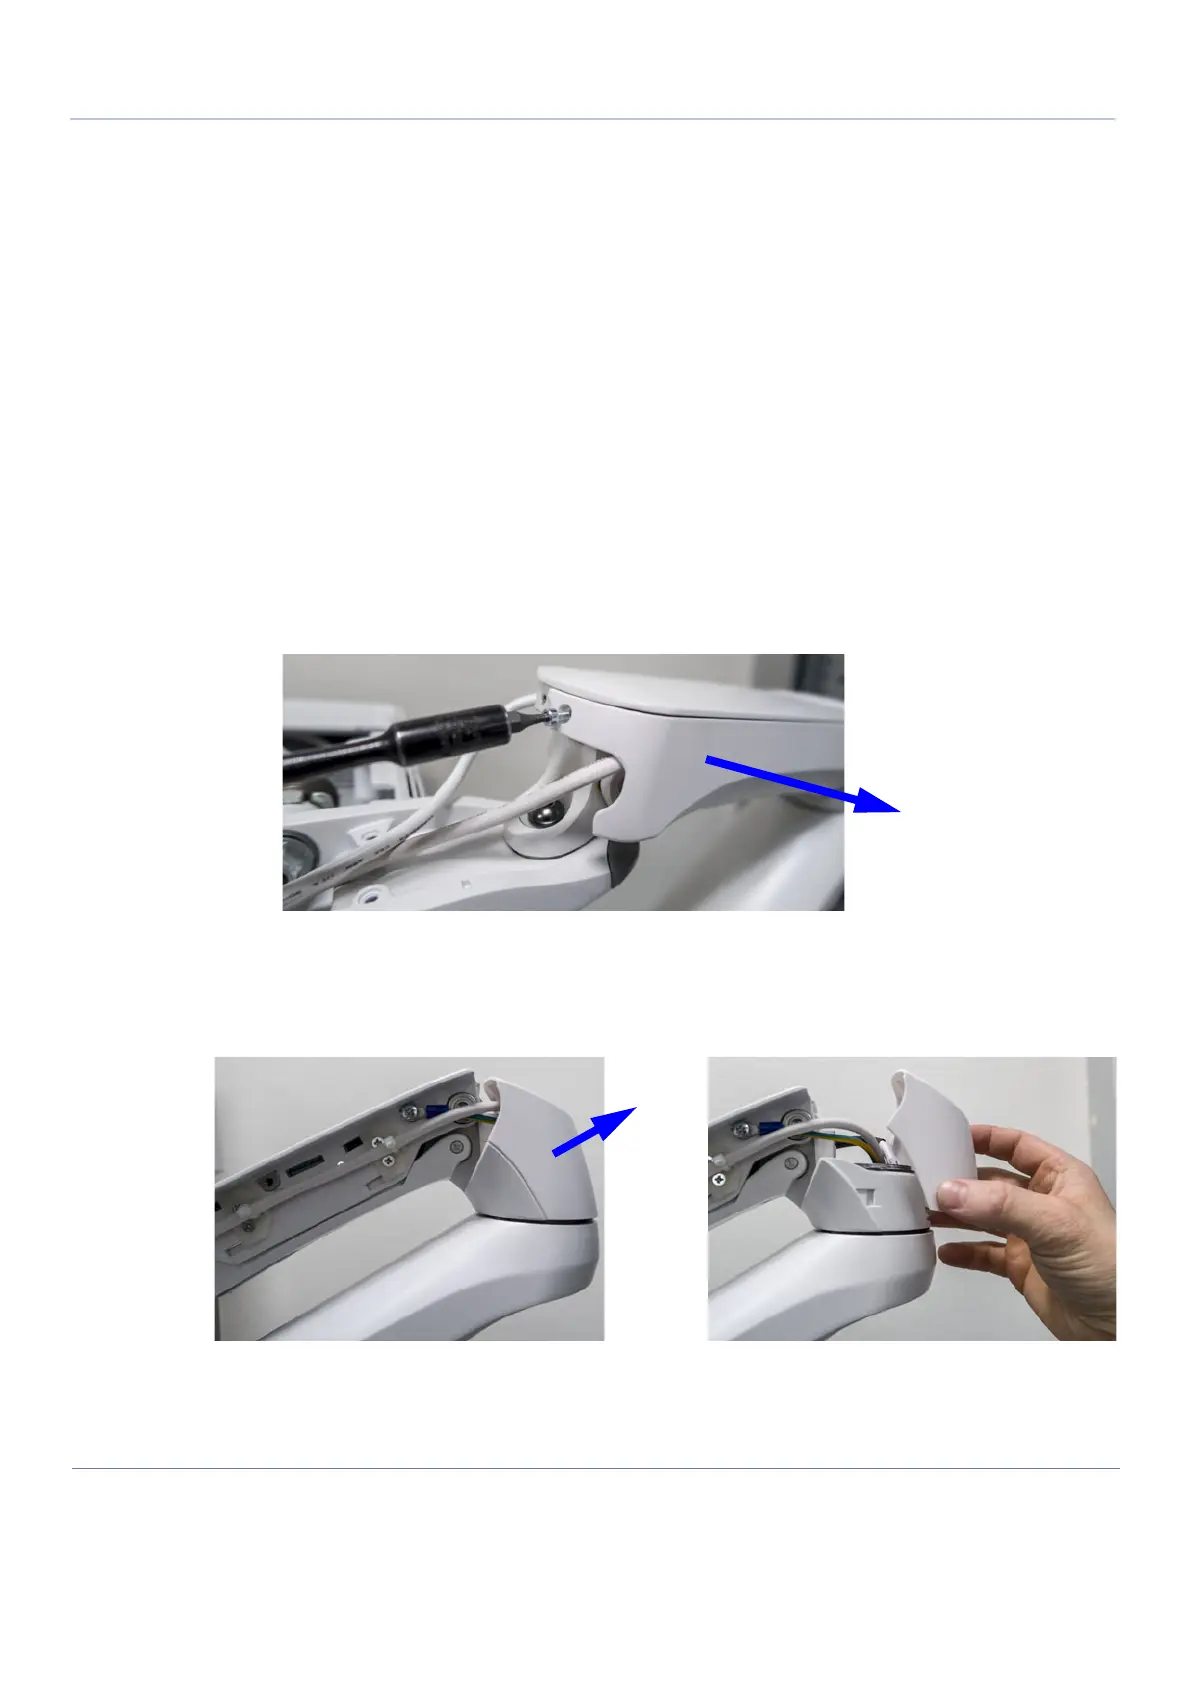
Figure 8-181 Remove the screw and the Upper Service Cover (one side illustrated)
Figure 8-182 Remove the Vertical Service Cover

 Loading...


