D
IRECTION FR091521, REVISION 1 VIVID S60N/VIVID S70N BASIC SERVICE MANUAL
Chapter 8 - Replacement Procedures 8-83
PRELIMINARY
Section 8-5
Electronic Cage Components - Replacement Procedures
NOTE: When replacing Vivid™ S60/Vivid™ S70 lower section components, after removal of the system covers (left
and right sides; front), the Front End door assembly should be removed from the main assembly (to gain
access to the internal components) and placed on a stable surface. These steps are described in the procedure
below.
8-5-1 Opening and Removing the Front End Door Assembly
8-5-1-1 Tools
Appropriate Phillips screwdriver
8-5-1-2 Time Required
5 min
8-5-1-3 Preparation
Shut down the Vivid™ S60/Vivid™ S70 ultrasound unit, as described in Power Shut Down on page 4 - 7.
8-5-1-4 Front End Door Assembly Opening and Removal Procedure
1) Remove the following covers: left side, right side, DVD, front.
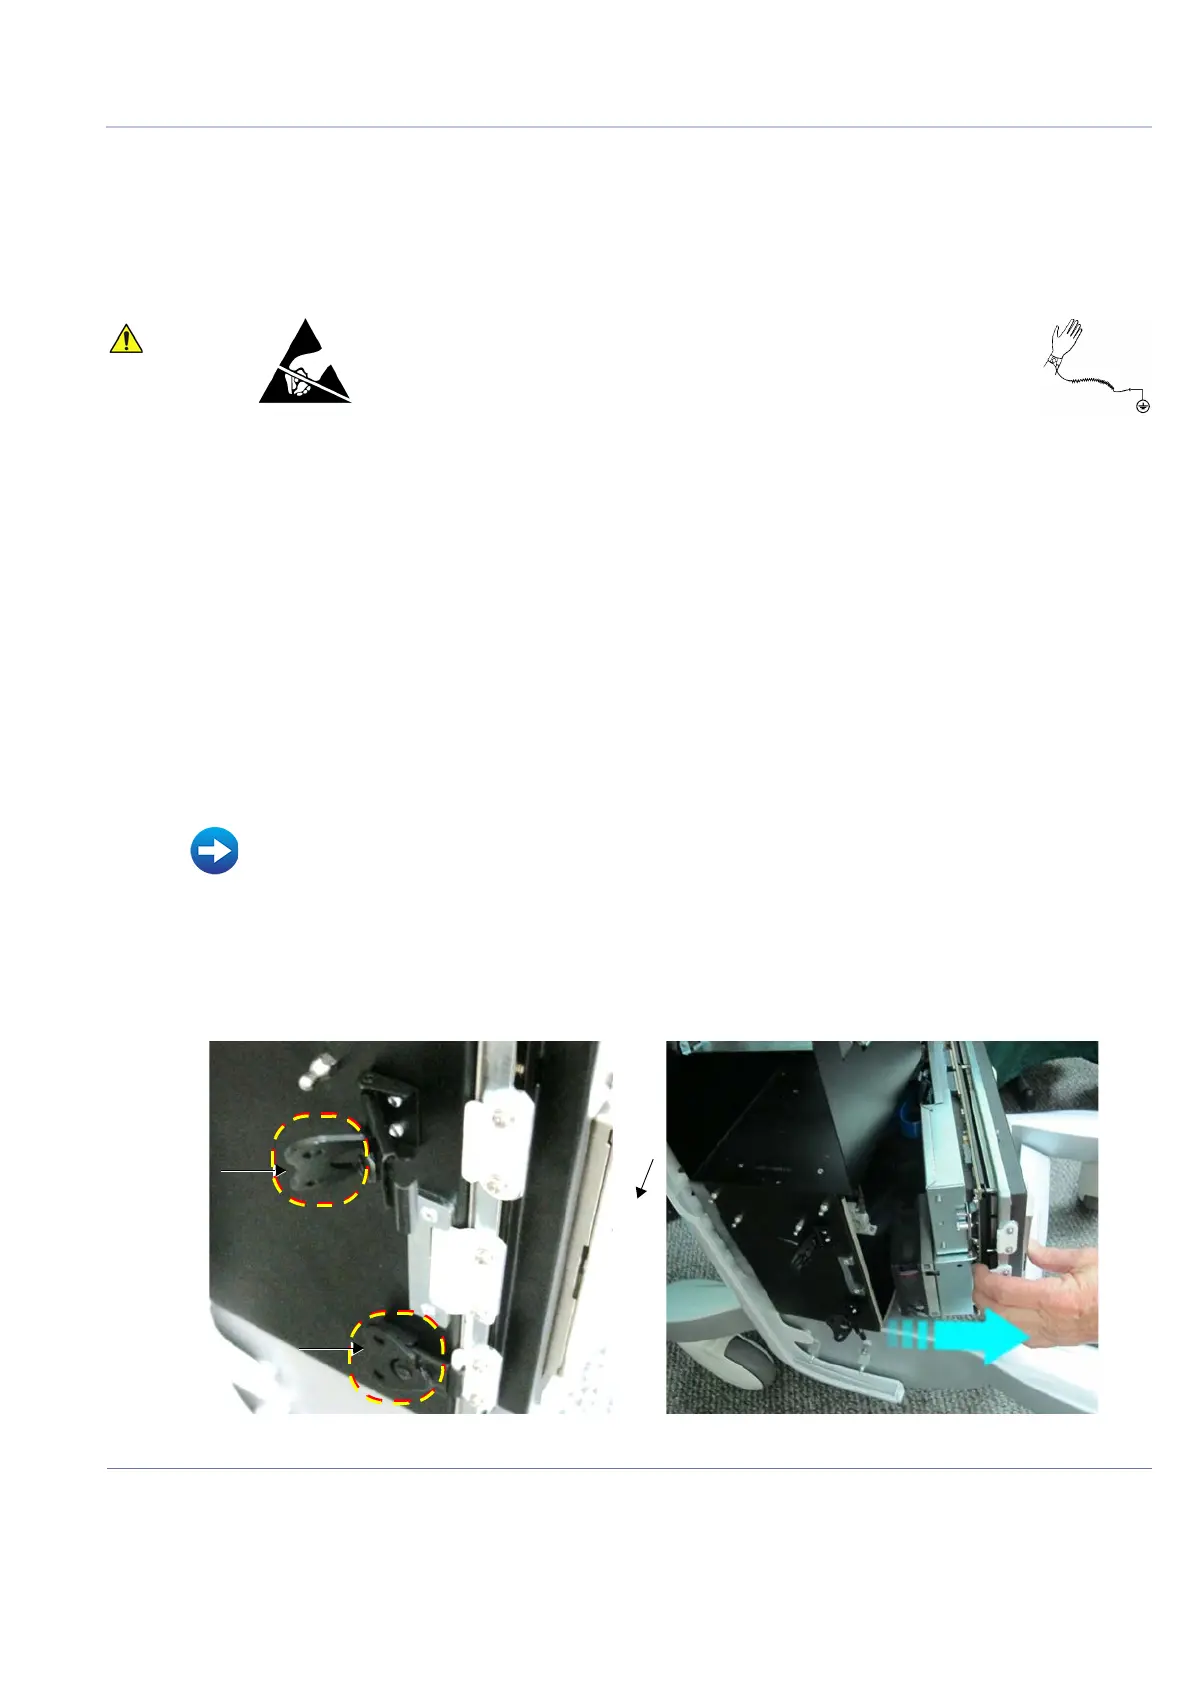
2) Open the two fastening latches on the left side of the Front End door assembly and carefully open
the cage door. (Figure 8-104).
When performing these procedures, take precautions to avoid damage of
electrostatic-sensitive components. Always have the ESD wrist strap
connected either to the DIB chassis or to the GND plug at the rear of the
scanner, and to your hand.
If a battery is present, first remove the battery as it contains stored energy.
Refer to Battery Removal Procedure on page 8 - 145.
• Air Inlet (Left Side) Cover Removal Procedure on page 8 - 7
• Right Side Cover Removal Procedure on page 8 - 10
• DVD Cover Removal Procedure on page 8 - 11
• Front Cover Removal Procedure on page 8 - 16
Figure 8-104 Unfastening the Latches and Opening the Cage Door

 Loading...


