D
IRECTION FR091521, REVISION 1VIVID S60N/VIVID S70N BASIC SERVICE MANUAL
Chapter 4 - General Procedures and Functional Checks 4-5
PRELIMINARY
7.) Proceed as follows:
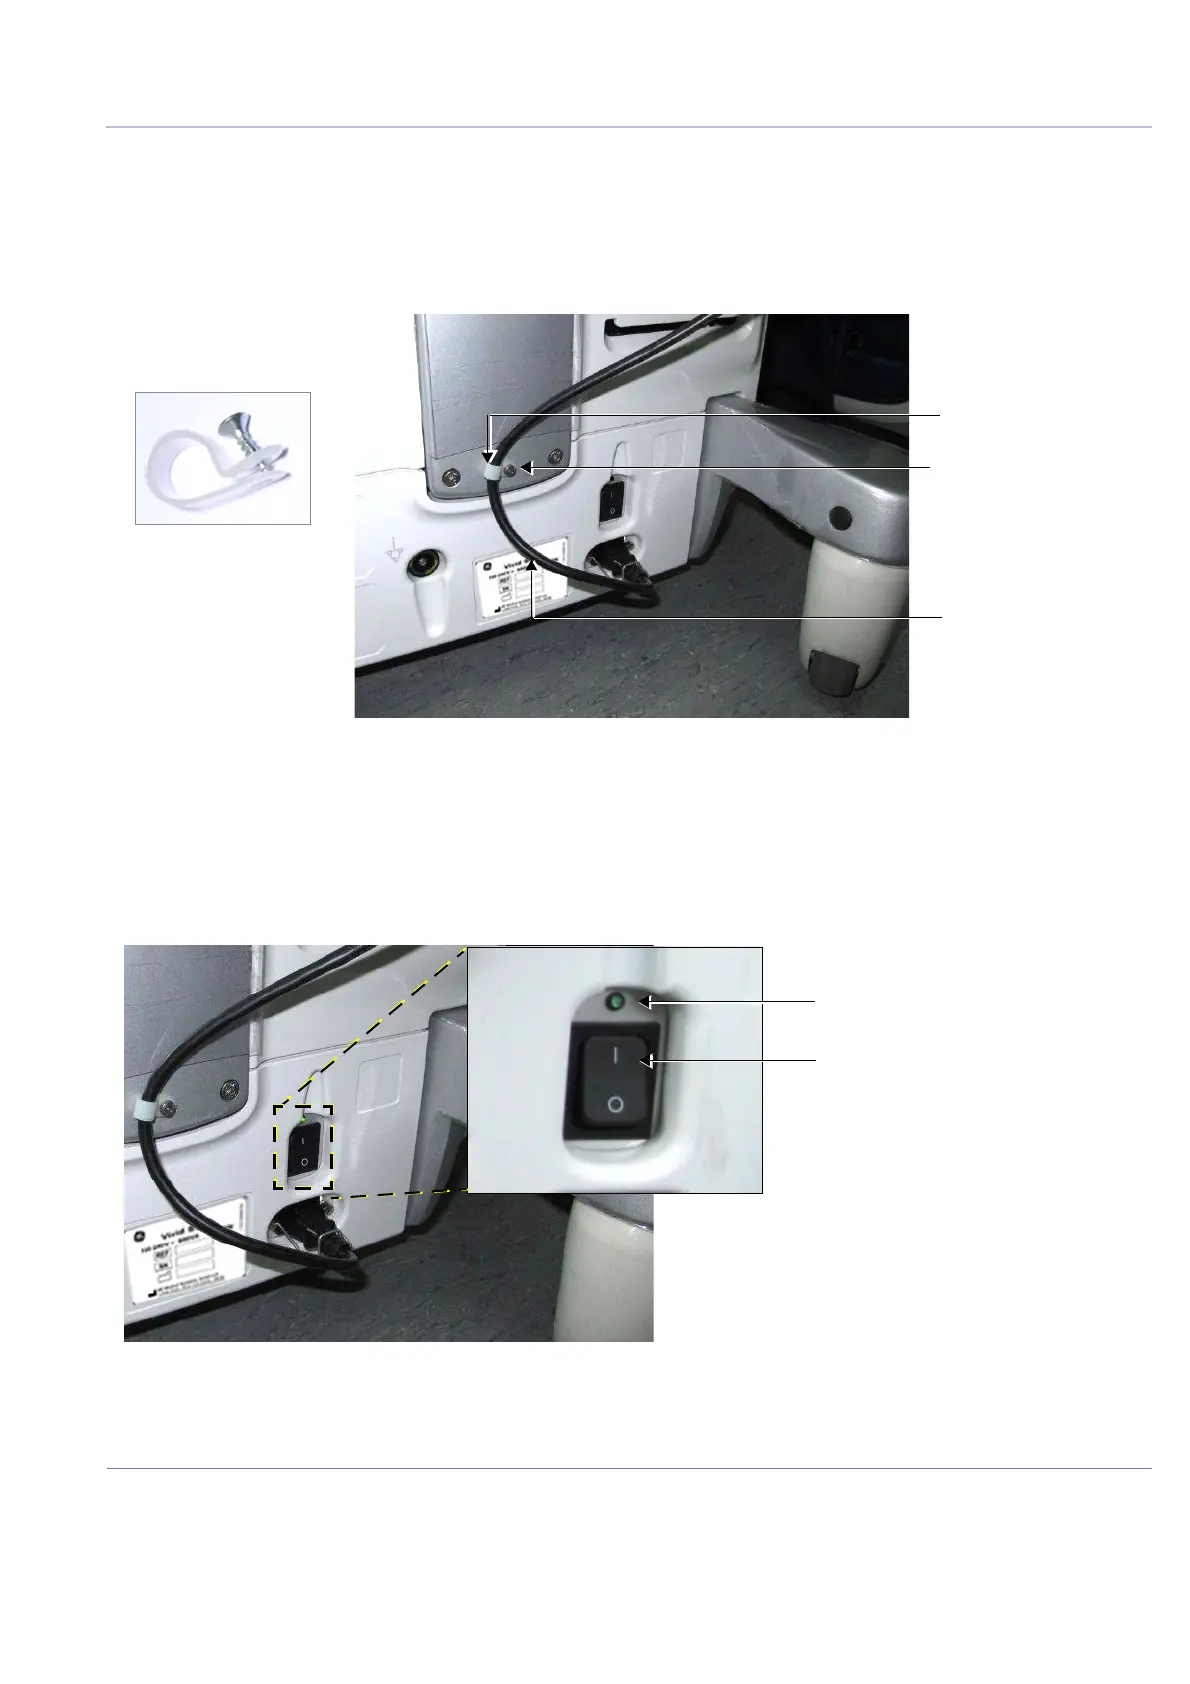
a.) Loosen the screw to open the plastic cable clamp (see Figure 4-3).
b.) Route the AC power cable upwards and through the clamp.
c.) Screw the plastic cable clamp into position on the support column (see below), carefully
tightening the screw sufficiently to secure the cable firmly in the clamp.
Take care not to over-tighten the screw, or damage the cable!
8.) Connect the other end of the AC Power Cable (male plug) to a hospital-grade mains power outlet
with the proper rated voltage.
The unit is ready for Power/ON/Boot Up.
4-2-2-3 Switch ON the AC Power to Vivid™ S60/Vivid™ S70
1) Turn ON the Power ON/OFF switch at the rear of the system.
NOTE: The LED is illuminated green, indicating Power ON.
You should hear a “click” from the relays in the AC Power and the unit is ready for Power ON/Boot Up.
Figure 4-3 AC Power Cable Secured with Plastic Cable Clamp
.
Figure 4-4 AC Power ON
Plastic Cable Clamp
Screw
AC Power Cable
Plastic Cable Clamp
and Screw
LED Illuminated Green
Power ON/OFF Switch in ON Position

 Loading...


