52
────────────────────────────────────────────────────
5.4 Taking Measurements
────────────────────────────────────────────────────
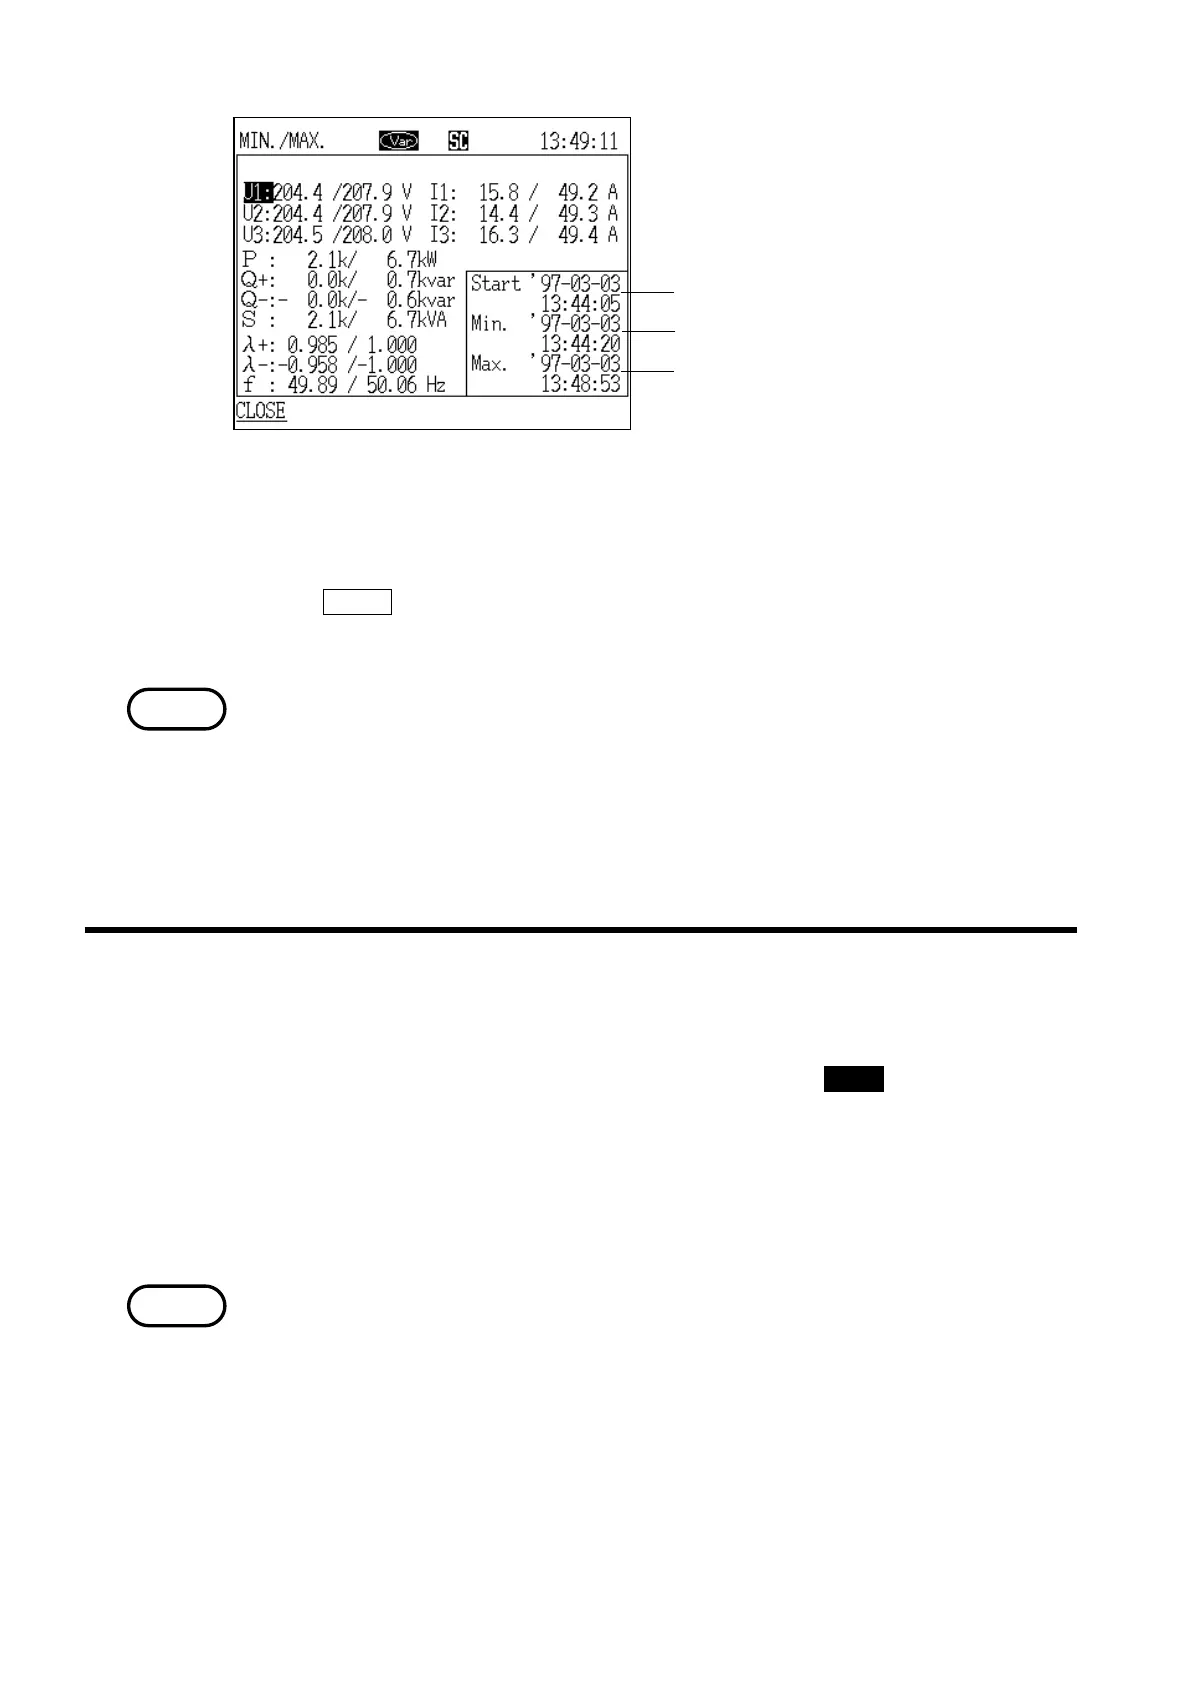
Data reset generation date and time
Minimum value generation date and tim
Maximum value generation date and tim
Minimum/Maximum Value Generation Time Window
NOTE
.4.3 Printing Measured Values on the Printer
NOTE
3. Position the cursor on the measurement item for which you wish to see the
generation time.
4. The generation time is displayed for the item specified by the cursor.
5. If the
CLOSE function key is pressed, the "Generation Time" window closes
and the display returns to the "Minimum/Maximum" screen.
"Over range" is defined to mean that the measured value exceeded 130% of
the voltage or current range, and is indicated by "o.r." (exit minimum and
maximum value)
Although the over range indication is made when the measured power exceeds
130% of the rated range, if the voltage and current measurements both exceed
130% of their respective ranges but the power measurement does not, the
measured power value is displayed.
1. While the measurement screen is displayed, press the PRINT key.
2. The "measurement values" and "time" that were selected as the print/save
items are printed.
Nothing is selected for the initial setting for the print/save value when the
power meter is shipped from the factory. For details on how to change the
items that are to be printed, refer to section 5.5.1, "Print/Save Items."
・Different "print/save items" are set for each measurement mode.
・Before printing, make sure that the setting for the device connected to the
"RS-232C interface" is "printer," and connect the printer to the power meter.
(Refer to section 8.2.11, "RS-232C Device.")