47
────────────────────────────────────────────────────
5.3 Preparations for Measurement
────────────────────────────────────────────────────
1
2
3
4
5
6
7
8
9
10
11
12
13
14
A
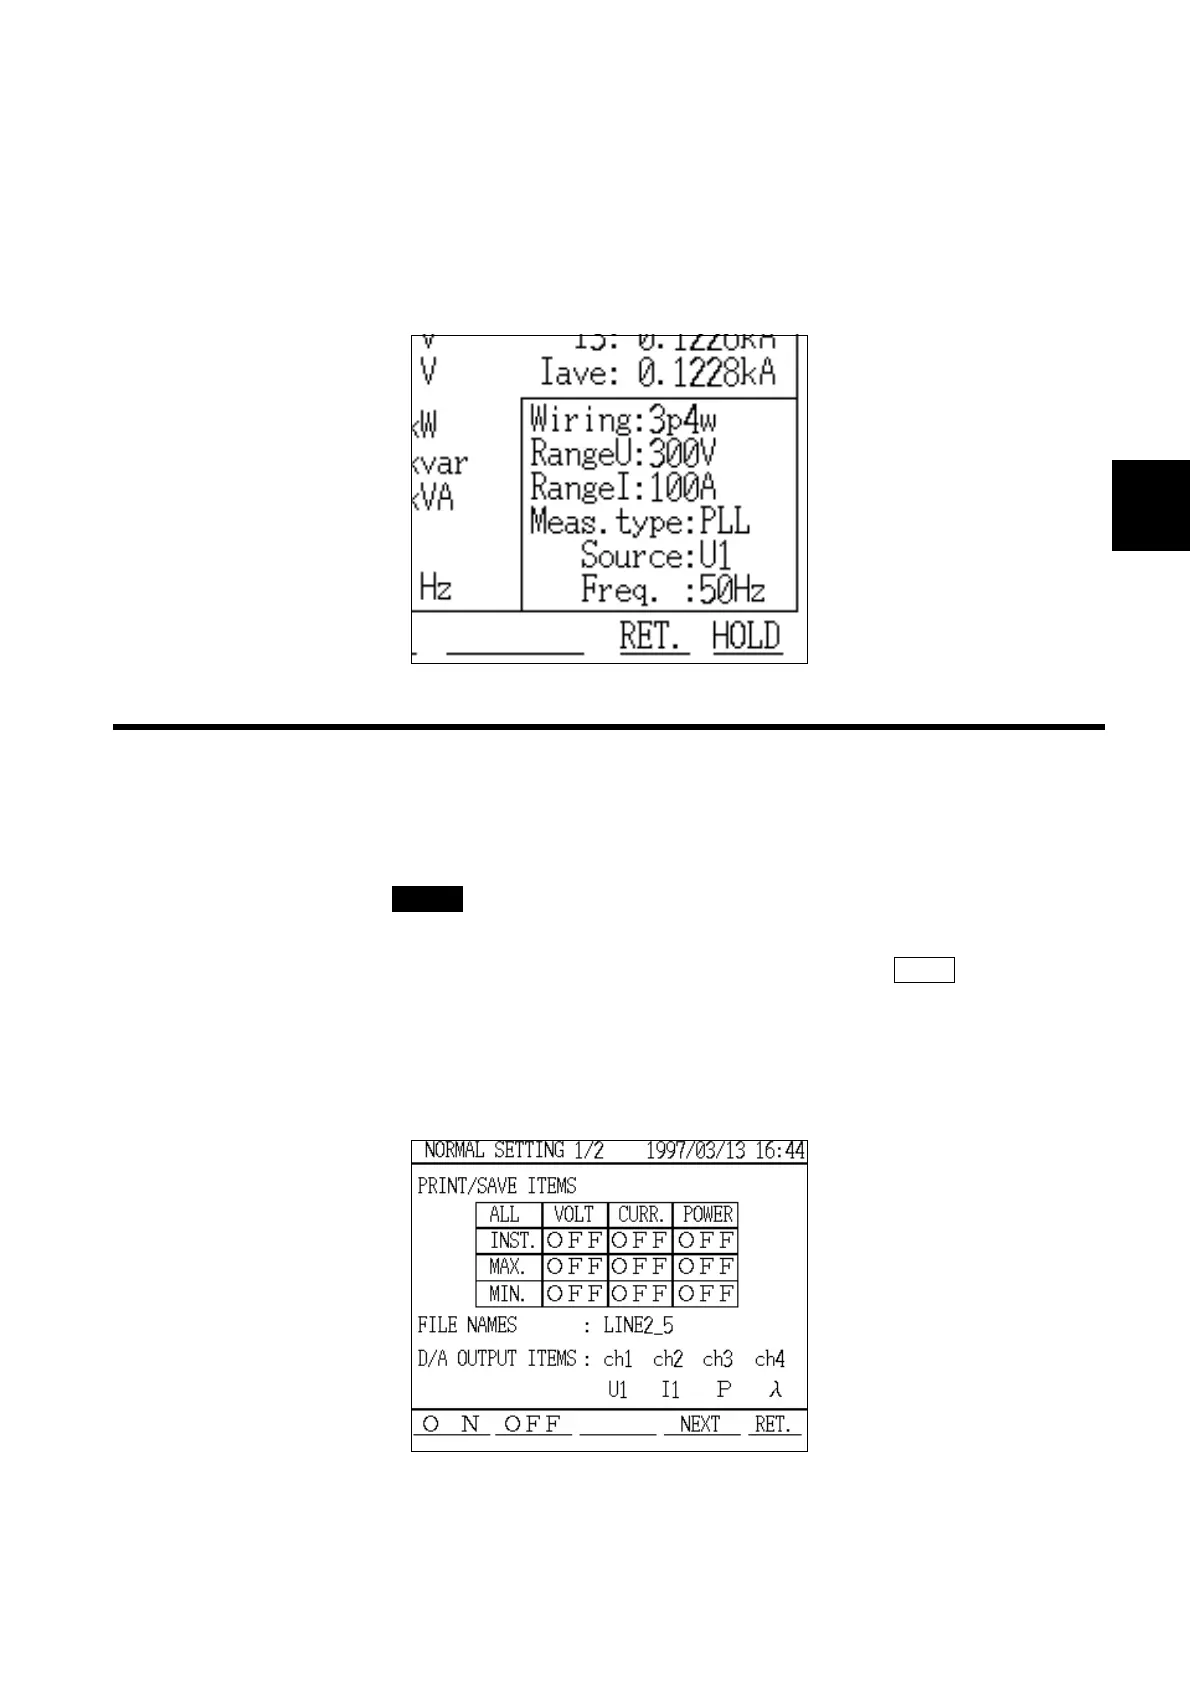
Display of Basic Settings
.3.2 Confirming Settings
Normal Measurement Setting Screen
(page 1/2)
(4) Checking the basic setting conditions
The basic settings (wiring, voltage range, current range, measurement method,
source, and line frequency) are displayed in the lower right corner of the
measurement screen.
If this settings necessary, the setting can be changed on "Normal
Measurement Settings" screen (page 2/2).
Confirm the setting items that are required for normal measurement mode.
1. Press the CHECK key.
2. The "Check" window is displayed.
3. Position the cursor on "Move to Setup" and then press the EXEC. function key.
4. The "Normal Measurement Settings" screen (page 1/2) is displayed.
The settings for the functions that can be used in normal measurement mode
(print/save items, file names, D/A output items) can be confirmed on this
screen.