54
────────────────────────────────────────────────────
5.5 Changing the Settings
────────────────────────────────────────────────────
.5.1 Print/Save Items
Instantaneous
values
Voltage(U1, U2, U3, Uave
Current(I1, I2, I3, Iave)
Power(P, Q, S, λ, f)
Maximum
values
Voltage(U1, U2, U3)
Current(I1, I2, I3)
Power(P, Q, S, λ, f)
Minimum
values
Voltage(U1, U2, U3)
Current(I1, I2, I3)
Power(P, Q, S, λ, f)
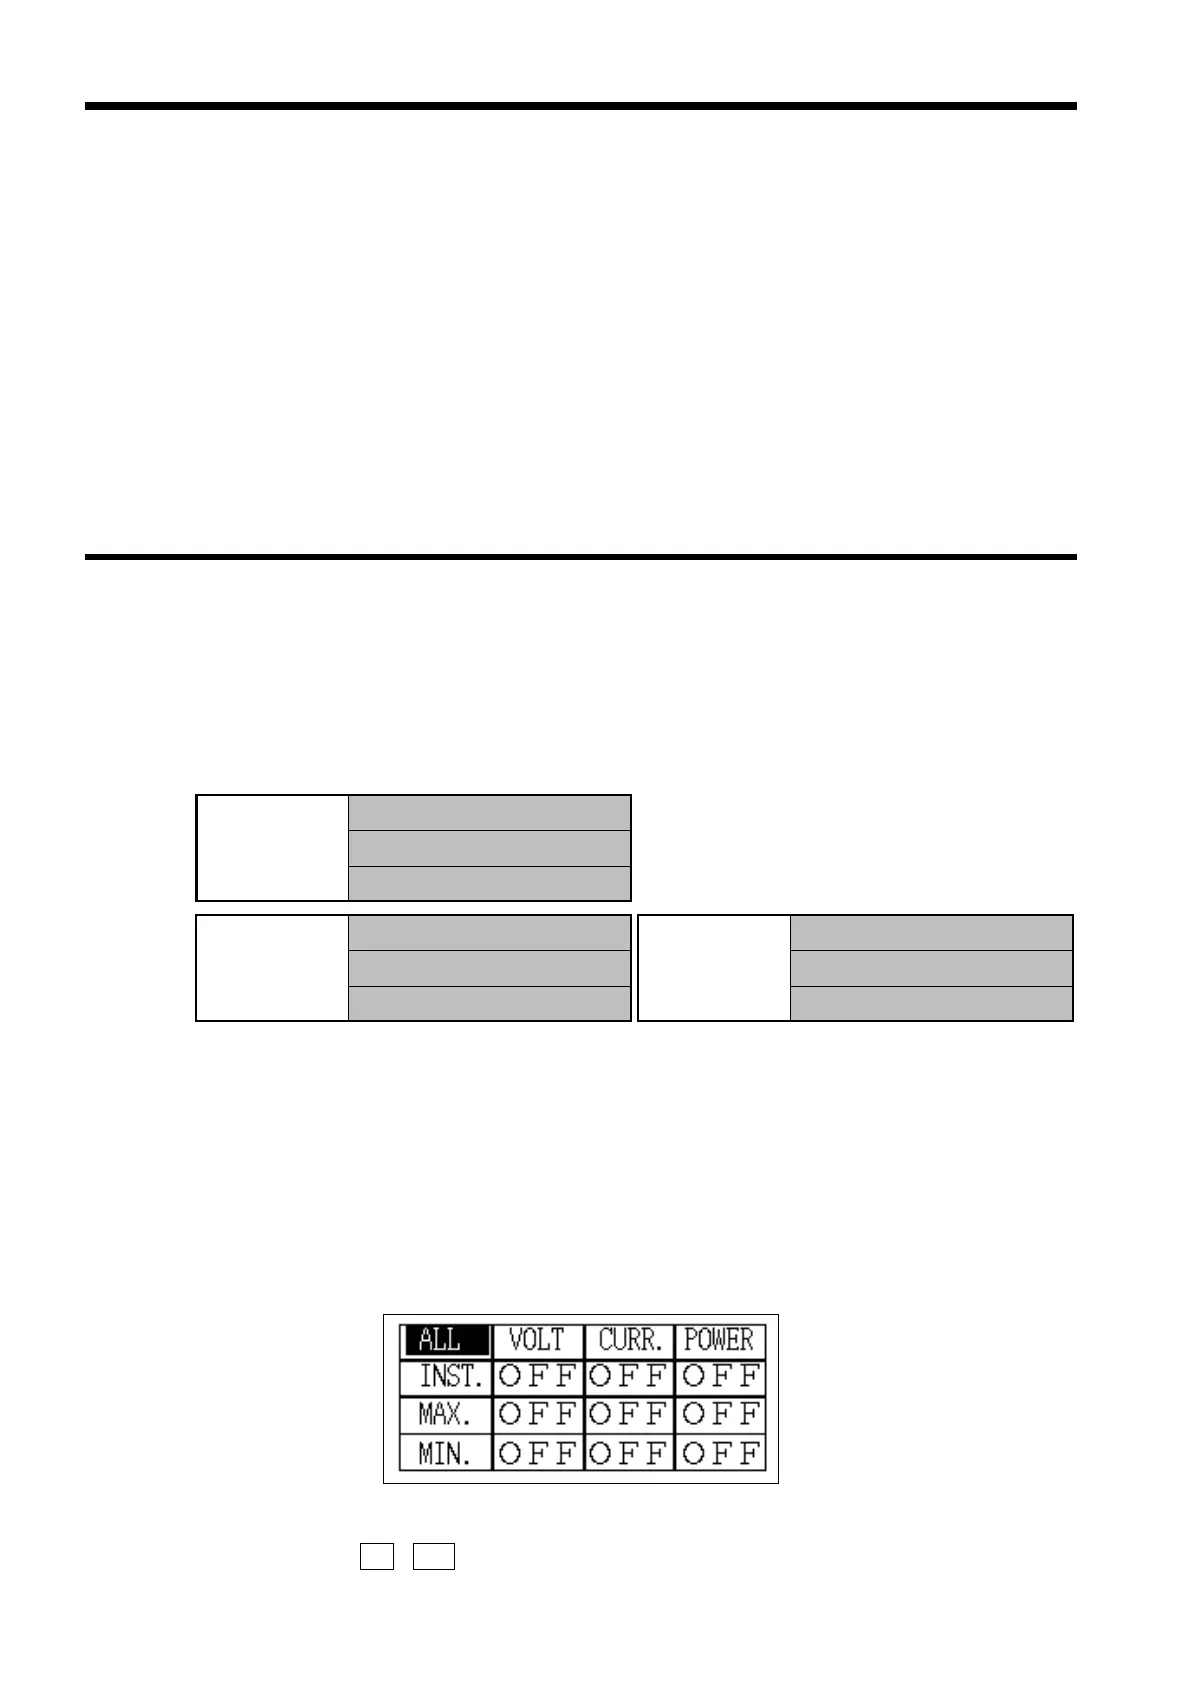
Print/Save Item Settings
.5 Changing the Settings
The asterisk ("*") is used in this section to indicate initial values (initial
settings when the power meter is shipped from the factory).
●To display the normal setting screen, press the CHECK key in the
normal measurement mode, and move the cursor to the "Move to
Setup" on the Check screen, and then press the EXEC. function key.
●Items that can be changed when the "Normal Measurement Settings"
screen (page 1/2) is displayed
These are used to set the items that are to be printed on the printer or saved
on floppy disk. The settings are shared for both devices; it is not possible to
set items so that they are printed on the printer but not saved on floppy disk.
Setting range: Set for 9 blocks
* All items are "OFF" (selected).
* Minimum/maximum value data includes the time at which
the minimum/maximum was generated.
(1) Position the cursor on an item that is to be set
1. If the cursor is positioned on "All (ALL)", all items can be changed at one time.
2. If the cursor is positioned on "Voltage (VOLT)" and "Instantaneous values
(INST.)", the settings in the vertical column and horizontal row can be
changed at one time.
(2) Press the
ON , OFF function keys to set each block