9-78 FLIGHT CONTROLS / FLAP CONTROLS
ICON A5 / MAINTENANCE MANUAL CHANGE C3
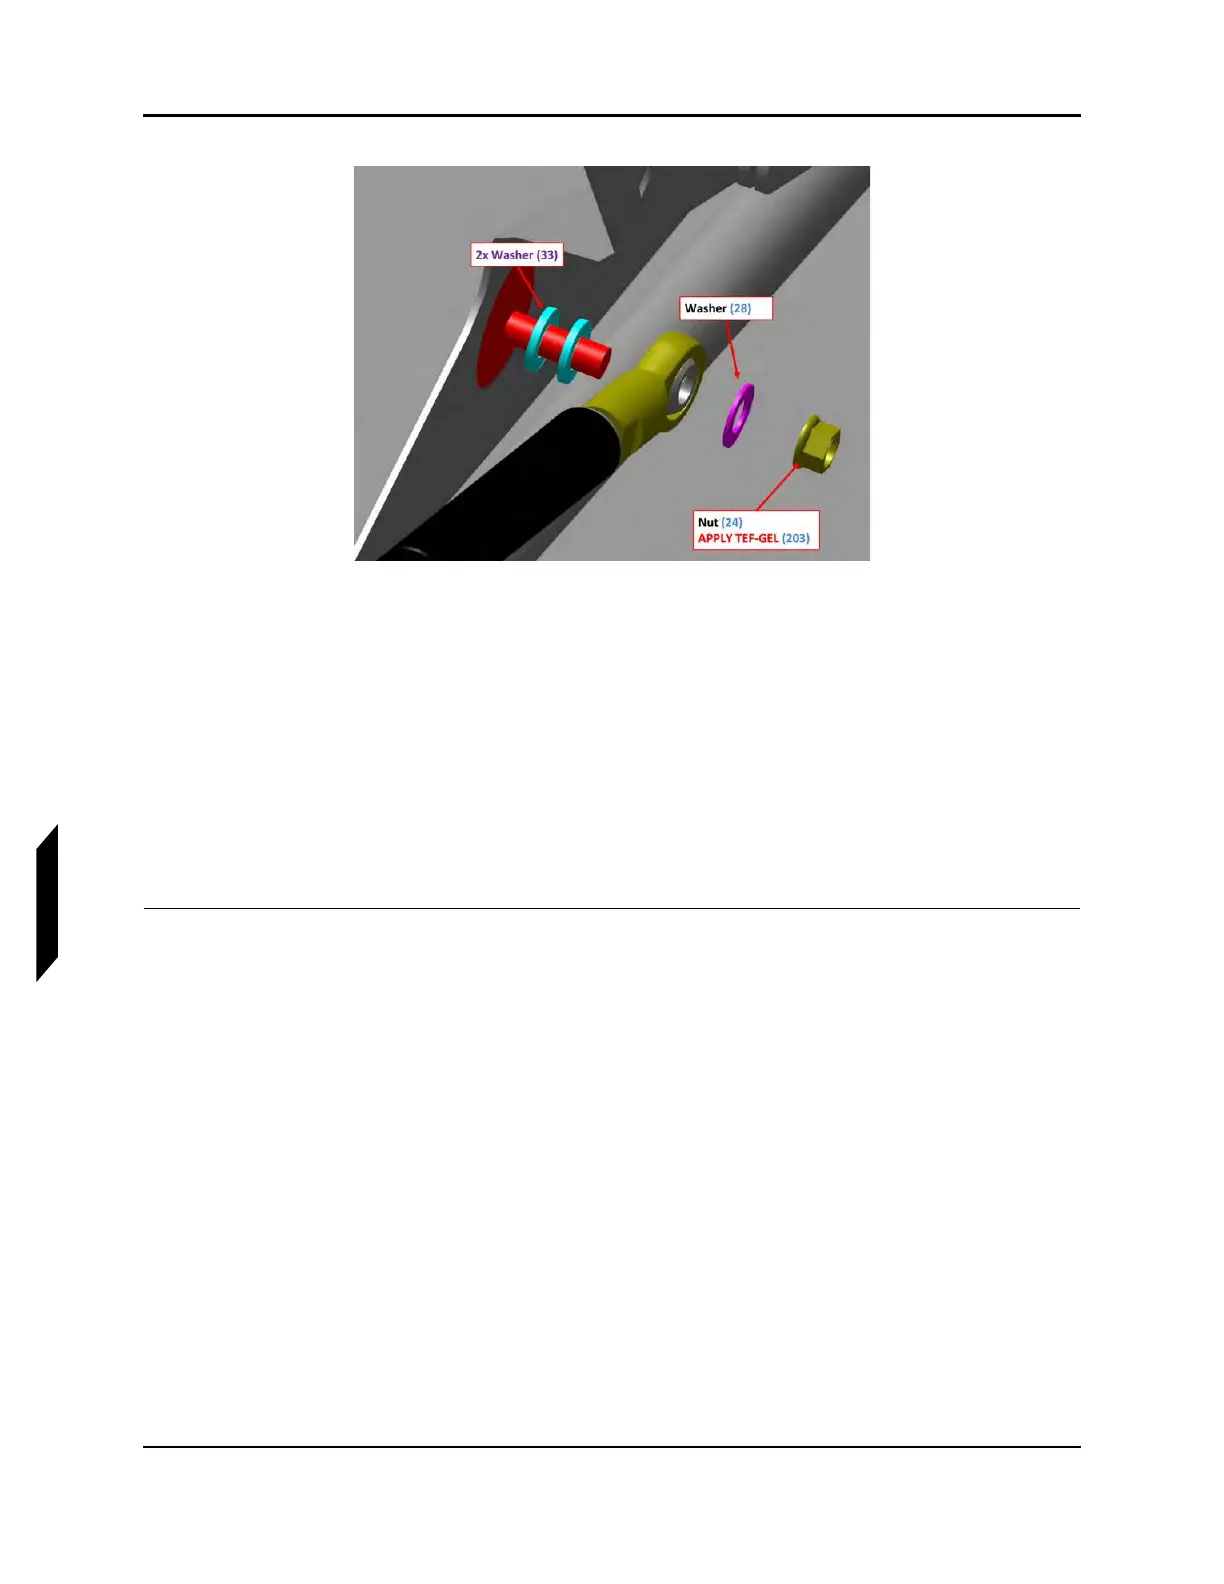
FIGURE 9-49
LEFT FLAP ASSEMBLY
3. Slide the cylinder end fitting of the strut onto the threaded stud, followed by one
NAS1149C0432R washer and an MS21043-4 nut. Use a 5/16 socket wrench to torque the nut to
30-40 in-lb
f
.
4. Slightly compress the strut by hand and snap its socket end onto the ball stud.
5. Slide the ball retaining clip into the locked position.
6. Deflect the flap surface by hand while watching the gas strut and flap pushrod move. Verify that
there is no binding or interface.
7. Check for proper flap operation. (See “Inspect Flap Rigging” on page 9-65.) Install the wing fold
access panel.
VERIFICATION METHOD:
To verify, check the flap rigging. (See “Install Flap Gas Strut” on page 9-77.) Fully actuate the flap
through its full range of motion, both up and down. Visually inspect the system for proper function and
security.
RELATED INFORMATION:
"Removal and Installation of Inspection Panels and Fairings" on page 3-34
"Inspect Flap Rigging" on page 9-65