Scanning Documents
2
IC-402 2-28
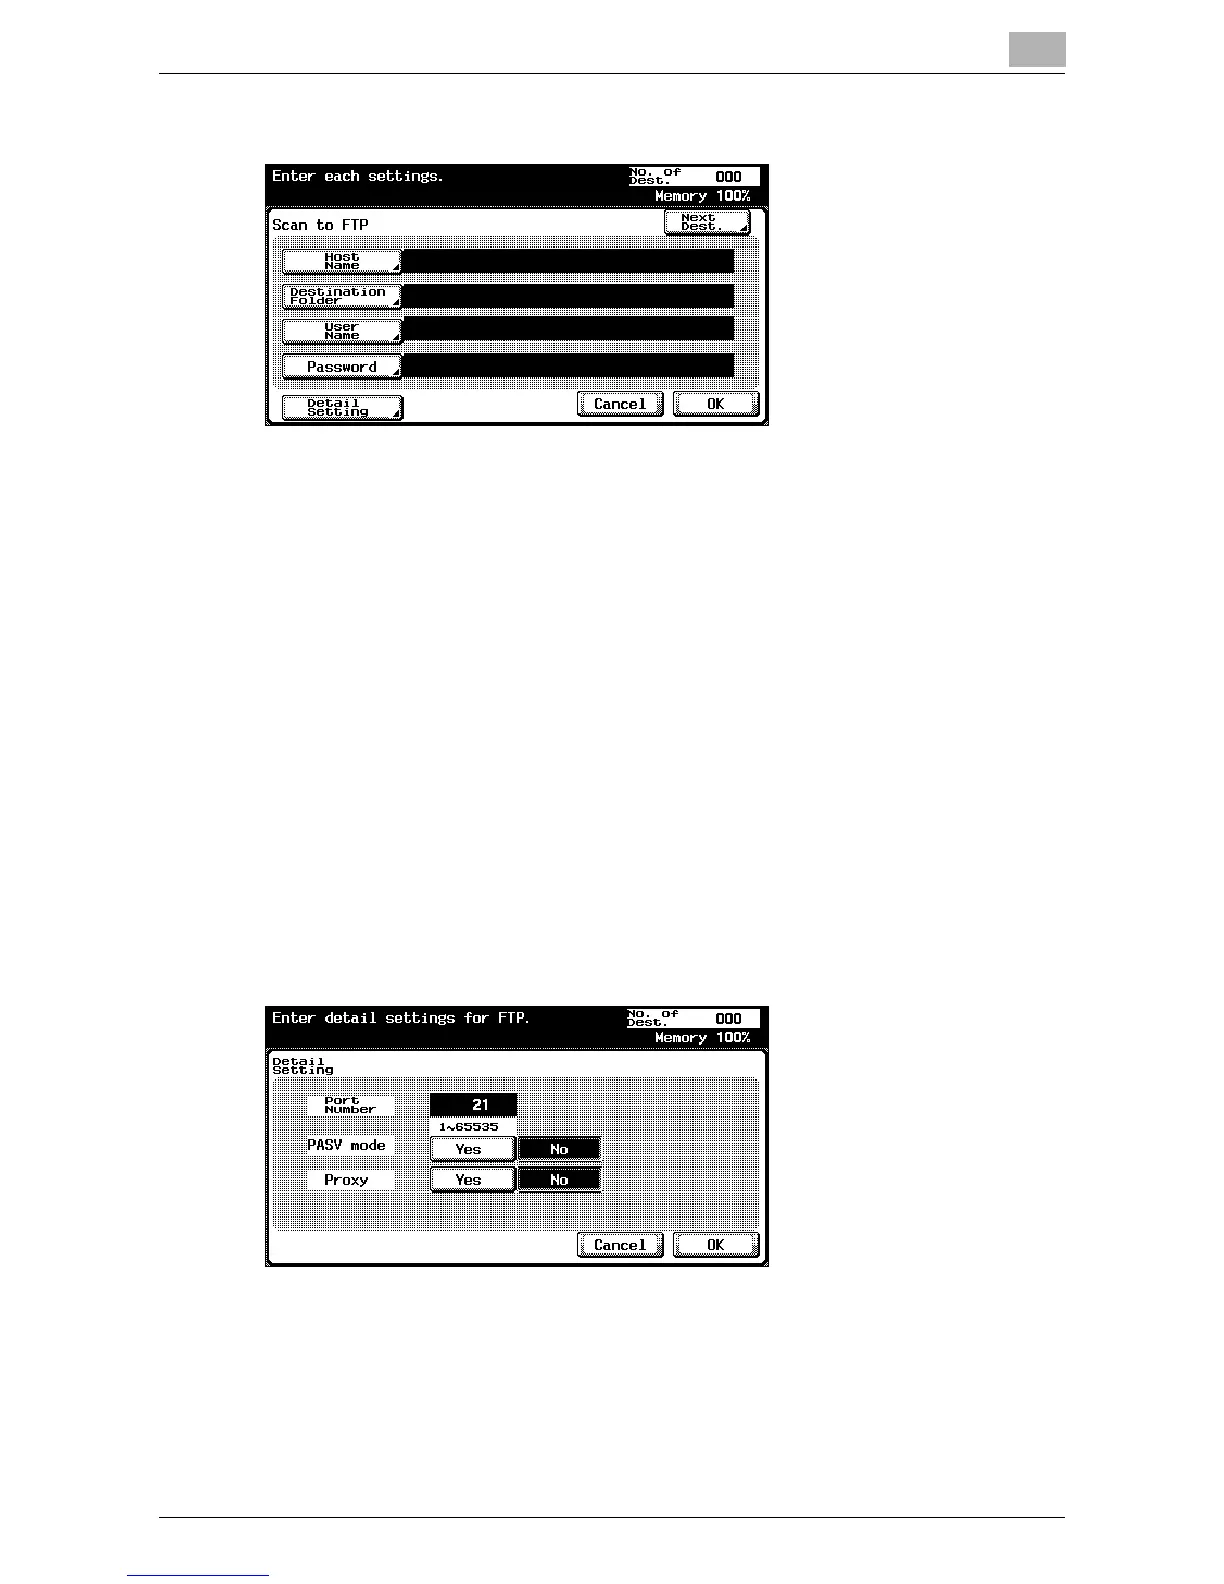
3 Enter the host name, destination folder, user name, and password.
– Host Name: Use the keyboard that appears in the touch panel to
specify the destination host name or IP address, and then touch
[OK].
– In order to specify an FTP destination as a host name, the DNS set-
ting must have been specified in the image controller’s setup
screen. In the setup screen for the image controller, select [Network
Setup] – [Protocol Setup] – [TCP/IP Setup] – [DNS Setup] to specify
the setting. For details on displaying the image controller’s setup
screen, refer to “Displaying the Setup Screen” on page 5-4.
– Destination Folder: Use the keyboard that appears in the touch
panel to specify the path to the destination folder, and then touch
[OK].
– User Name: Use the keyboard that appears in the touch panel to
specify the login user name, and then touch [OK].
– Password: Use the keyboard that appears in the touch panel to
specify the password, and then touch [OK].
4 Touch [Detail Setting], and then specify detailed FTP settings.
– Port Number: Check the port number.
– PASV mode: Select whether the PASV (passive) mode is used.
Touch [Yes] or [No].
– Proxy: Select whether a proxy server is used. Touch [Yes] or [No].
5 Touch [OK].