Diagnostic information 2-89
5026
245.17—Paper Jam service check
Step Questions / actions Yes No
1 Has paper been fed from an input option
before?
Go to step 4. Go to step 2.
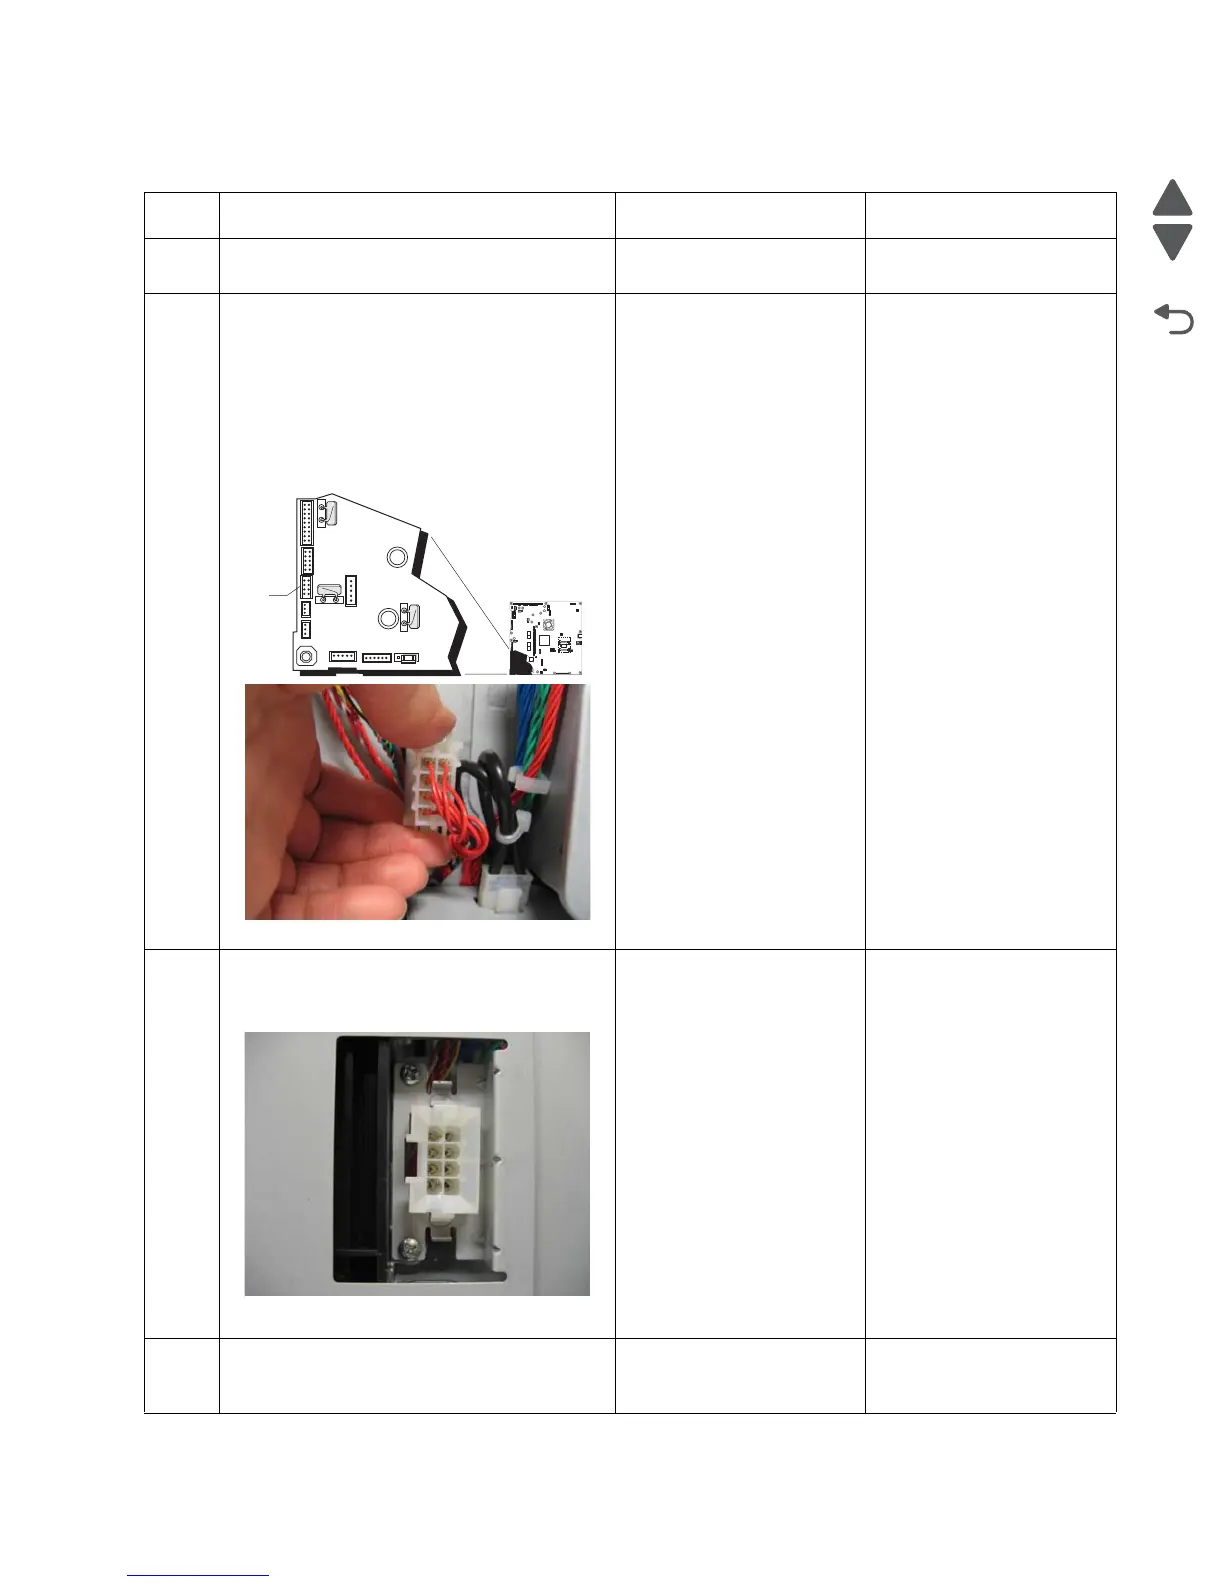
2
1. Turn the printer off.
2. Remove the rear frame cover. See “Rear
frame cover removal” on page 4-33.
3. Remove the right cover. See “Right
cover removal” on page 4-37.
4. Check the connector JOPT1 for proper
connection to the system board, the cable
for pinch points, and the cable or
connector for any other damage.
Is the cable damaged?
Replace the option cable.
See “Option cable
removal” on page 4-125.
Go to step 3.
3
Carefully lift the printer off the options, and lay
the printer on its back.
Check the option connector for damage.
Is the connector damaged?
Replace the option cable.
See “Option cable
removal” on page 4-125.
Go to step 4.
4
Replace the complete tray 5 option.
Does the error clear?
Problem resolved. Replace the system board.
See “System board
removal” on page 4-153.
1
JSB1
JBIN1
JFAN1
JFUSER1
JBOR1
JHVPS1
JMIRR1
JBLW1
JCVR1
JLVPS2
JCARTP1
JCARTS1
JCARTS2
JCARTP2
JDVR1
JTPS1
JOPT1
JFDS1
JINT1JINT1
JFDPCK1JTRAY1JSEC1
JDX1
JT12
J5
JDIMM1
JOPP1
JT1
JUSB1
JBOOT1
JFMUSB1
J49
JTWF1
JTDBUG1
1
1
1
1
1
1
1
1
1
1
1
1
1
1
1
1
1
1
1
1
1
1
1
1
1
JTLBT1JTLBT1
JPH1
F5
F6
F7
F9
F10
F12
F13
F14
1
1
J10
1
1
A
 Loading...


