Repair information 4-153
5026
System board removal
See the system board part number for the model you need on page 7-9.
Warning: When replacing any one of the following components:
• Operator panel assembly
• System board
• Top access cover assembly
Only replace one component at a time. Replace the required component, and perform a POR before
replacing a second component listed above. If this procedure is not followed, the printer will be
rendered inoperable.
Warning: Be careful not to damage the printhead cable when removing the system board.
1. Remove the left cover and the rear left cover. See “Left cover removal” on page 4-21.
2. Remove the rear frame cover. See “Rear frame cover removal” on page 4-33.
3. Remove the hard disk if one is installed. See “Hard drive assembly removal” on page 4-107.
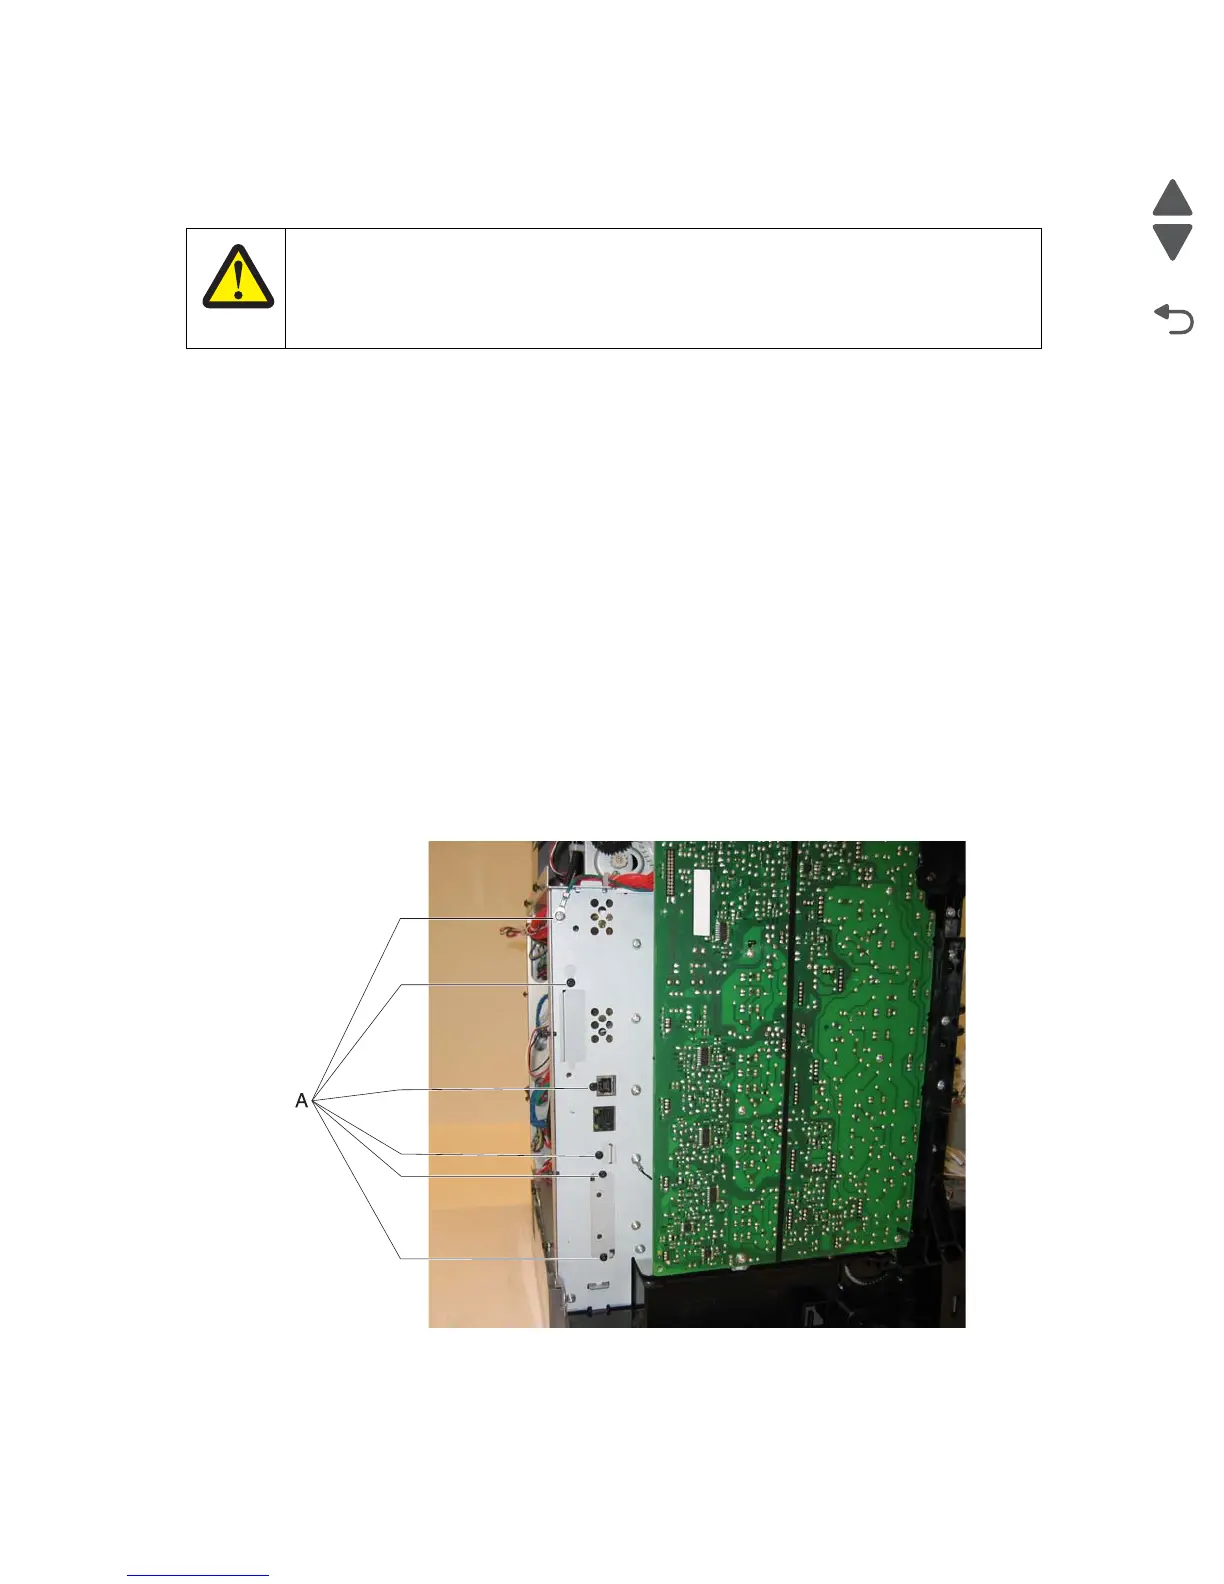
4. Remove all the screws (A) from the left side of the printer so you can remove the system board, including:
• USB port connector (1 screw)
• Ethernet port connector (1 screws)
• Modem shield (1 screws)
• Hard disk shield (2 screws)
• Ground screw (1 screw)
CAUTION
This product contains a lithium battery. THERE IS A RISK OF EXPLOSION IF THE BATTERY
IS REPLACED BY AN INCORRECT TYPE. Discard used batteries according to the battery
manufacturer’s instructions and local regulations.
 Loading...


