Diagnostic information 2-39
5026
120.xx—Fuser error service check
Step Questions / actions Yes No
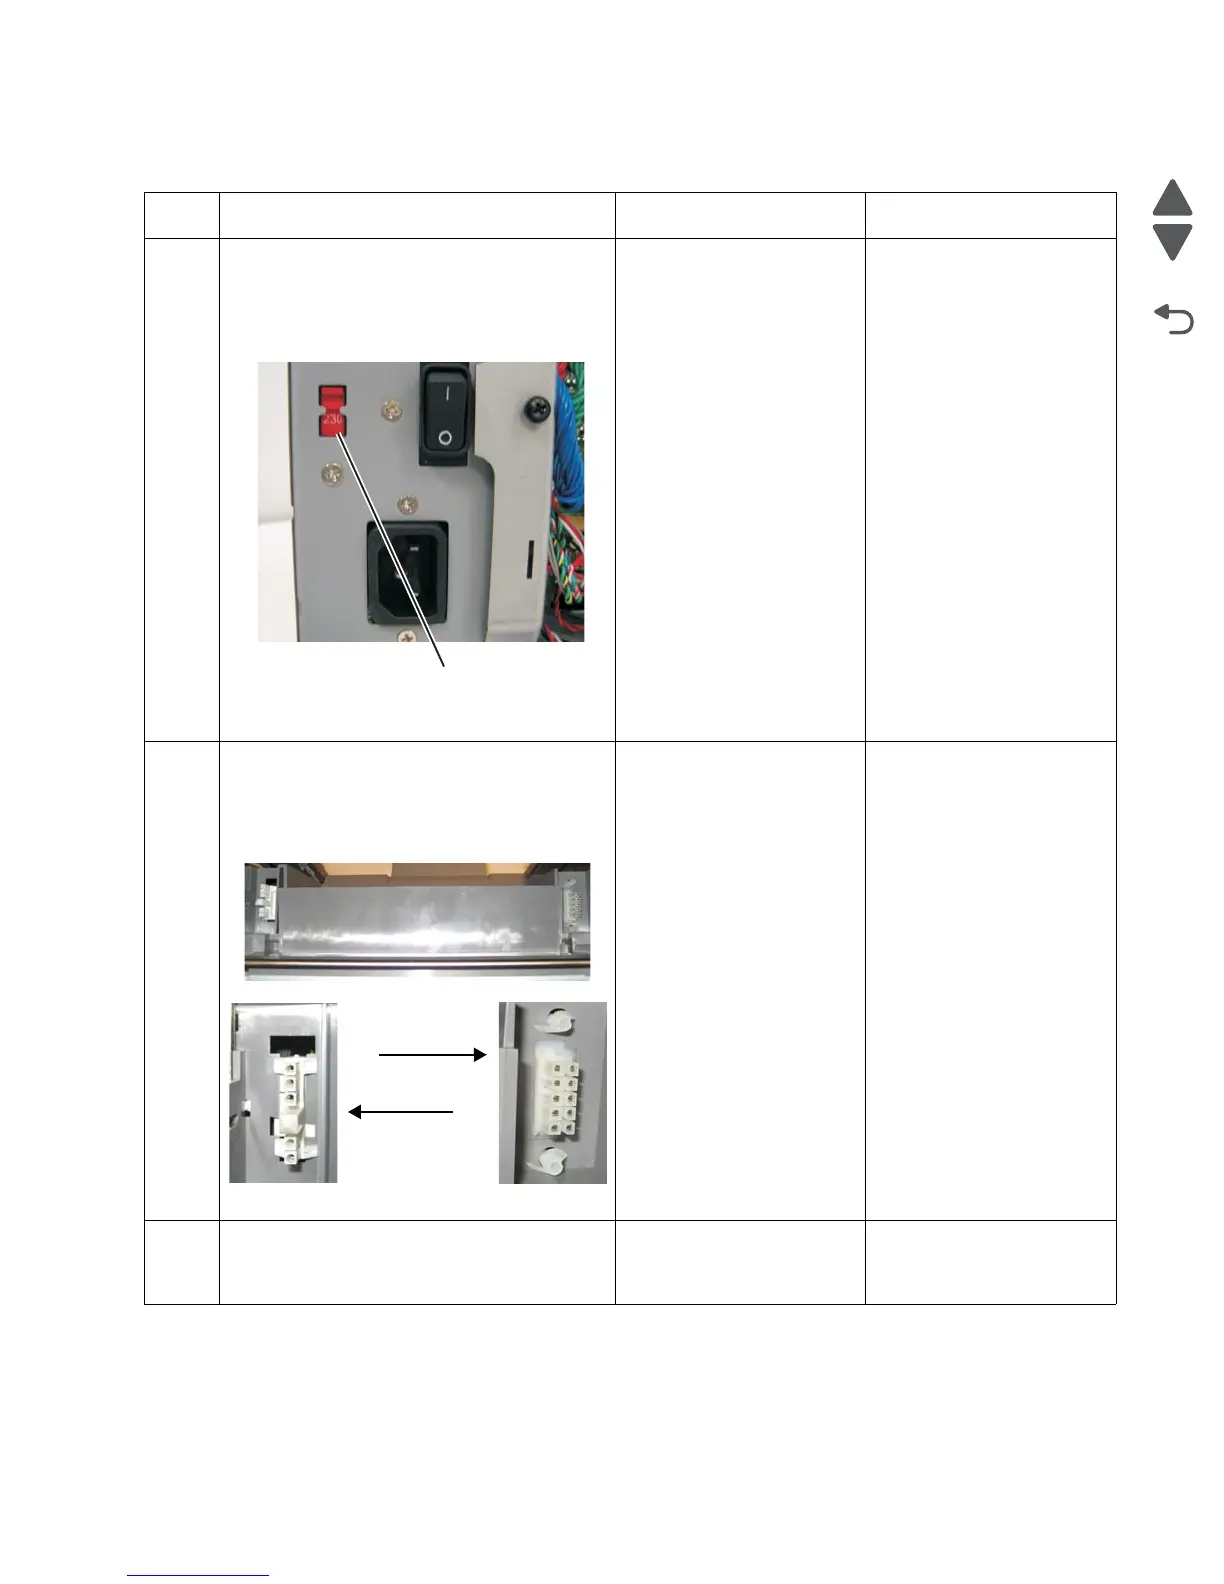
1 Check the input voltage switch on the back of
the low-voltage power supply (LVPS).
Note: Some LVPS FRU do not have switches
and switch automatically. If your does not
have a switch, go to step 2.
Is the voltage level (115 V/230 V) properly
set?
Go to step 2. Set the switch for the
proper country voltage.
2
1. Remove the fuser. See “Fuser removal”
on page 4-104.
2. Check the AC and DC autoconnects on
both the fuser and the printer for damage.
Are the connections damaged?
Replace the appropriate
cable. See “Fuser AC
cable removal” on
page 4-105 or “Fuser DC
cable removal” on
page 4-106.
Go to step 3.
3
Replace the fuser. See “Fuser removal” on
page 4-104.
Does the error clear?
Problem resolved. Go to step 4.
DC autoconnect
AC autoconnect
On printer