Diagnostic aids 3-9
5026
Motor tests
The motor tests are run primarily to locate noises in the printer.
General motor tests procedures
In some instances, when you enter a particular test, you will be given the choice to run the motor in forward or
reverse. Other times, there will only be the option to run the motor in forward direction.
In general, the test should work as follows:
1. Select MOTOR TESTS from DIAGNOSTICS, and press Select ().
2. Select the motor that you need to test, and press Select ( ).
3. Check the table below for setup requirements, if any.
4. Select the direction if a choice is offered (Forward or Reverse) or other setting for that test, and press
Select ( ).
Press Back () or Stop ( ) to stop the motor and end the test.
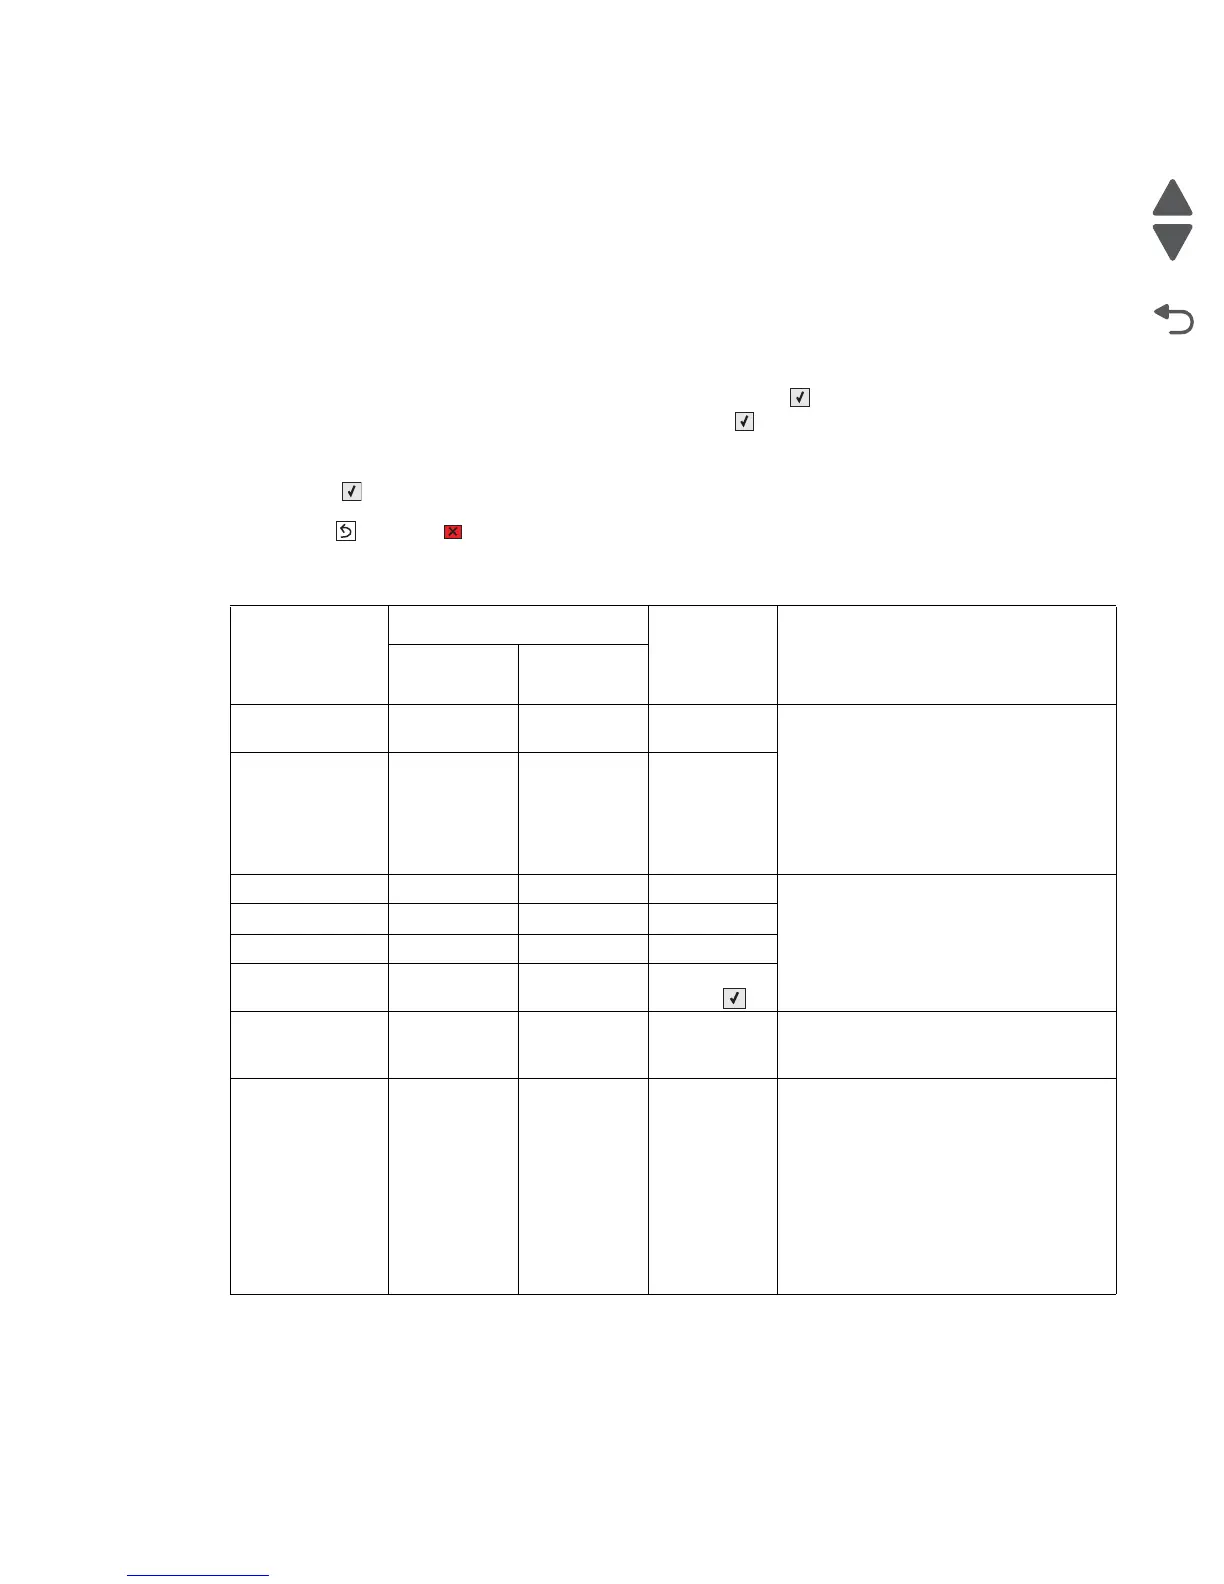
The following tests have special setup before running the test:
Motor test
Setup requirements
Values in
menu
Notes
Top cover
position
Lower door
position
Align Motor Test N/A Closed* Forward,
Reverse
* If this test is run with the lower door
open:
• Remove the right cover (see
“Right cover removal” on
page 4-37),
• Manually activate the 5 V interlock
switch and the 24 V interlock
switch must be pushed in.
Fuser Closed Closed* Forward,
Reverse
Cart 1 N/A Open Forward Remove the right cover to observe the
motor moving. See “Right cover
removal” on page 4-37
Cart 2 N/A Open Forward
Cart 3 N/A Open Forward
Transfer Belt Closed Closed Press
Select ()
Option Motors—
Tray 1 Pickup
N/A N/A Single,
Continuous
Remove all paper from the input source
tray to avoid paper jams while
performing this test.
MPF N/A Closed* Reverse Remove any paper in the multifunction
feeder in order to run this test.
* If this test is run with the lower door
open:
• Remove the right cover (see
“Right cover removal” on
page 4-37),
• Manually activate the 5 V interlock
switch and the 24 V interlock
switch must be pushed in.