Repair information 4-131
5026
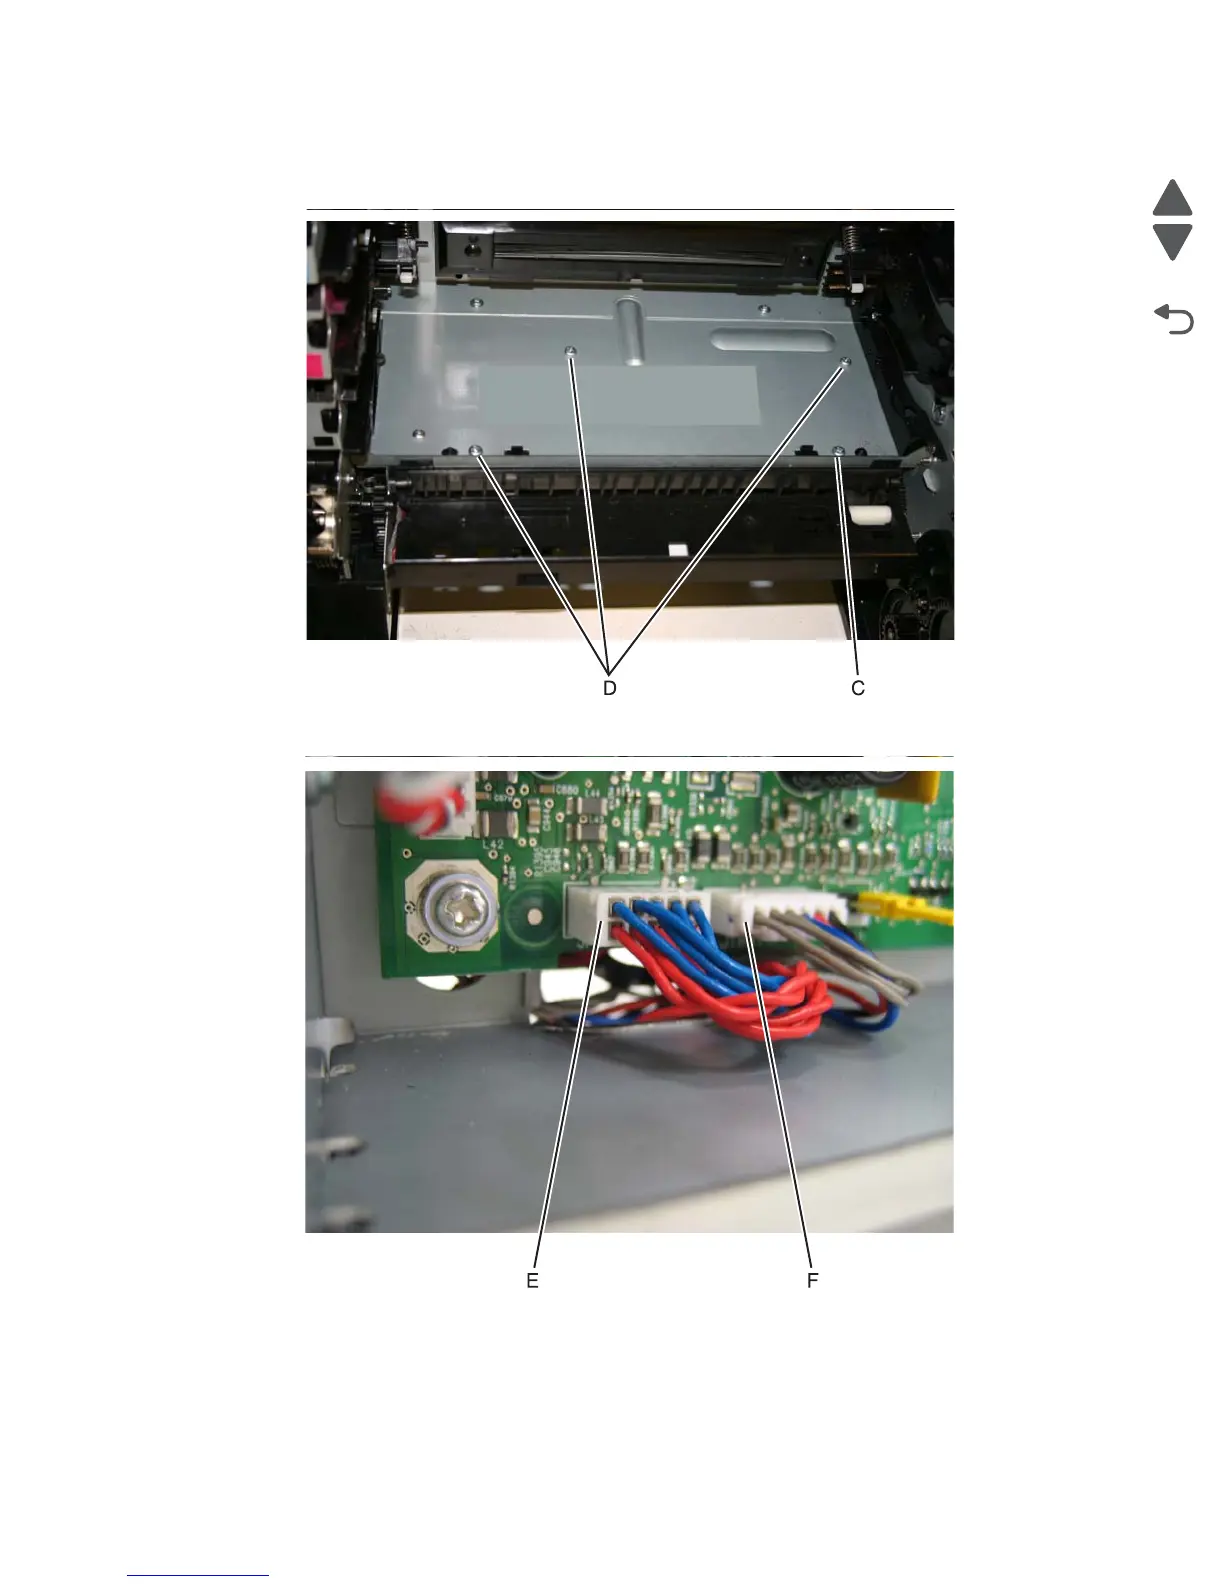
6. Reach into the printer, and replace the front right screw (C) to secure the paper pick assembly.
7. Set the printer upright.
8. Secure the remaining three screws (D).
9. Remove the rear frame cover.
10. Route the cables through the hole in the frame, and connect them to JFDPCK1 (E) and JTRAY1 (F).
11. Replace the rear frame cover.
12. Replace the waste toner assembly.
13. Replace the toner cartridges.
14. Replace the transfer module with the photoconductor units.
15. Close the front access cover.
16. Replace the paper tray.
 Loading...


