4-156 Service Manual
5026
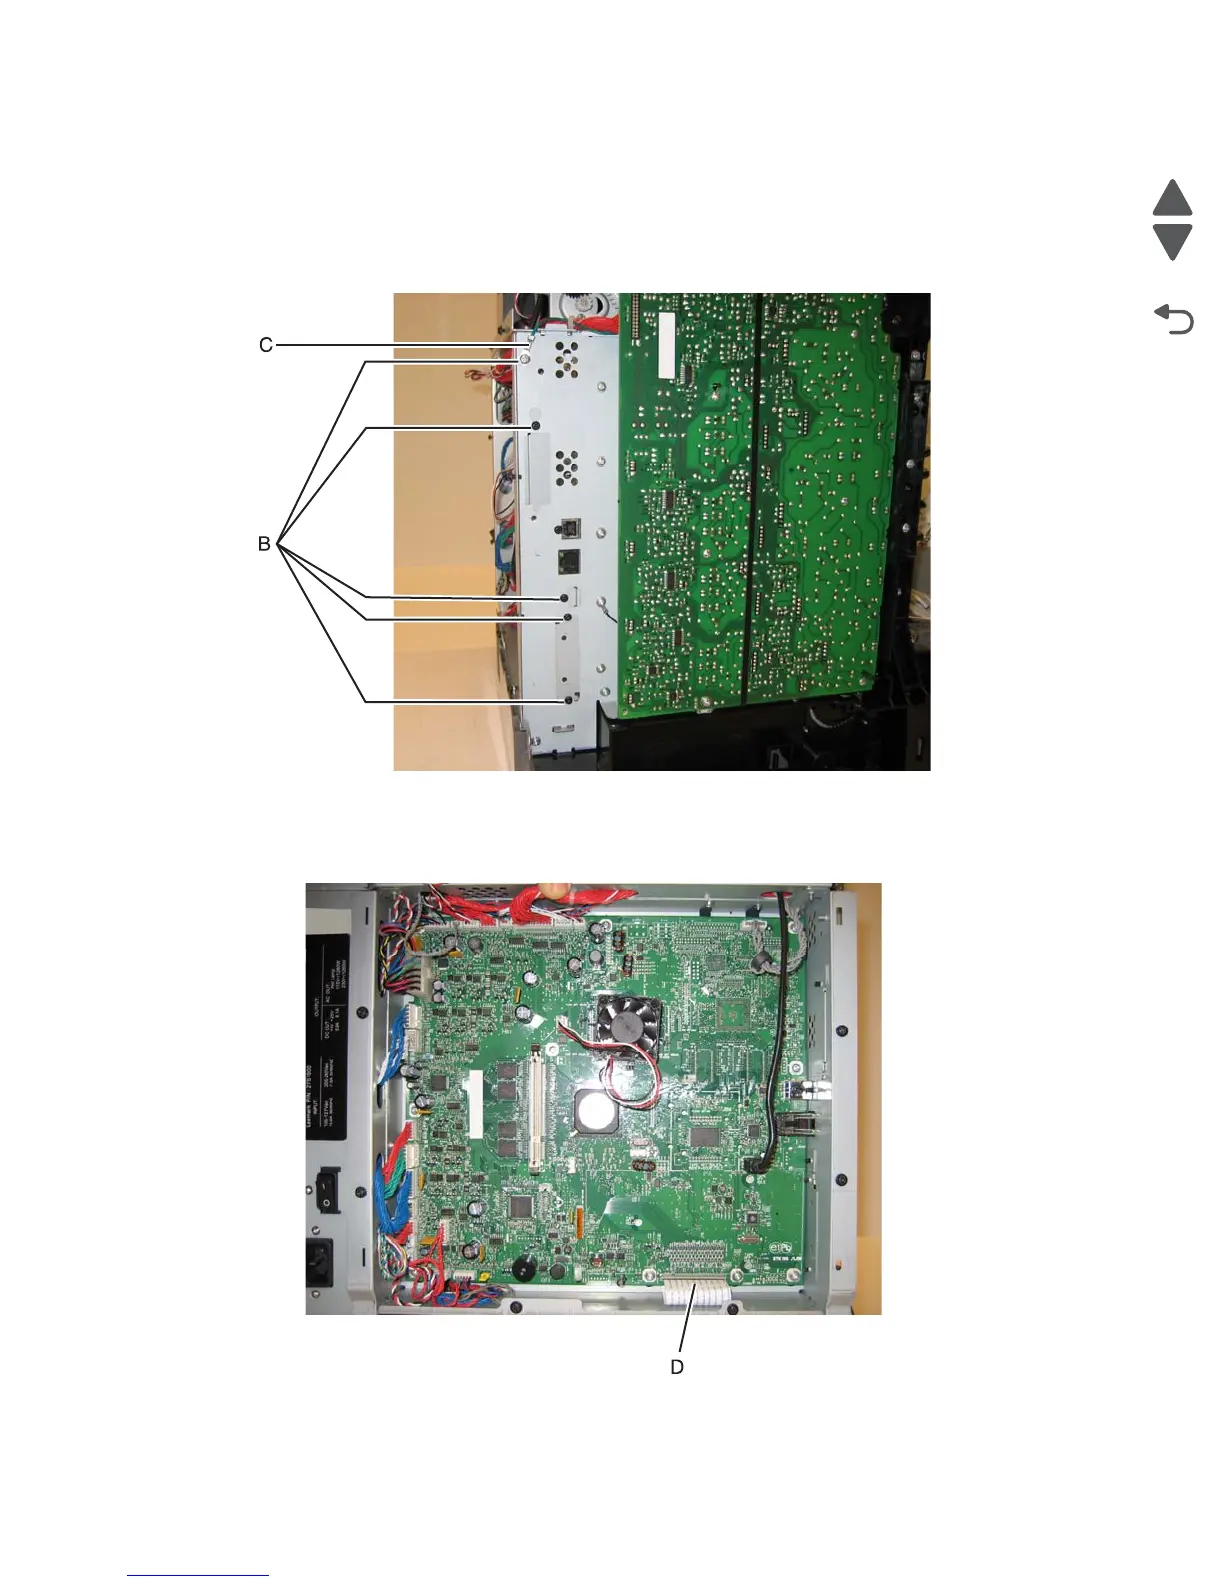
4. Replace all the screws (B) from the left side of the printer, including:
• Ethernet port connector (1 screws)
• Modem shield (1 screws)
• Hard disk shield (2 screws)
• Ground screw (1 screw)
Note: Be sure to attach the ground wire (C) to the ground screw.
5. Reconnect all the cables to the system board. Use the diagram below for a guideline.
Warning: Be careful reconnecting the printhead ribbon cable (D). It can be damaged and should be
handled carefully. A flat ribbon cable can easily be damaged and should be connected gently by hand.
6. Install the hard disk if appropriate.
7. Replace the rear frame cover and the left cover.
 Loading...


