4-158 Service Manual
5026
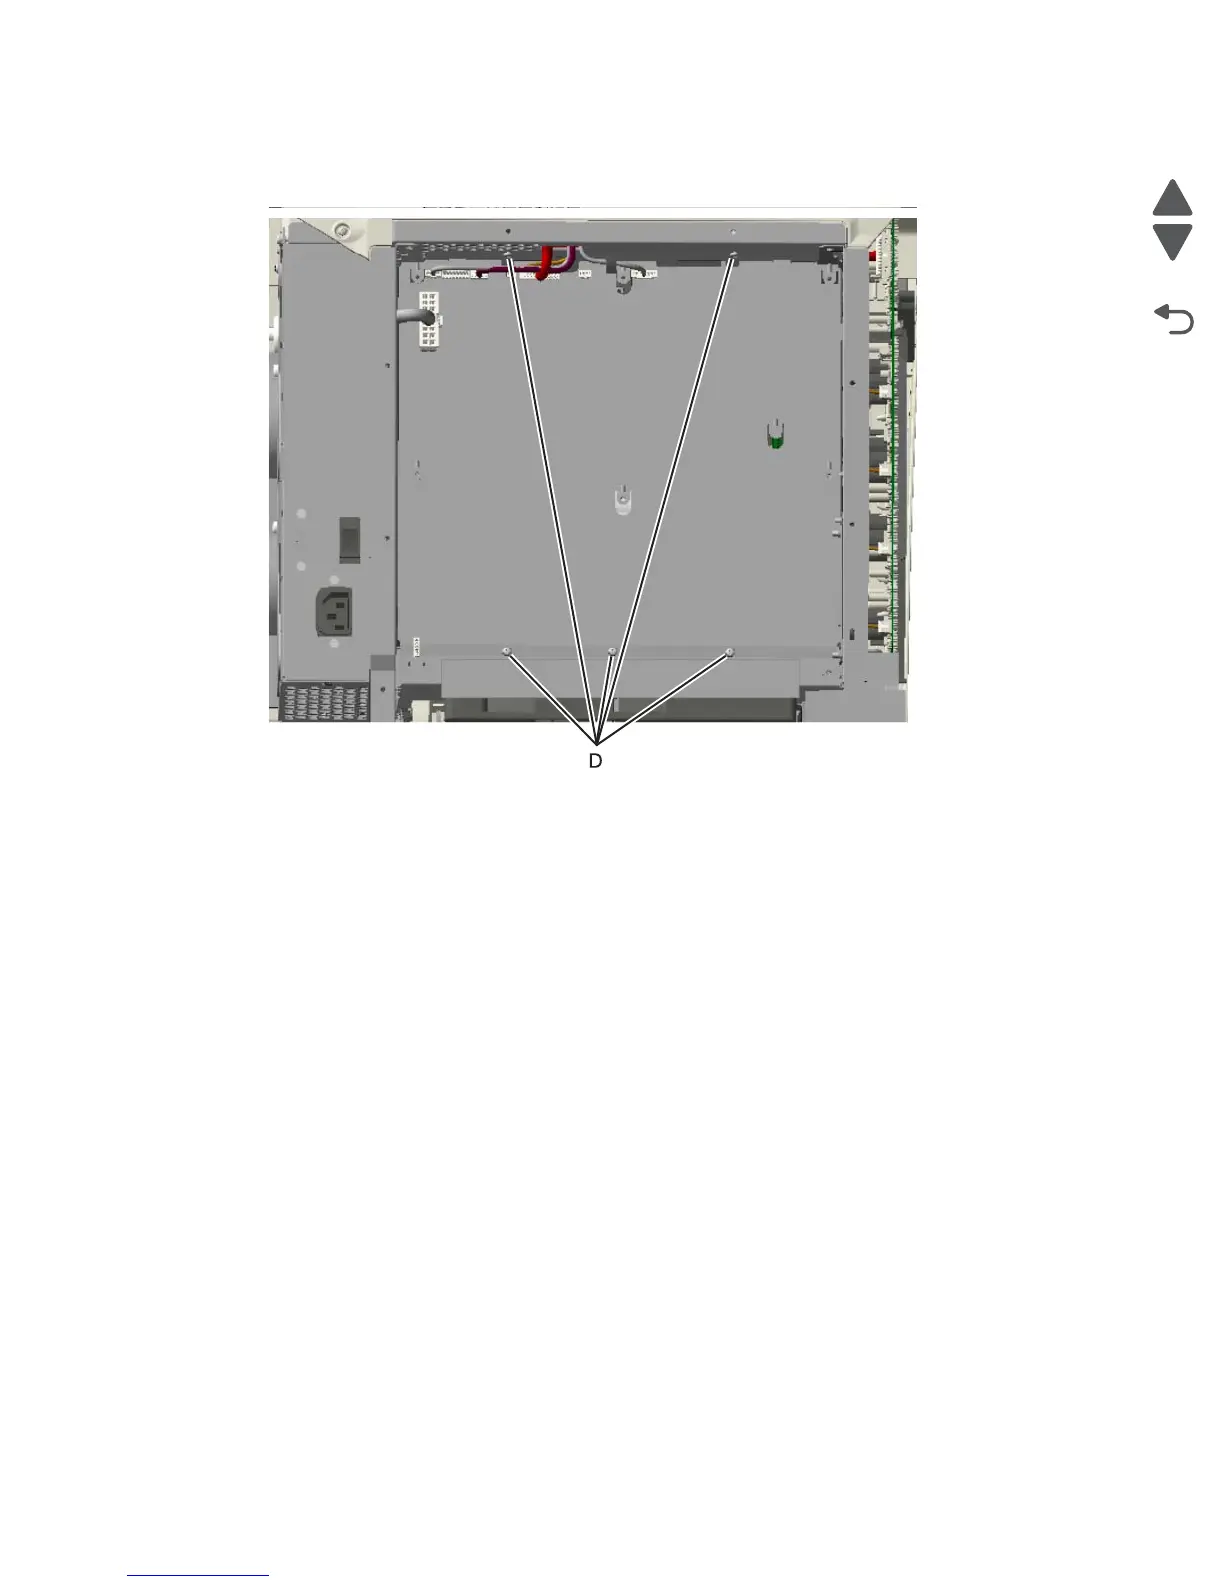
6. Remove the five mounting screws (D) from the top and bottom of the support shield.
Note: Only the ribbon and mirror motor cables come through the access holes in the system board
support shield.
7. Lower and remove the support shield. Be careful not to damage the ribbon cable that routes through the
bottom frame of the printer.
Installation notes:
1. Loosely attach the two mounting screws (A).
2. Set the system board support shield in place.
Note: Check that the ribbon mirror motor cable (white) and the printhead cable (bottom) do not rub against
the edges of the frame.
 Loading...


