Repair information 4-169
5026
Note: If you are removing the transfer module to access another part, leave the photoconductor units attached,
and you are done. If you need to replace the transport belt, continue with the next step to remove the separate
photoconductor units.
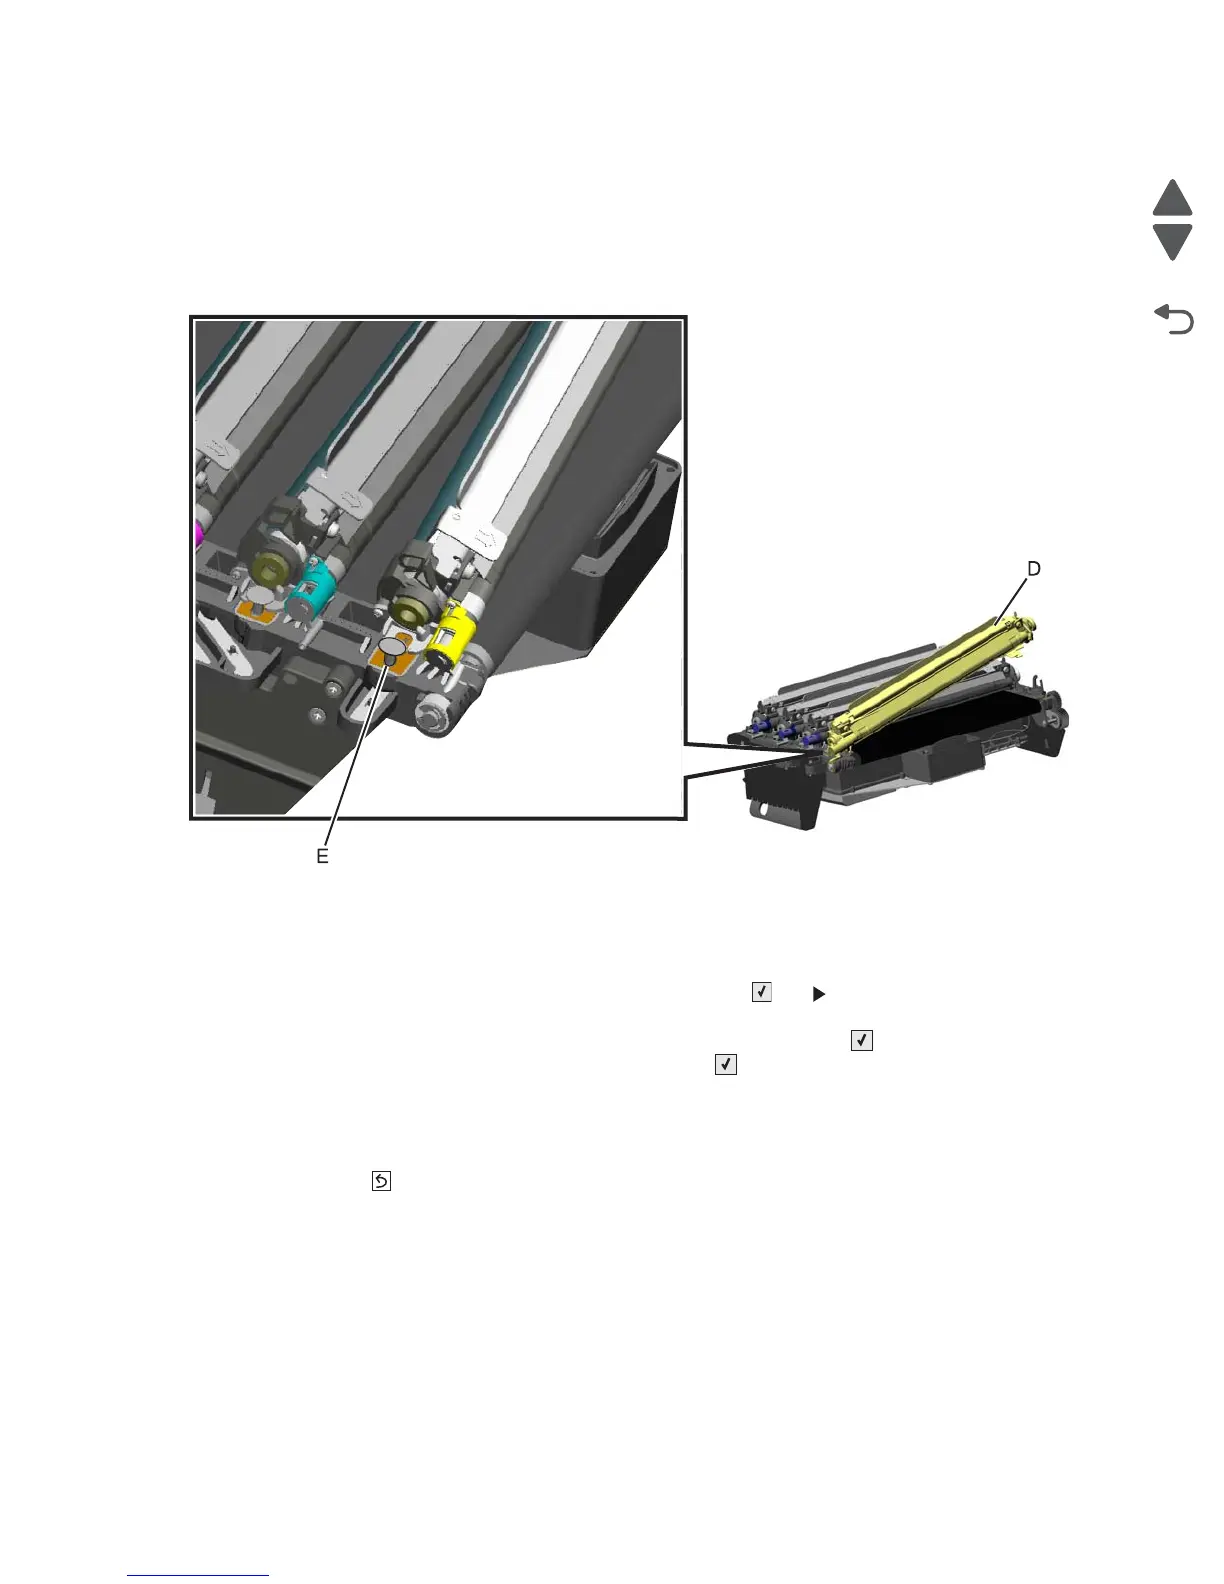
4. Remove the photoconductor units. Lift the right end handle (D) of the photoconductor unit, releasing from
the mount.
5. Lift the unit up and away from the left side of printer, ensuring the left end of the photoconductor is released
from the holding pin (E).
Installation note:
• Place the photoconductor units on the new transport belt, and reinstall.
• Perform the Color Alignment in the Configuration Menu:
1. Enter Config Menu (turn off the printer, press and hold and , turn the printer on, and release the
buttons when the clock graphic displays).
2. Select Color Alignment from the Config Menu, and press Select ().
3. Select Print Alignment Page, and press Select ().
4. Select Set A.
5. Consulting the printed page, follow the instructions on the operator panel to choose the best
appearing line numbered 0 through 20 for line A.
6. Continue selecting the best lines for the sets through Set L.
7. Back ( ) to return to the Configuration main menu, and select Exit Config Menu.
 Loading...


