T26
EXTERIOR LIGHTING SYSTEM
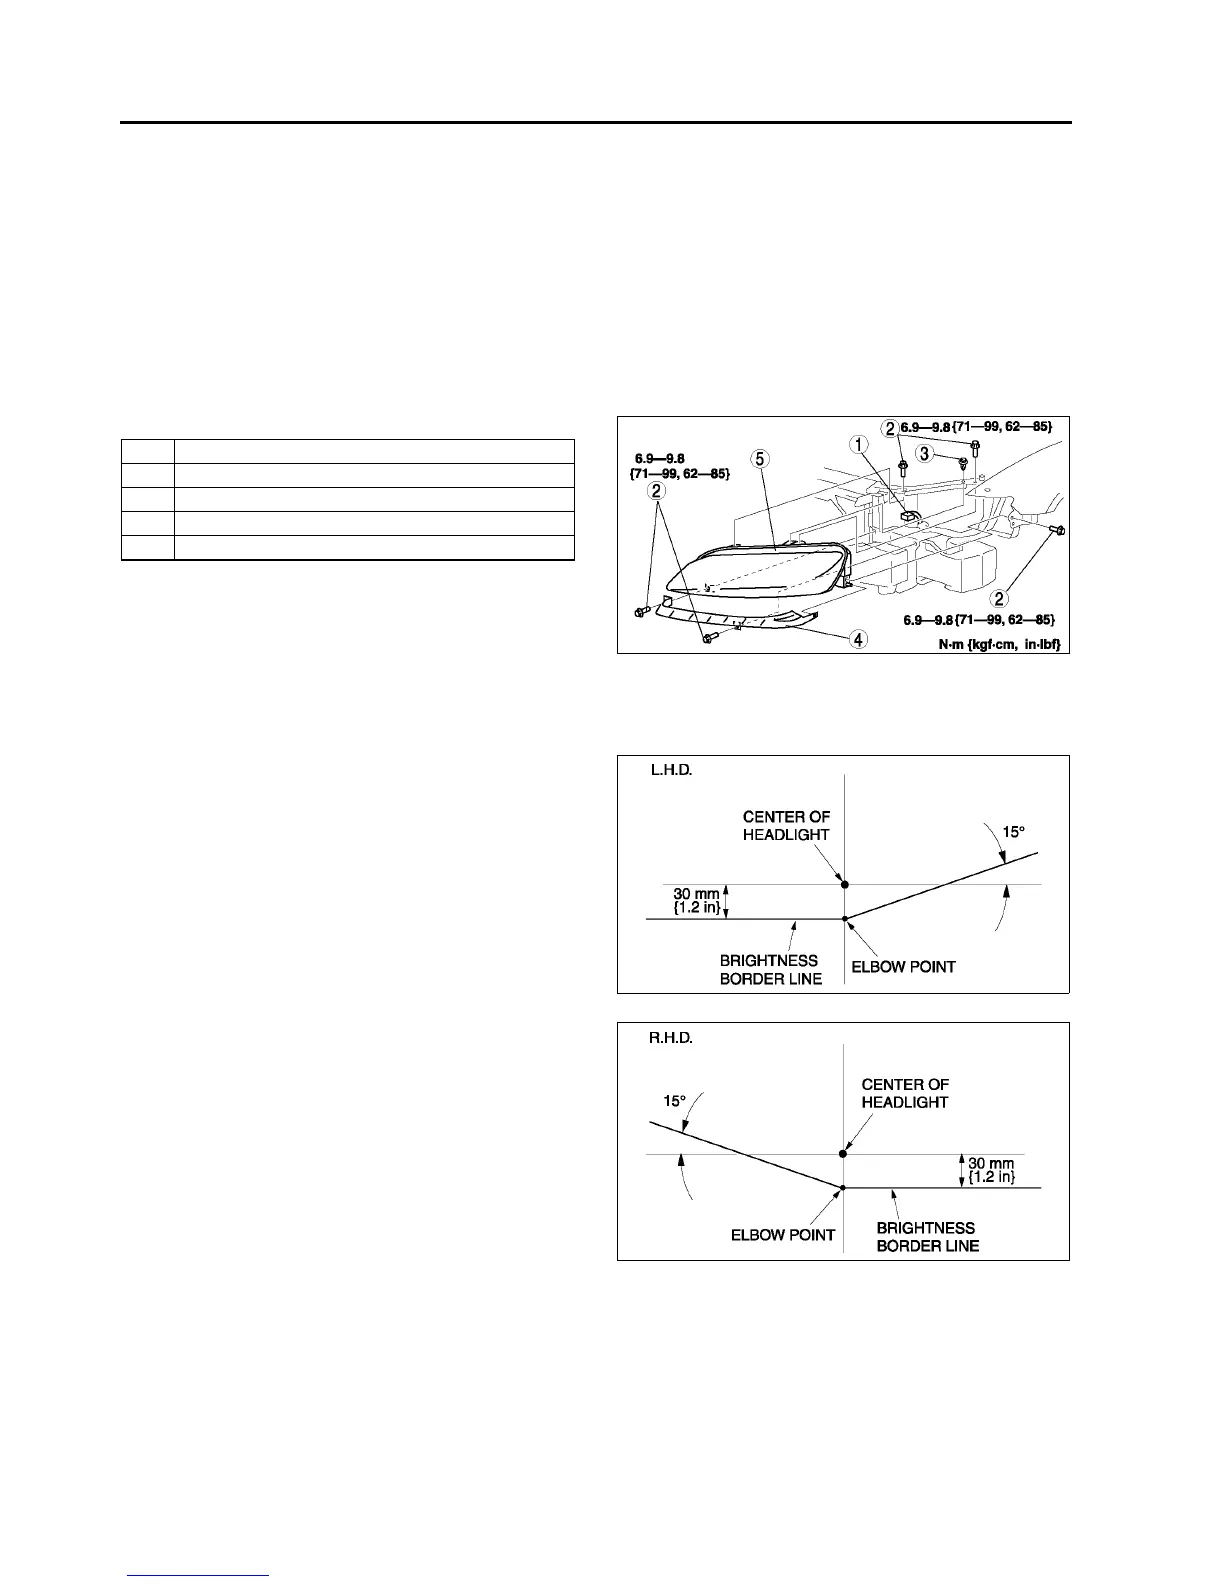
FRONT COMBINATION LIGHT REMOVAL/INSTALLATION
A6E811251060W02
Caution
•
••
• Incorrect servicing of the discharge headlights could result in electrical shock. Before servicing
the discharge headlights, always refer to the Discharge headlight service warnings. (See T25
DISCHARGE HEADLIGHT SERVICE WARNINGS)
Note
• When the ignition switch is turned to ON, it is normal to hear the headlight leveling actuator operating for a
few second, as it verifies headlight auto leveling system operating condition.
1. Disconnect the negative battery cable.
2. Remove the front bumper. (See S47 FRONT BUMPER REMOVAL/INSTALLATION)
3. Remove in the order indicated in the table.
4. Install in the reverse order of removal.
5. Adjust the headlight aiming. (See T26
HEADLIGHT AIMING.)
End Of Sie
HEADLIGHT AIMING
A6E811251030W01
Low-beam
1. Set up a screen as shown in the figure below for
aiming the headlights.
2. Adjust the tire air pressure to the specification.
3. Position the unloaded vehicle on a flat, level
surface.
4. Seat one person in the driver's seat.
5. Position the vehicle straight ahead and
perpendicular to a wall.
1 Connector
2Bolt
3 Clip
4Cover
5 Front combination light
A6E8112W101
A6E8112W132
A6E8112W133