ENGINE
B31
B
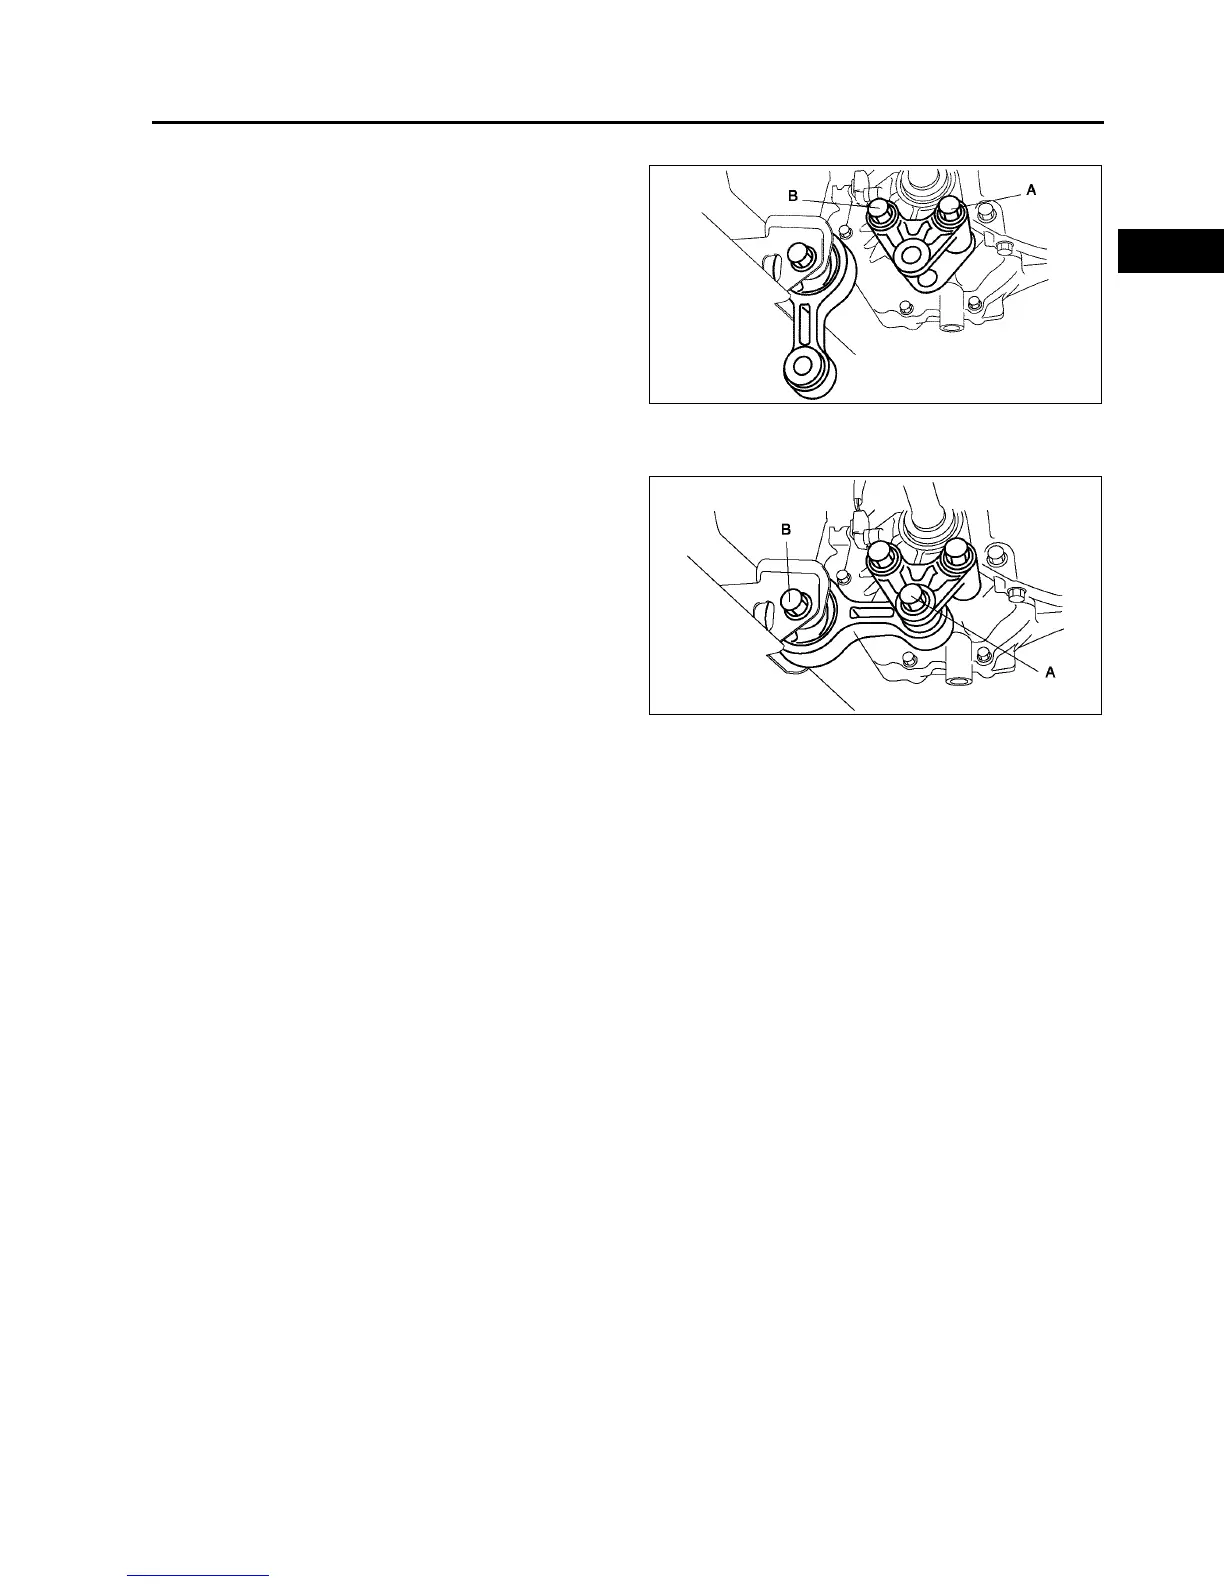
No.1 Engine Mount Bracket Installation Note
1. Tighten No.1 engine mount bracket bolt A.
Tightening torque:
93.1116.6 N·m {9.5011.88 kgf·m, 68.72
85.92 ft·lbf}
2. Tighten No.1 engine mount bracket bolt B.
Tightening torque:
93.1116.6 N·m {9.5011.88 kgf·m, 68.72
85.92 ft·lbf}
No.1 Engine Mount Rubber Installation Note
1. Tighten through bolt A on No.1 engine mount
bracket.
Tightening torque:
85.3116.6 N·m {8.711.88 kgf·m, 62.93
85.92 ft·lbf}
2. Tighten through bolt B on chassis side.
Tightening torque:
93.1116.6 N·m {9.5011.88 kgf·m, 68.72
85.92 ft·lbf}
End Of Sie
ENGINE DISASSEMBLY/ASSEMBLY
A6E222401001W02
1. Disconnect the engine and automatic transaxle. (ATX) (See K29 AUTOMATIC TRANSAXLE REMOVAL/
INSTALLATION.)
2. Disconnect the engine and manual transaxle. (MTX) (See J5 MANUAL TRANSAXLE REMOVAL/
INSTALLATION.)
3. Remove the intake-air system. (See F10 INTAKE-AIR SYSTEM REMOVAL/INSTALLATION.)
4. Remove the exhaust system. (See F35 EXHAUST SYSTEM REMOVAL/INSTALLATION.)
5. Remove the generator.
6. Remove the ignition coils. (See G8 IGNITION COIL REMOVAL/INSTALLATION.)
7. Remove the CKP sensor. (See F54 CRANKSHAFT POSITION (CKP) SENSOR REMOVAL/INSTALLATION.)
8. Assemble in the reverse order of disassembly.
End Of Sie
AME2213W008
AME2213W009