EasyManuals Logo

Zebra ZXP 9 Series User Manual

Zebra ZXP 9 Series
450 pages
To Next Page IconTo Next Page
To Previous Page IconTo Previous Page
Page #311 background imageLoading...
Page #311 background image
P1086708-001 ZXP Series 9 Card Printer Service Manual 303
Replacement Procedures for the Printer
Procedures: Ribbon Take-up Assembly
Step 3. In the Serial Number eld, enter the serial number of the printer, or press ESC and it
will be entered automatically.
Step 4. Select Ribbon Torque Calibration and click .
Step 5. You will be prompted to remove the ribbon and the transfer lm.
Step 6. Enter the torque value printed on the Low Torque tool.
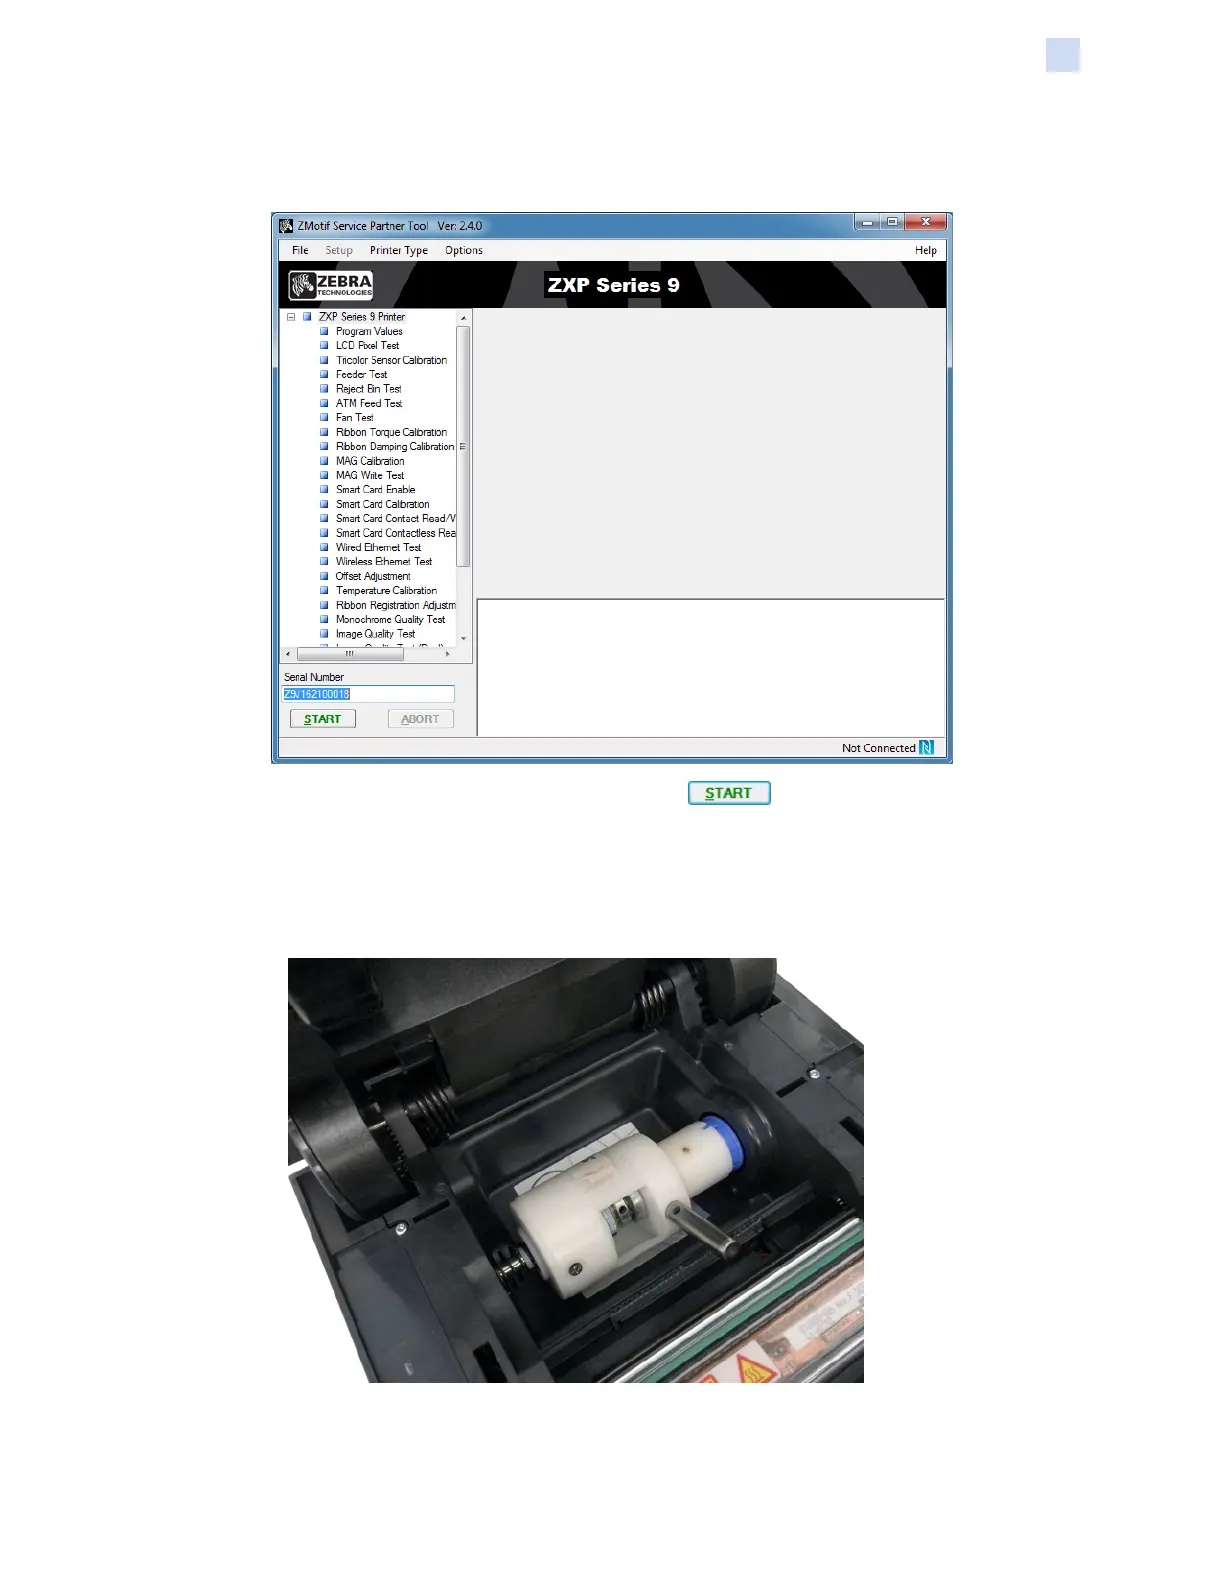
Step 7. Insert the Low Torque tool (as shown below) and close the printer door.
Step 8. Click Continue, the Calibration routine will begin.
Step 9. Open the printer door, and remove the Low Torque tool.

Table of Contents

Questions and Answers:

Question and Answer IconNeed help?

Do you have a question about the Zebra ZXP 9 Series and is the answer not in the manual?

Zebra ZXP 9 Series Specifications

General IconGeneral
Resolution300 dpi
Card Capacity Output100 cards
Memory64 MB
InterfaceUSB, Ethernet
Operating Humidity20% to 80% non-condensing
Print TechnologyDye Sublimation
Print Speed YMCKUp to 190 cards/hour
Card Capacity Input100 cards
Card SizesCR-80 ISO 7810
ConnectivityUSB, Ethernet
Operating SystemWindows, Linux
OptionsMagnetic stripe encoding
Power Requirements100-240V AC, 50/60Hz
Operating Temperature15°C to 35°C
Card Thickness10-40 mil

Related product manuals