Quick Start Guide 2
Agilent Nano Indenter G200 User’s Guide 2-18
If additional samples will be mounted in the sample tray, start loading in
the sample-disk hole at the rear-left and continue clockwise.
Install the Sample Tray into the Indenter
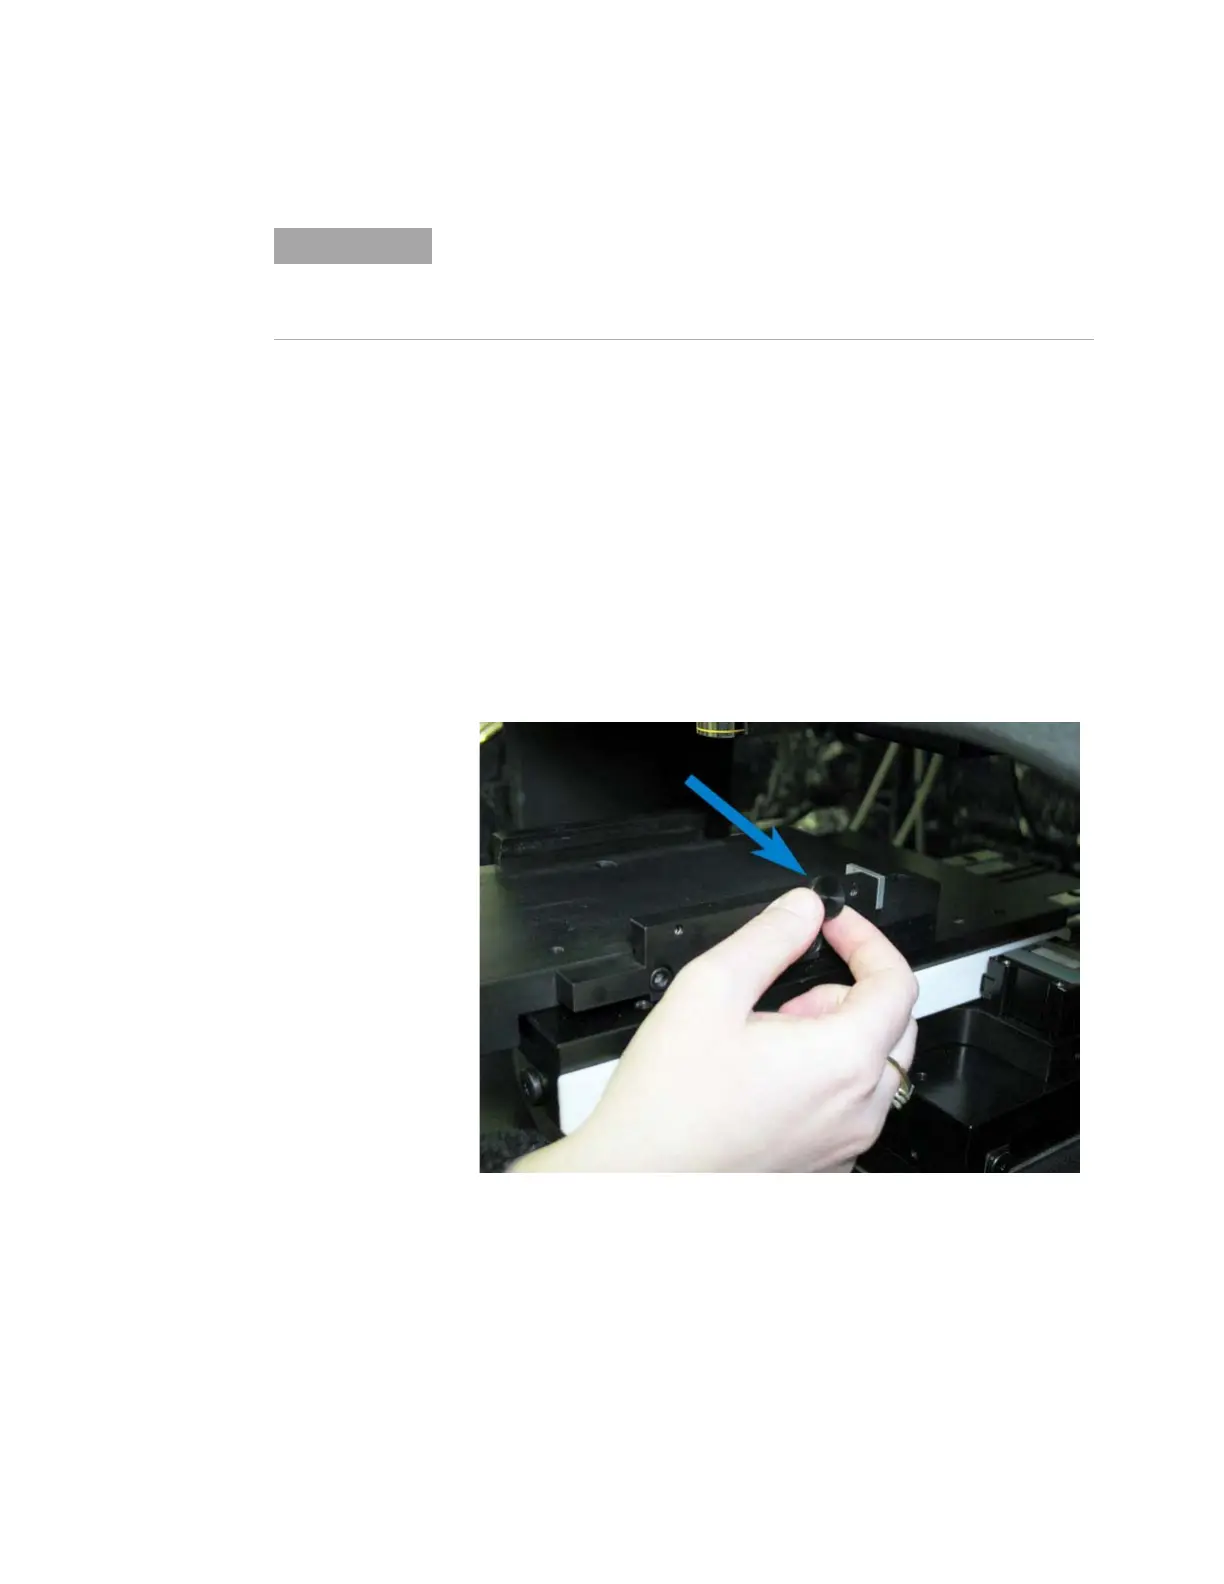
1 Loosen the sample tray locking screw in the right sample tray
retaining rail at the top of the motion system, as shown in
Figure 2-21, so that the retaining rails accept the sample tray.
Figure 2-21Adjust sample tray locking screw
2 Slide the sample tray between the rails at the top of the motion
system all the way to the end stop, as shown in
Figure 2-22 on
page 2-19.
Each brass thumbscrew contains a spring-loaded ball plunger that
applies pressure to the disk. Do not fully tighten the thumbscrew at this
stage because the disk will need to be adjusted vertically during a
subsequent stage.

 Loading...