INSTALLATION AND STARTUP
1MANUL220 Belanger, Inc.® * PO BOX 5470 * Northville, MI 48167-5470 * Ph (248) 349-7010 * Fax (248) 380-9681 15-21
Chapter 15 Wheel Cleaning and CTA Options
Hockey Puck Installation
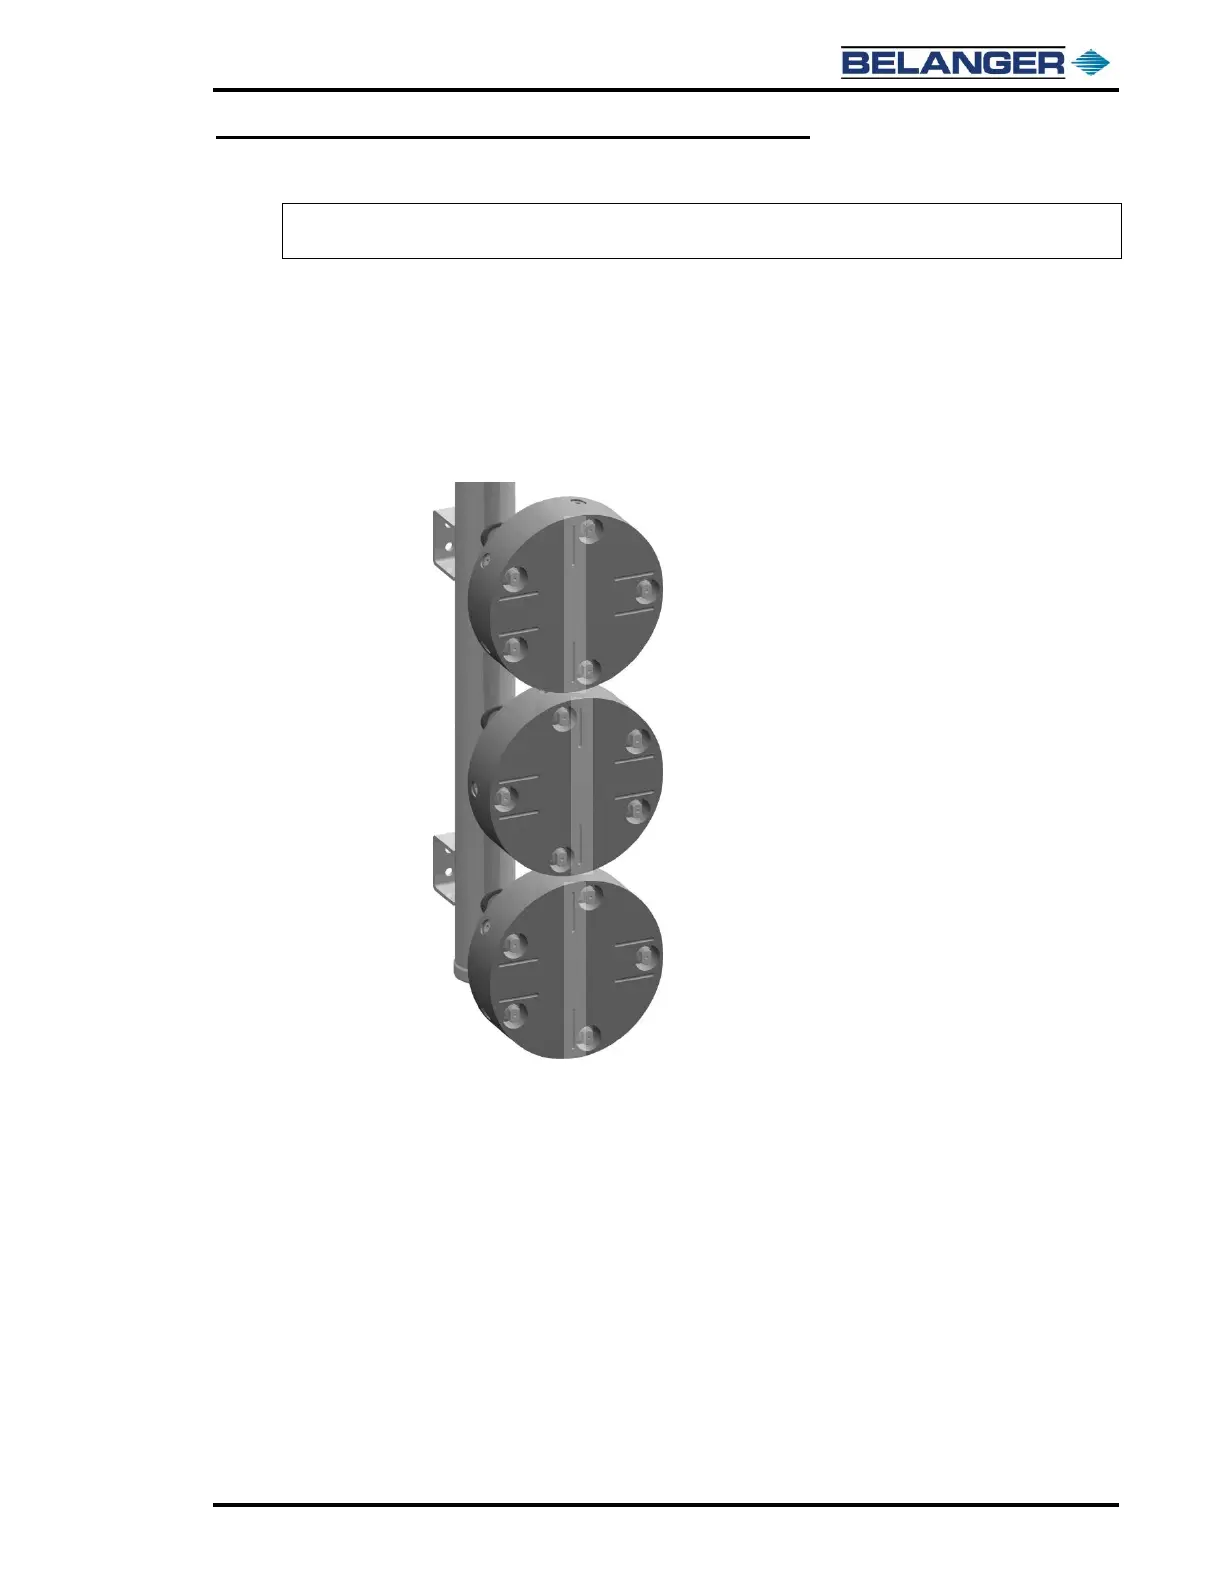
Note: Before tightening the Hockey Pucks completely, refer to the detailed image below to verify
the proper orientation.
• Notice on the face of the Hockey Pucks there are 2 sets of double lines and 2 sets of
single lines.
• All the single lines need to be in a vertical orientation.
• The middle Hockey Puck assembly should have its single (vertical) lines on the right of
center.
• The other 2 Hockey Pucks should have their single (vertical) lines on the left of center.
• See the image below.
1) When all three Hockey Puck assemblies have been tightened completely, the spray
nozzle holes should be aligned as shown in the image above. Verify the following:
• The top and bottom Hockey Puck assemblies should have 3 nozzles to the right of the single
line and 2 nozzles to the left of the single line.
• The middle Hockey Puck assembly should have 3 nozzles to the left of the single line and 2
nozzles to the right of the single line.
2) Tighten all the spray nozzles completely.
Only apply liquid Teflon™ to the threads of the nozzles.
Make sure not to get any liquid Teflon™ inside of the nozzle as this may cause it to plug the
hole up.