INSTALLATION AND STARTUP
14-10 Belanger, Inc. ®* PO BOX 5470. * Northville, MI 48167-5470 * Ph (248) 349-7010 * Fax (248) 380-9681 1MANUL220
Chapter 14 HydroBlade® Assembly Option
HydroBlade® R.O. / Low Pressure Feed Assembly
Installation
1) Turn off all power supply to the FreeStyler® to avoid any accidents.
2) Open the exit side utility cover.
Note: Located at the center of the carriage is the Universal Manifold. One of the Asco™ Valves on
that manifold feeds the rinse water to the other side of the manifold. NO ACTION is needed
for this water line.
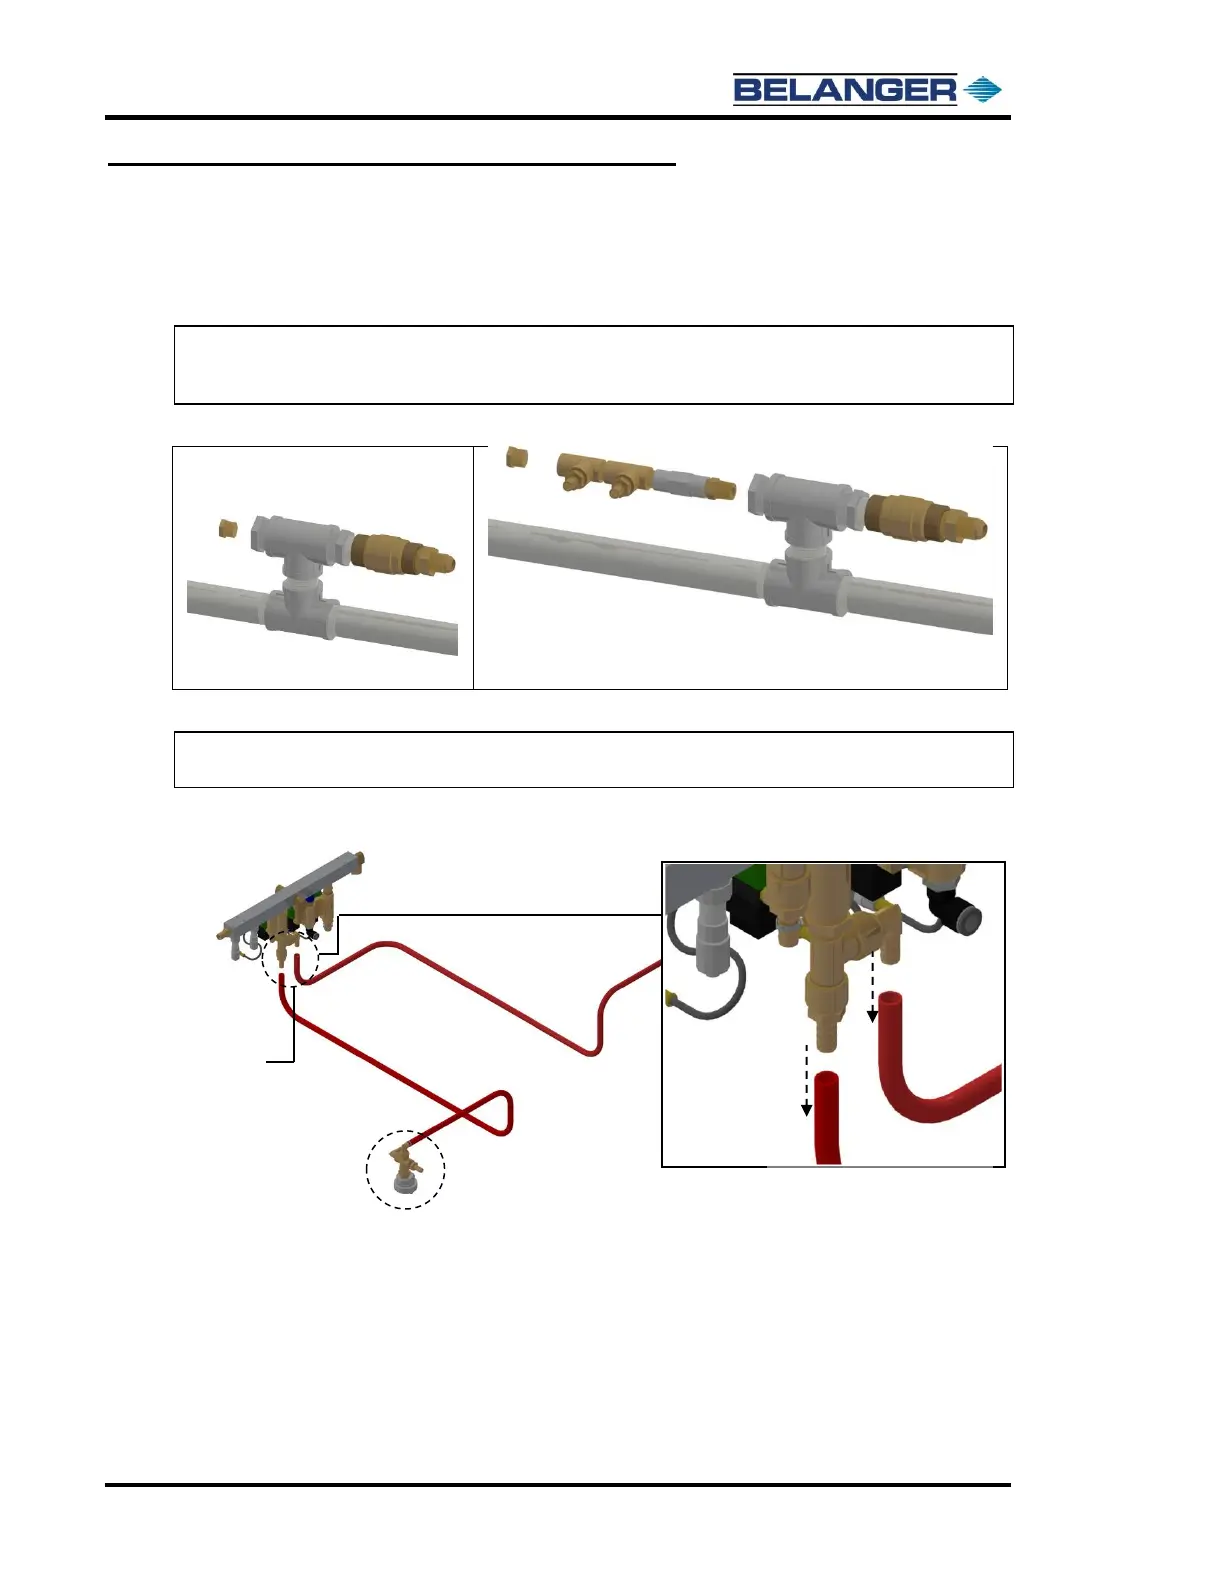
3) In the Accessory Box locate the HydroBlade® Low Pressure Feed Kit and install it as shown below.
Remove Brass Plug as shown above
Install the HydroBlade® Low Pressure Feed Kit as shown and place the
previously removed Brass Plug in the end
Note: Located at the center of the carriage is the Universal Manifold. The Asco™ Valve that
controls the R.O. feed is in the center of this manifold (circled in the image below).
4) Remove both lengths of the 1/2” blue water hose that run from the R.O. Asco™ Valve to each side of the
machine. See the image below.
5) Open the Passenger side pod cover and locate the brass cross assembly that is towards the entrance side of the
machine. See the image above in Step 4.
Brass Cross
Assembly
(typical)