INSTALLATION AND STARTUP
4-14 Belanger, Inc.® * PO BOX 5470. * Northville, MI 48167-5470 * Ph (248) 349-7010 * Fax (248) 380-9681 1MANUL220
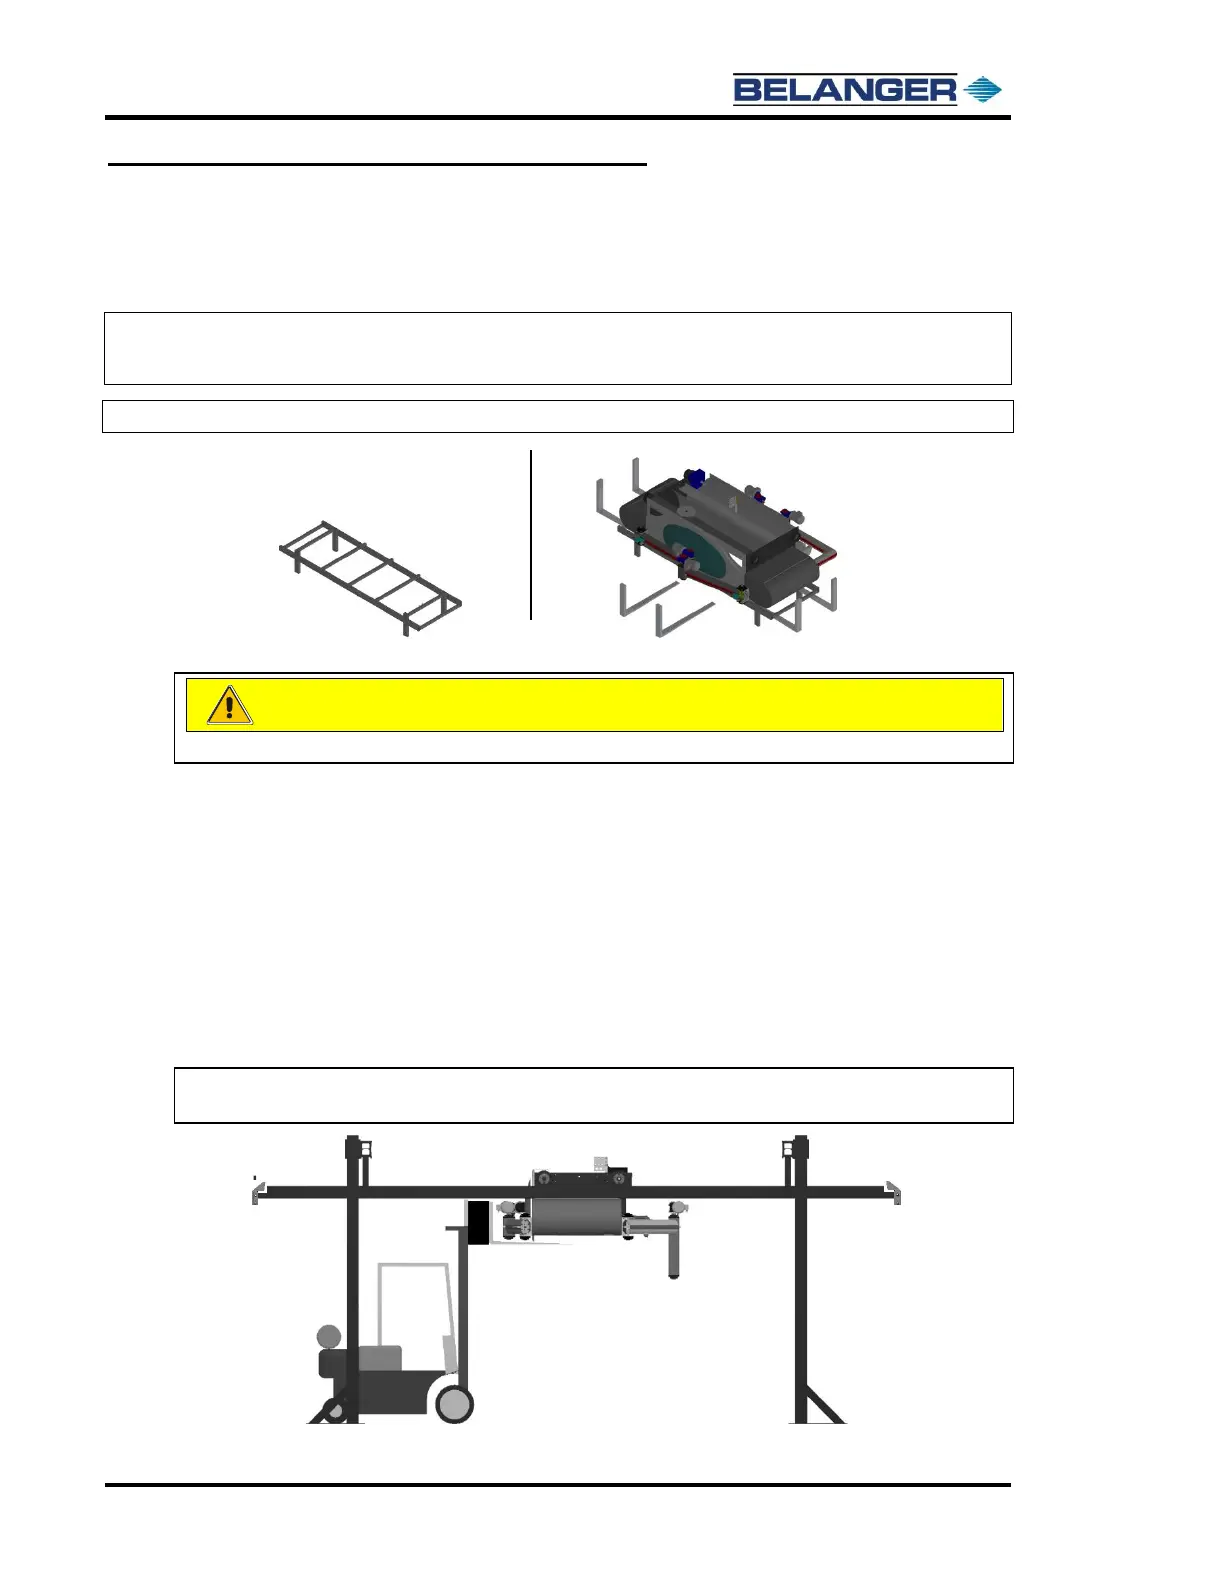
Chapter 4 Frame and Carriage Assembly
Carriage Placement
You are now ready to place the carriage onto the rails. The Carriage Assembly arrives on the site
secured to a shipping frame. When lifting it into place the forks can be inserted from either side as
shown below.
Note: If you have fork extensions, the Carriage may also be lifted from the exit side of the shipping frame.
Be sure to clamp the forks to the shipping frame before lifting.
1) From the entrance end, maneuver the Carriage Assembly into the bay on one of the forklifts and
move to the center position.
2) If the rail spacing is:
Set to the 92-1/4” distance, proceed to step 3.
Set to the 100’’ distance, proceed to step 4.
3) 92-1/4’’ Rail Spacing: Pull the Carriage up to just in front of the rails. Have someone on each
side of the machine to check clearance and slowly drive the machine onto the rails.
4) 100” Rail Spacing: From the predetermined end, maneuver the Carriage into the bay on one of
the forklifts and move to the center position of the rails as shown below.
Note: There is 1/8’’ of clearance between the pods and the rails, keep this in mind when loading
the carriage onto the rails.
Note: The forklift considerations for the carriage are as follows: load weight of the carriage is
2,250 lbs., load is 136” wide, load center is 40”, and the load needs to be lifted 72” high.