INSTALLATION AND STARTUP
4-12 Belanger, Inc.® * PO BOX 5470. * Northville, MI 48167-5470 * Ph (248) 349-7010 * Fax (248) 380-9681 1MANUL220
Chapter 4 Frame and Carriage Assembly
Rail Travel Stop-Clamp Placement
Before placing the Carriage onto the rails, you will need to install the Rail Travel Stop Clamps.
Follow the instructions below to do so.
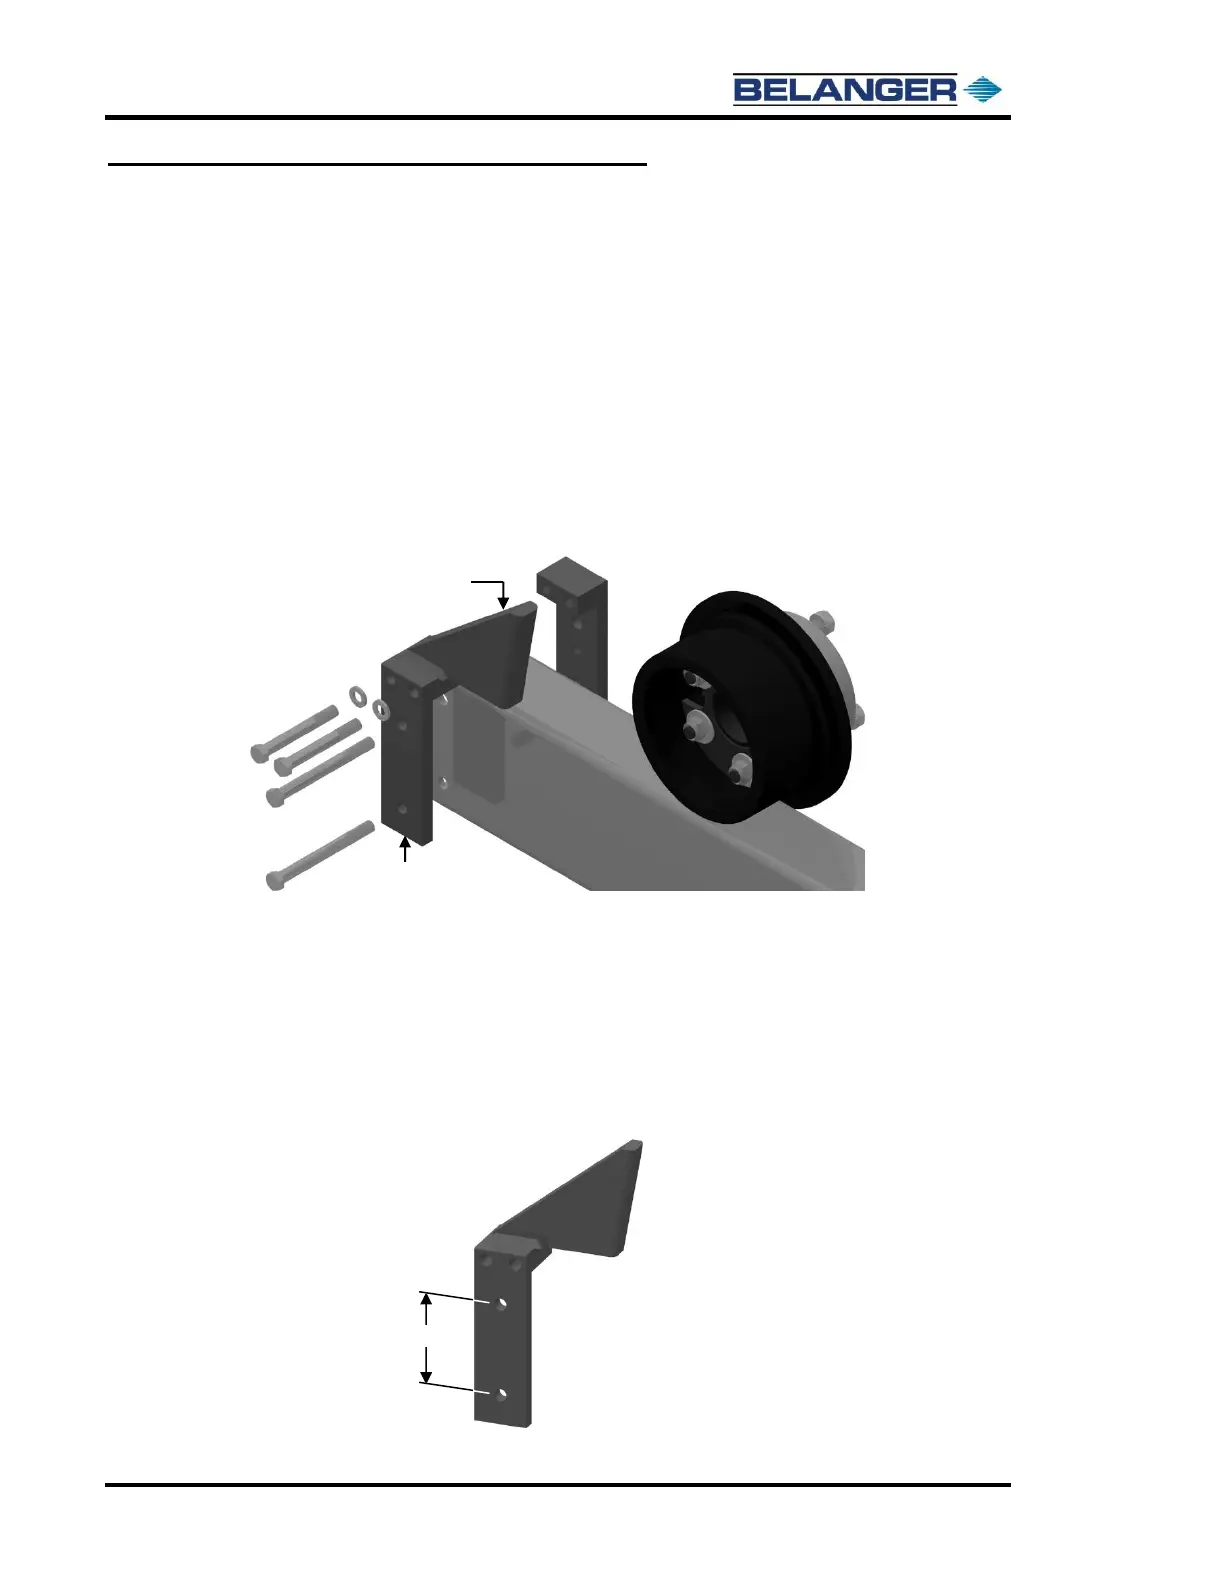
1) Secure two of the Rail Travel-Stop Clamps on the end of the rails that is opposite of where the
machine will be loaded.
Make sure that the Stop Post is facing so that the roller will hit it as shown below.
Secure the two Rail Travel Stop Clamps according to the following:
• If the machine is to be loaded onto rails from the entrance end of the bay, the Rail Travel
Stop Clamps will be placed onto the rail at the exit end flush to the edge of the rail. The
7/16 through-bolts will be tightened through the pre-drilled holes in the rails.
• If the machine is to be loaded from the exit end of the bay, you must then determine
where to position the Travel Stops. Refer to the previous section under “Length
Considerations” to refresh your memory on the Rail Travel Stop placement.
If no adjustment is needed for the Rail Travel Stop Clamp: Position the clamps flush to the
end of the rail.
Tighten the 7/16 x 4-1/2” through-bolts through the pre-drilled holes in the rails using the
supplied 7/16” lock nuts.
For inward adjustment of the Rail Travel Stop Clamps: Use the “end limit” stop clamp holes
as the pattern locator within the 30’’ adjustment area.
Then use a 15/32” drill bit to drill new through-holes into the rail to secure the Rail Travel
Stops.
Use the 7/16 x 4-1/2” bolts and lock nuts to secure the clamp into place on the rail.