INSTALLATION AND STARTUP
1MANUL220 Belanger, Inc.® * PO BOX 5470. * Northville, MI 48167-5470 * Ph (248) 349-7010 * Fax (248) 380-9681 4-31
Chapter 4 Frame and Carriage Assembly
Installing the Boom
There are two types of Booms available: the standard Channel Boom and the Deluxe Boom.
The Deluxe Boom is supplied when a HydroBlade® and/or Wheel Stinger® option is purchased. It can
also be purchased as an optional upgrade if desired. If you have purchased an option that requires a
Deluxe Boom, proceed to the install instruction called Optional Deluxe Boom later in this chapter.
Connecting the Standard Boom Channel
To reorient the components shown below from a Driver side equipment room to a Passenger side
equipment room configuration; see the following instructions:
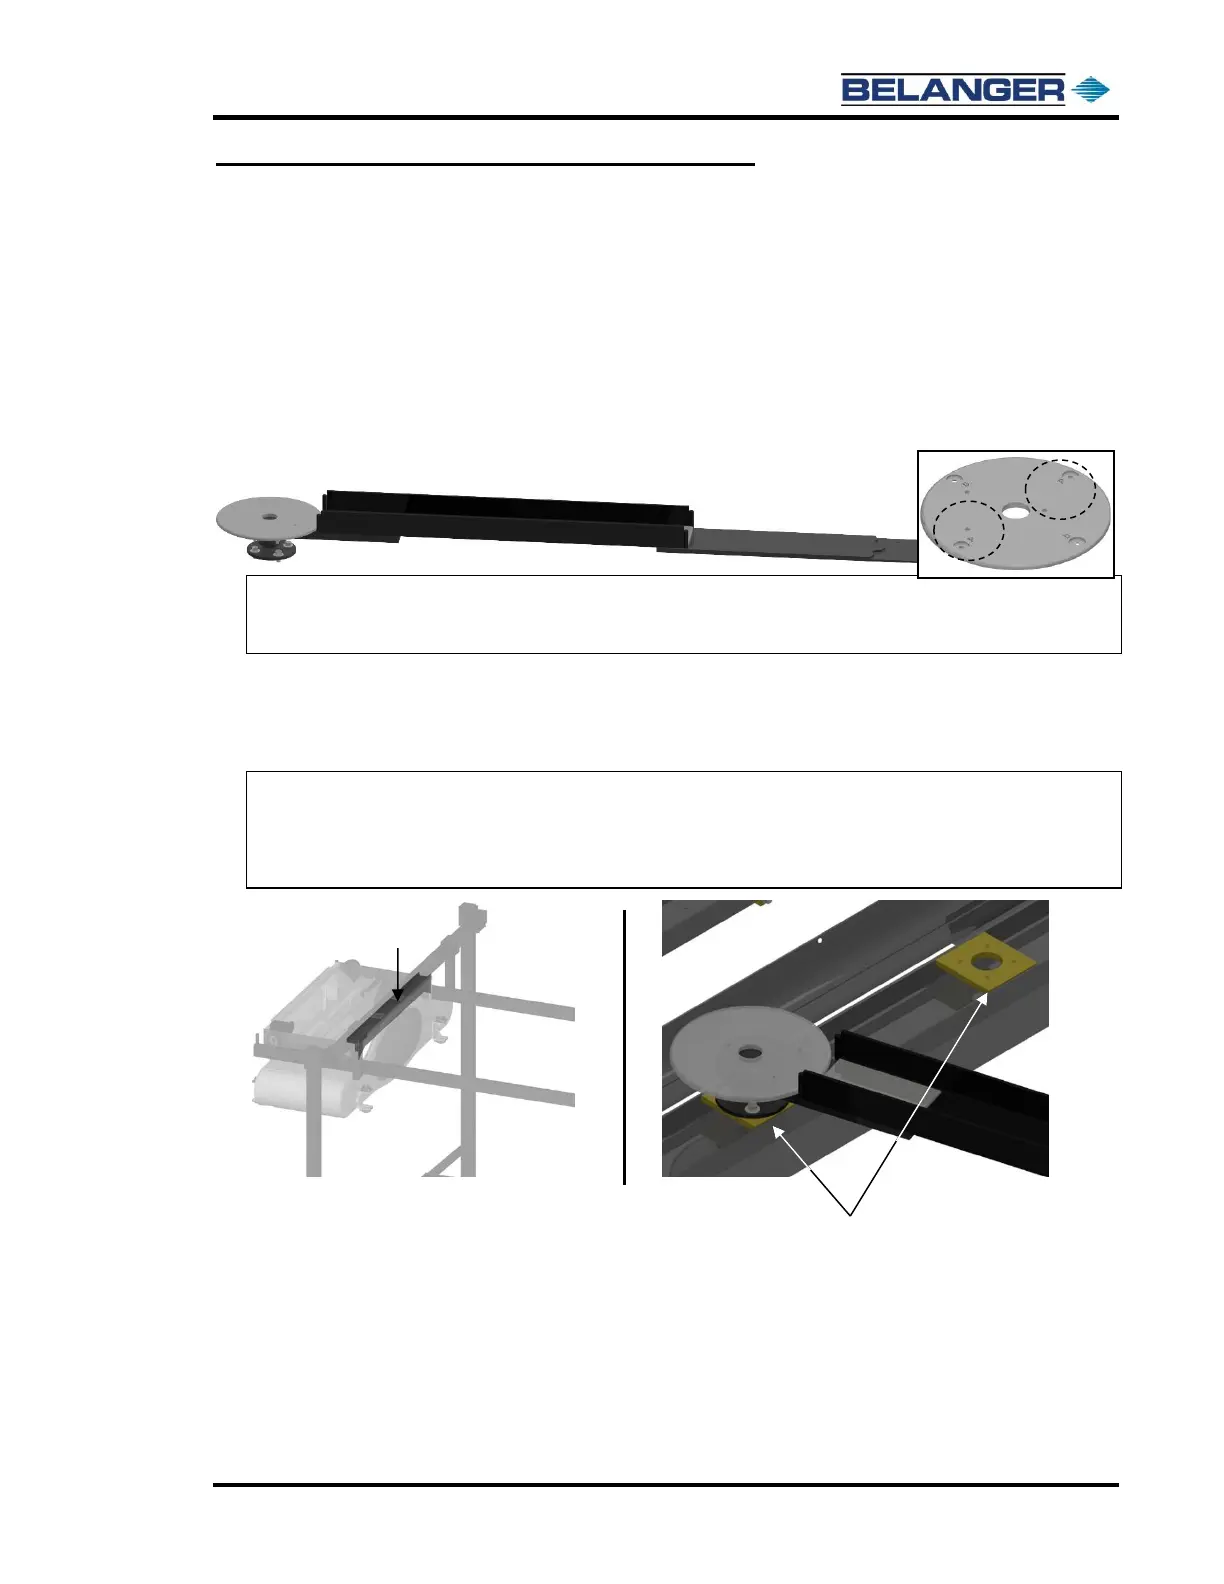
1) Locate Machine Mount Boom Assembly as shown below.
Note: The Boom Hose Support Posts are assembled at the factory for a driver side configuration. If
your Boom is configured for the passenger side, rotate the posts to the holes labeled with the “P”
(passenger side – circled on the right) before running your utility lines.
2) Locate the supplied 7/16-14 x 1” stainless steel fasteners, 7/16” lock washers, and 7/16” flat
washers (in the accessory box).
Attach the Boom Arm to the appropriate Mount Plate on the top of the entrance side of the
Carriage Assembly as shown below.
Note: If the Boom Wall or Freestanding Mount Leg is on the Passenger side, the Boom Arm will
connect to the Carriage Assembly on the Driver side.
Note: If the Boom Wall or Freestanding Mount Leg is on the Driver side, the Boom Arm will connect
to the Carriage Assembly on the Passenger side.