INSTALLATION AND STARTUP
1MANUL220 Belanger, Inc.® * PO BOX 5470. * Northville, MI 48167-5470 * Ph (248) 349-7010 * Fax (248) 380-9681 5-1
Chapter 5 Entrance and Exit Photo-Eyes
Photo Eye Placement
All Photo-Eye placement from entrance to exit,
including the VPS Virtual Positioning System® is
covered in this chapter and on the 11 x 17 pages at
the end of this manual.
Photo-Eye Available Style Options
Photo Eye Set (Floor Mounted)
Photo Eye Set (Wall Mounted)
Photo-Eye Available Add-on Options
Note: Read through this entire section to familiarize yourself with the Photo-Eye requirements
before installation.
Photo-Eye Layout and Description
This single set can handle up to 5 functions (3 Enter operations, Door Operation and POS
Communication). Some of the typical items that are controlled by a single set of Photo-Eyes are Rust
Inhibitor, Undercarriage Wash and machine activation.
If On-Board Door Controls are utilized, the site must have at least two sets of Photo-Eyes. One set for
the entrance and one set for the exit.
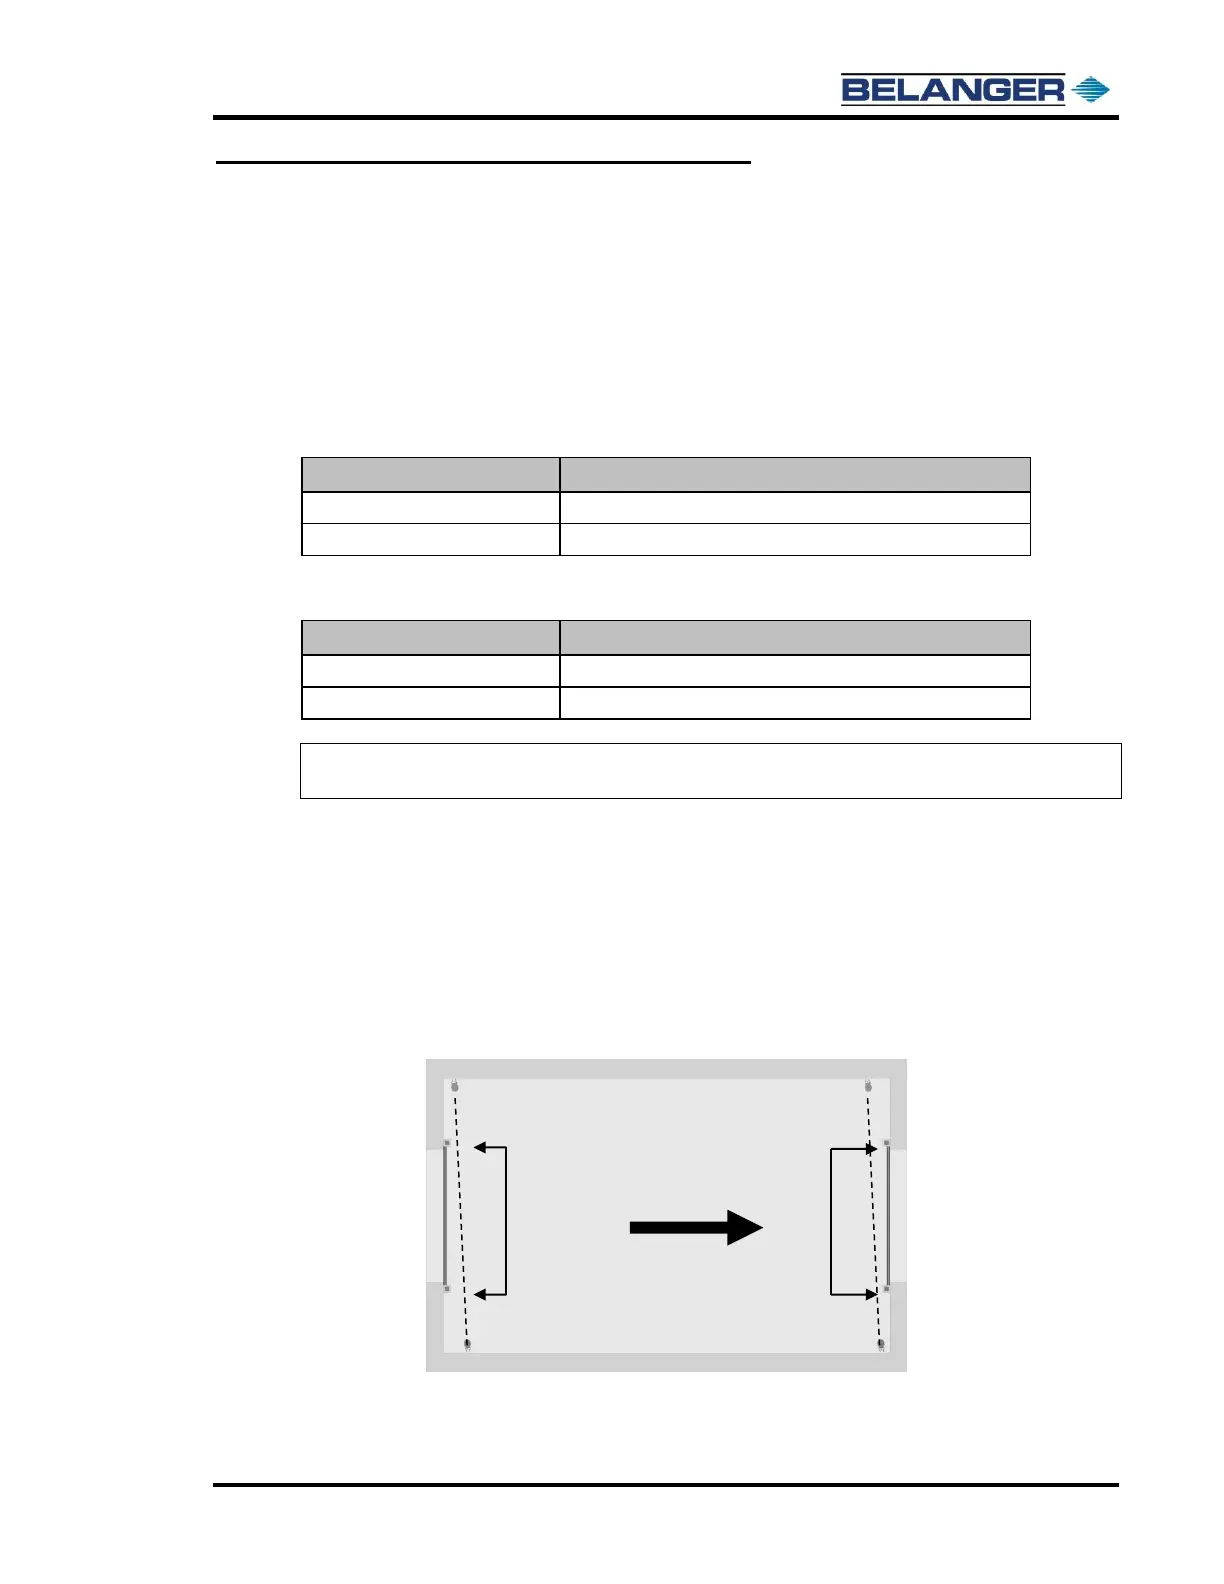
The Photo-Eyes should be installed as close as possible to the entrance and exit door tracks and off-
set by 6” as shown below.
Photo-Eyes
with 6” Off-Set
Photo-Eyes
with 6” Off-Set
Image Shown with Wall Mounted Photo-Eyes

 Loading...


