INSTALLATION AND STARTUP
1MANUL220 Belanger, Inc.® * PO BOX 5470. * Northville, MI 48167-5470 * Ph (248) 349-7010 * Fax (248) 380-9681 4-19
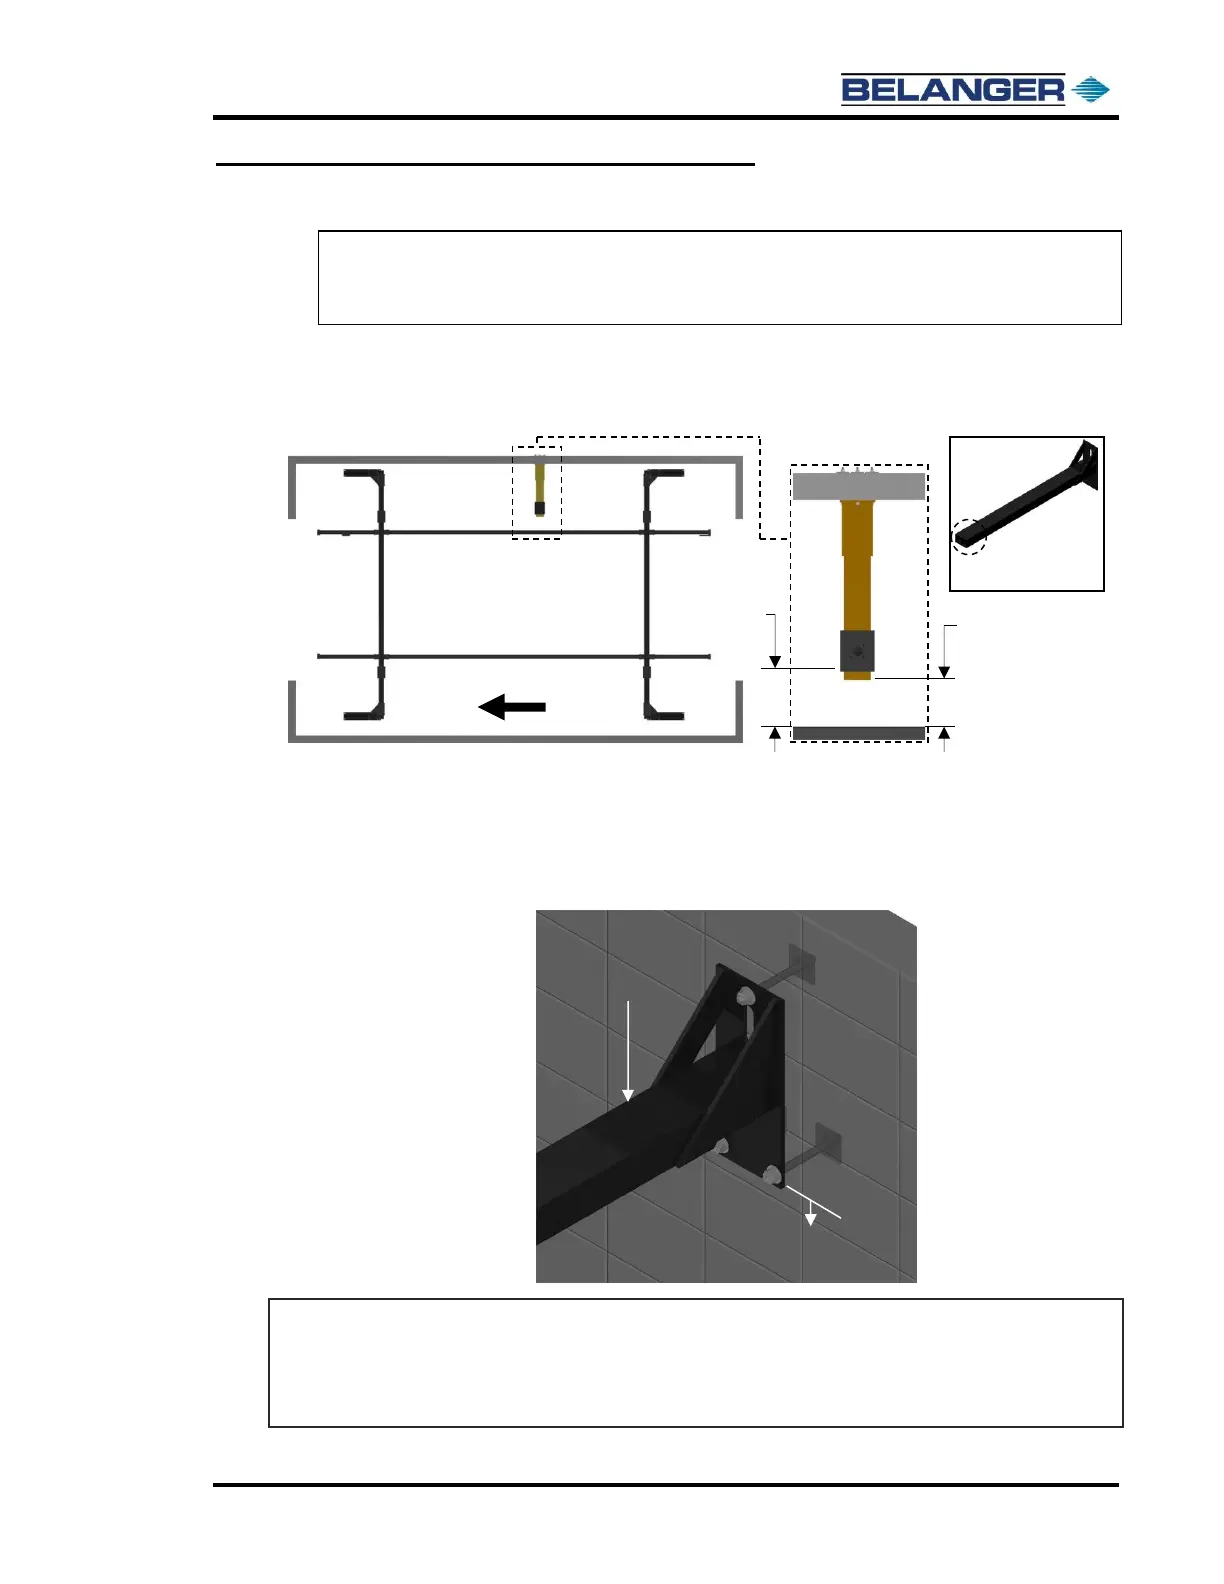
Chapter 4 Frame and Carriage Assembly
Installing the Boom Mount
Note: The following instruction about mounting the Boom Mount to the bay wall applies to a
FreeStyler® either with or without an Onboard Dryer.
Note: If you purchased the Onboard Dryer option, see Chapter 17 for more details.
1) Measure the distance from the outside surface of the rail to the wall on the Equipment Room
side and subtract 3-1/2” as shown below. Cut the Boom Mount to the determined length.
2) The following image shows the location to mark the wall for bay height placement of the Wall
Mount.
For the bay height location, measure up 112-7/8” from the ground and mark the wall. This
mark will be used to line up the bottom edge of the detail plate in Step 4.
Note: All of the above dimensions are applicable for either Driver side or Passenger side Boom
orientation.
Note: The Wall Mount bay height is the same for the 4-Legged Frame and 6-Legged Frame
configurations.