INSTALLATION AND STARTUP
4-16 Belanger, Inc.® * PO BOX 5470. * Northville, MI 48167-5470 * Ph (248) 349-7010 * Fax (248) 380-9681 1MANUL220
Chapter 4 Frame and Carriage Assembly
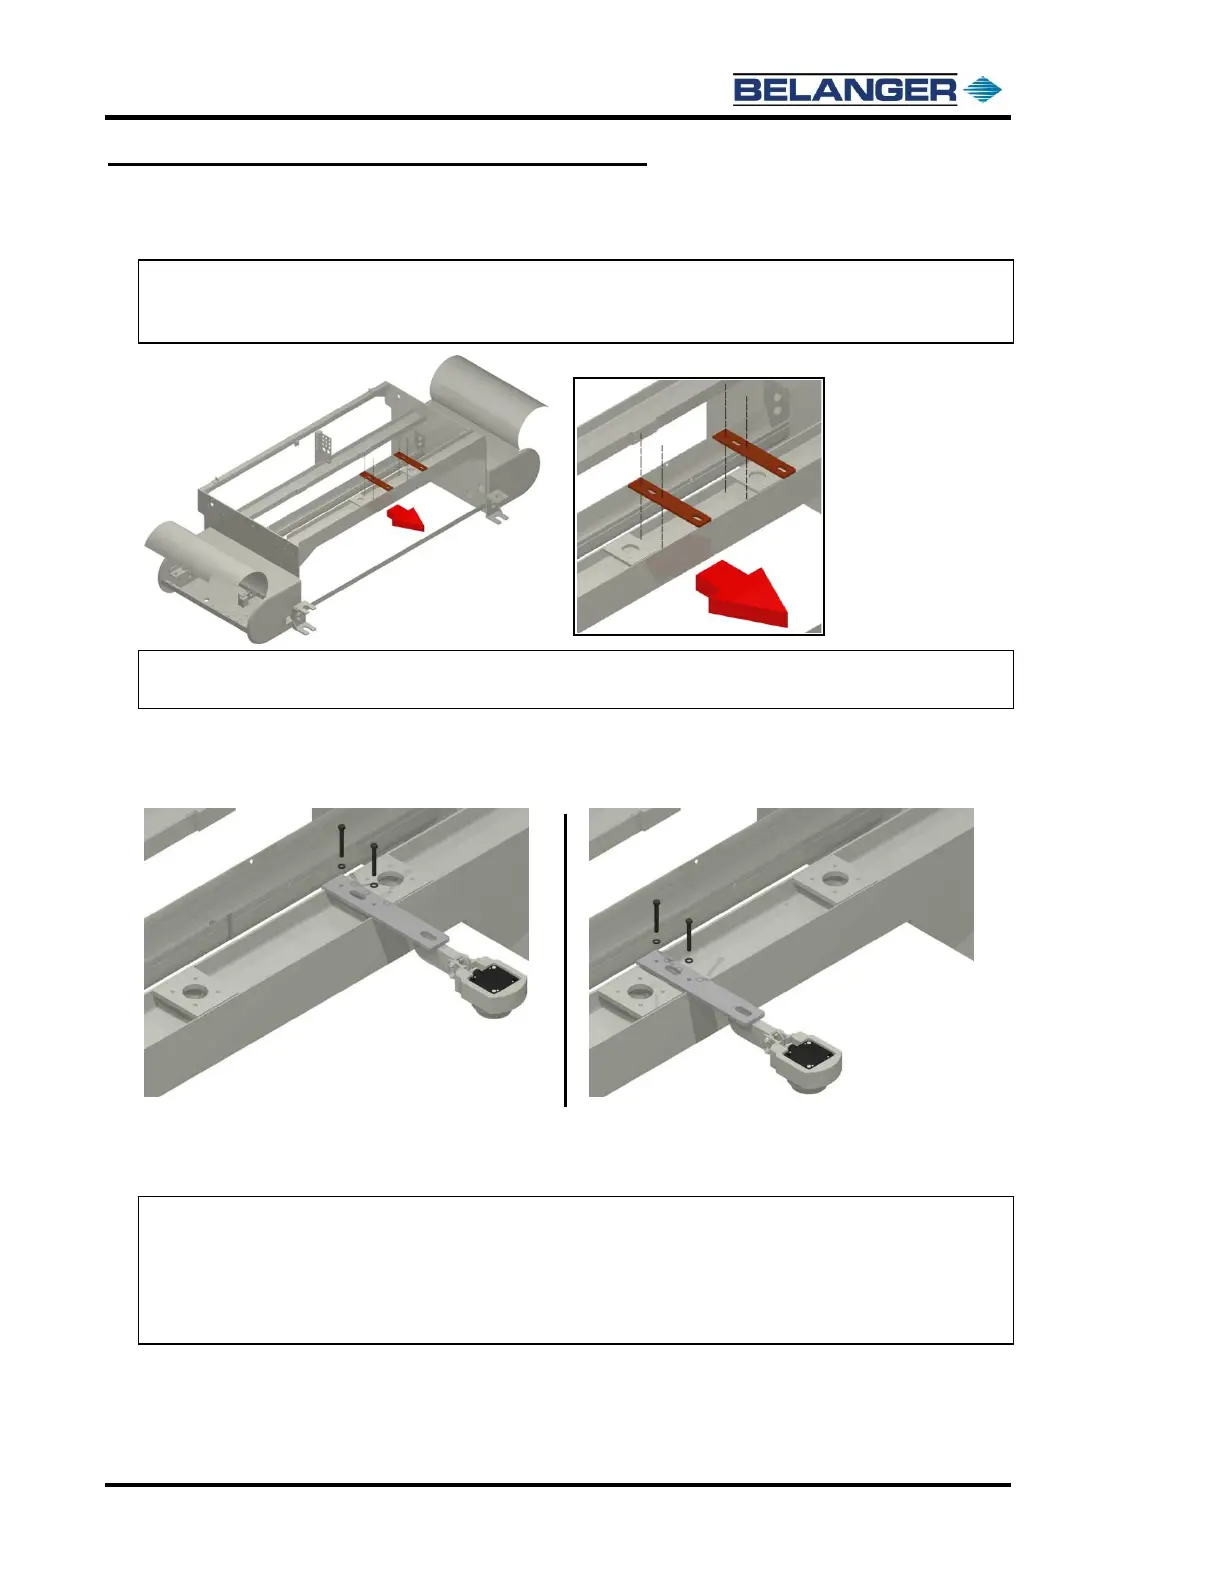
Sonar Placement
1) The Sonar Bracket can be mounted in either of 2 positions as shown below.
Note: If your floor has a grating in it that runs the full length of the wash bay or any other
obstruction that may interfere with the proper function of the sonar, then mount the
sonar in the position that minimizes the interference.
Note: The Sonar Mounts using a 2-1/2’’x 3/8” fastener and a 3’’ x 3/8” fastener, along with
two 3/8” lock washers and one 3/8’’ regular nut. See the image below.
2) Use the supplied 2-1/2’’ bolt with a lock washer to start the Sonar Bracket through the hole closest
to the entrance of the machine, but do not fully tighten yet.
Start the 3’’ bolt through the bracket in the hole closest to the exit end of the machine.
3) Snug both bolts down but do not over tighten because this will cause the bracket to bend.
Take the supplied 3/8’’ regular nut and tighten it onto the 3’’ fastener to lock the bolt in place.
Note: For proper setup of the Sonar floor distance, please refer to the programming and
operation manual under setup miscellaneous sonar offset.
Note: The Multifunction Sonar can be identified by the LED. It will flash a “pulse” pattern.
See following pages for adjustment and configuration of the Multifunction Sonar. See
Configuring the Sonar Unit later in this chapter.