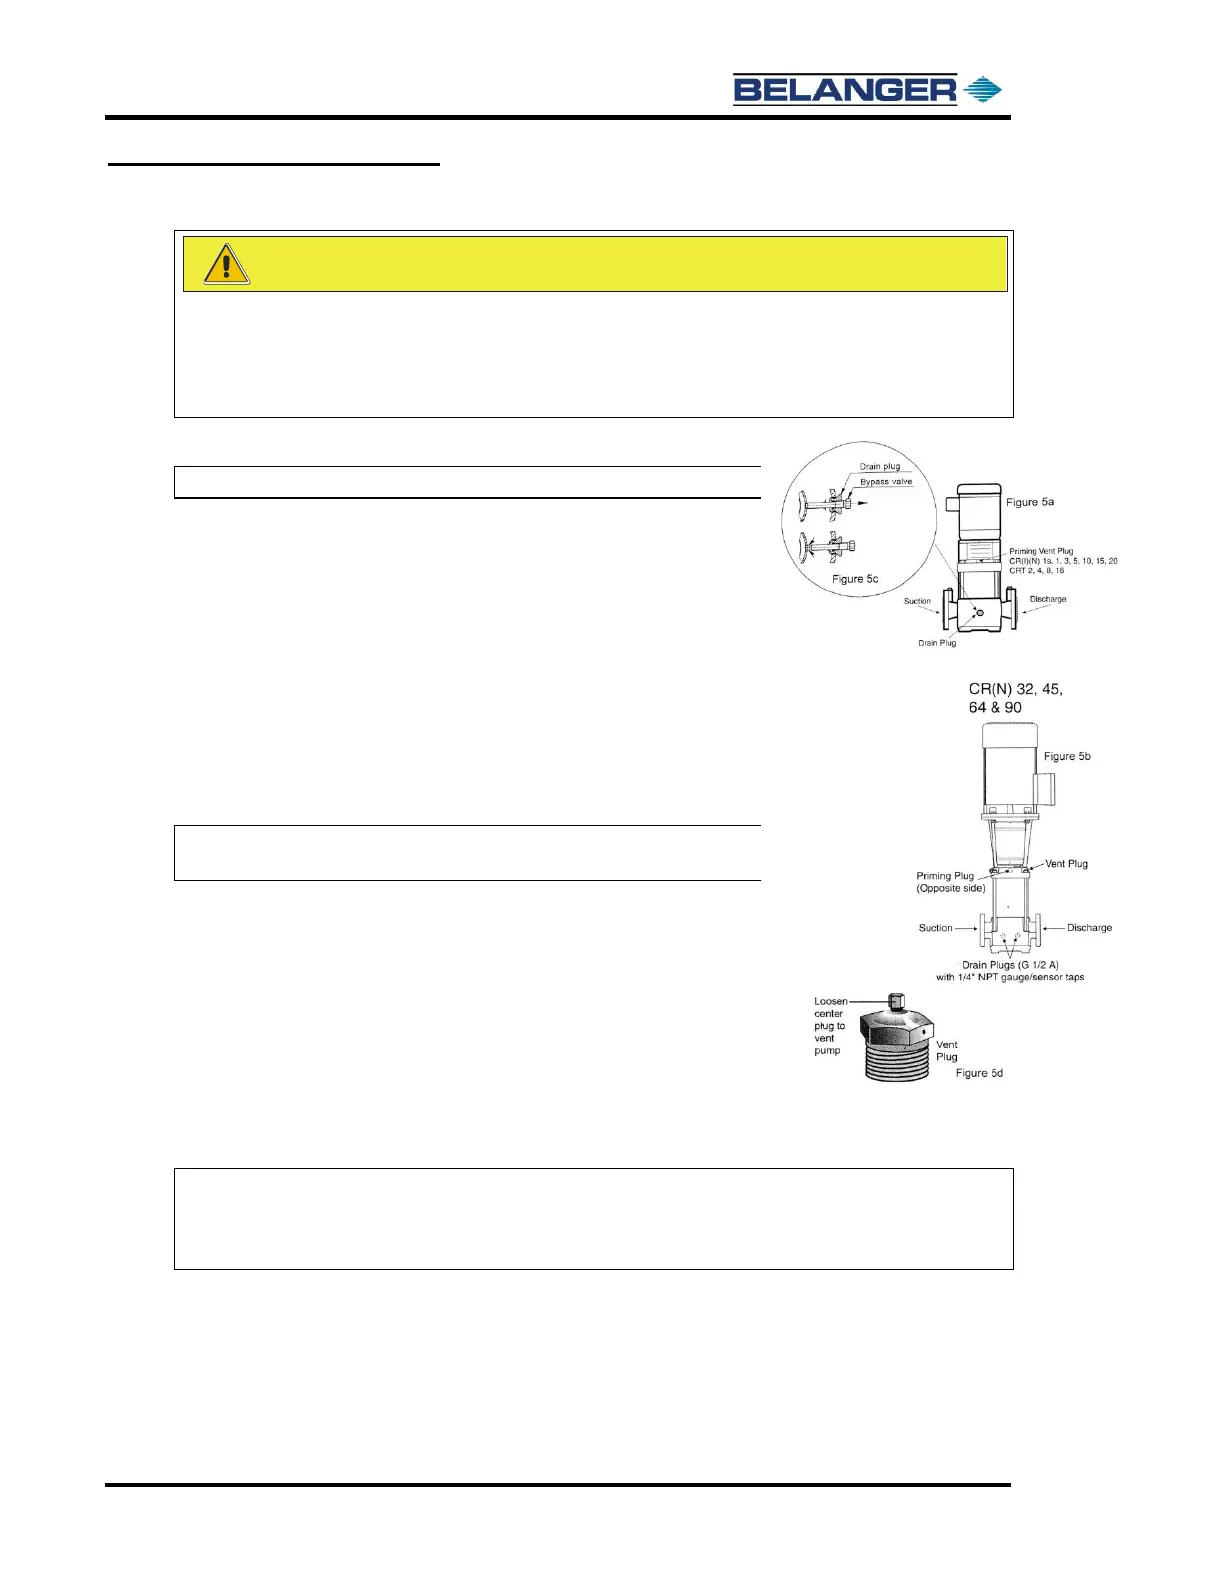
On startup, the air must be removed from the pump. To do so, loosen the center plug on
the pump, located on the top of the pump between the pump and the coupling guard.
DO NOT start the pump before priming or venting the pump!
Verify the pump rotation according to the arrow on the body of the pump.
Fill the tank with water turning on the 1-amp breaker inside the control box.
Note: The solenoid valve will open allowing the water to enter.
Confirm that the water shuts off when it reaches the “high level” float-switch with
slosh guard.
Open the priming plug on the pump head. With the water source above the
pump the water will be allowed to fill the pump.
When a steady stream of airless water runs out of the priming port, close the
plug and securely tighten.
Check rotation by bump starting the motor using the motor starter controls.
Verify the motor is turning in the same direction as the indication arrow.
Turn the motor on and check the entire system for leaks.
Set the control function to auto.
Note: The following information was taken from documents
provided by Grundfos™ (the pump manufacturer).
Priming
To prime the pump in a closed system or an open system where the water source is
above the pump, close the pump isolation valve(s) and open the priming plug on the
pump head. See Figures 5a, 5b, and 5d. Gradually open the isolation valve in the
suction line until a steady stream of airless water runs out the priming port. Close the
plug and securely tighten. Completely open the isolation valves.
In open systems where the water level is below the pump inlet, the suction pipe and
pump must be filled and vented of air before starting the pump. Close the discharge
isolation valve and remove the priming plug. Pour water through the priming hole until the suction pipe and pump are
completely filled with water. If the suction pipe does not slope downward from the pump toward
the water level, the air must be purged while being filled. Replace the priming plug and securely tighten.
Note: CR, CRI, CRN 1s to 5: For these pumps, it is advisable to open the bypass valve (Figure 5c)
during start-up. The bypass valve connects the suction and discharge sides of the pump, thus
making the filling procedure easier. When the operation is stable, the bypass valve must be
closed.



 To Next Page