INSTALLATION AND STARTUP
1MANUL220 Belanger, Inc.® * PO BOX 5470 * Northville, MI 48167-5470 * Ph (248) 349-7010 * Fax (248) 380-9681 22-11
Chapter 22 Initial Startup
De-Stroke Cylinder Arms
Exit Arm Cylinders
Note: The exit cylinder mounting blocks are installed in each side pod at the factory for the longer
stroke position.
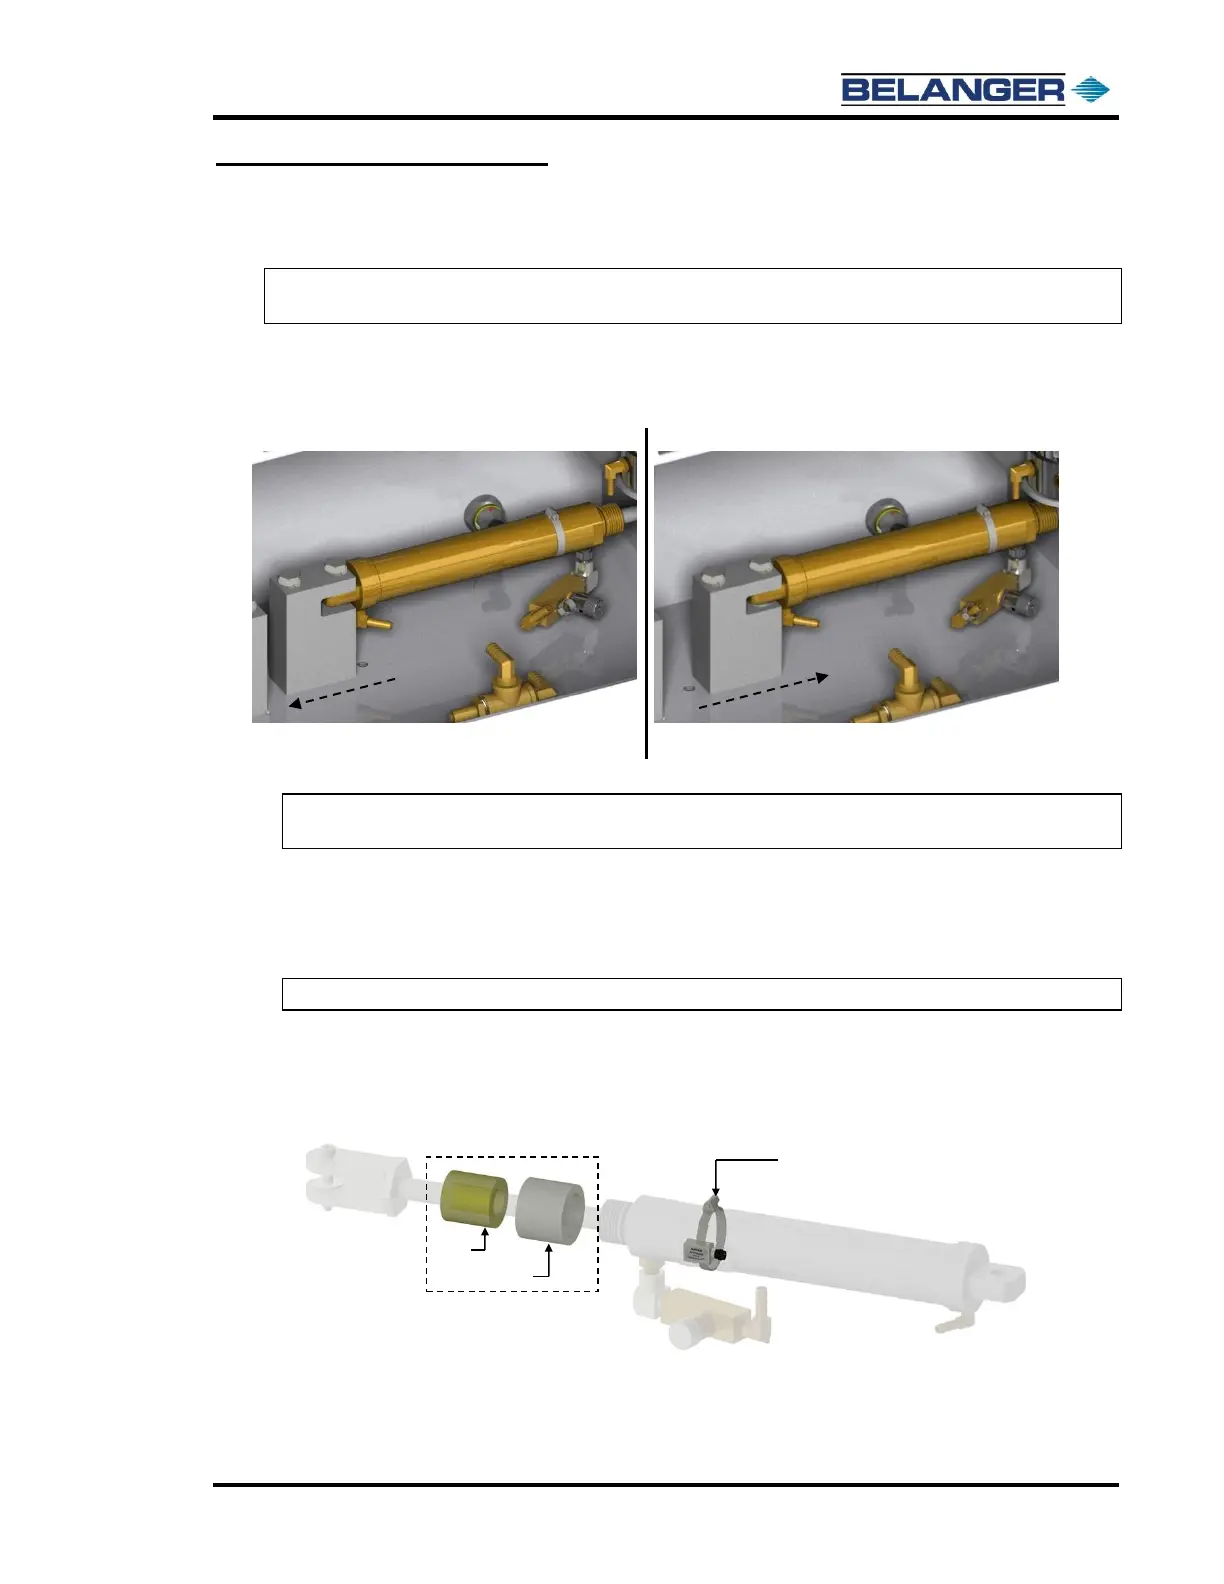
To de-stroke the exit cylinder, see the images below and use the following procedure:
Remove the fasteners and washers from the block.
Move the block to the alternative location as shown below.
Using a 5/8” wrench, remove the cylinder rod so that the clevis stays attached.
Note: DO NOT USE PLIERS, VISE-GRIPS OR ANY OTHER TOOL THAT WILL DAMAGE
THE CYLINDER ROD. THIS DAMAGE WILL CAUSE CYLIDER FAILURE.
Slide the Posi-Stop into the Limit Stop.
Slide the Posi-Stop and Limit Stop over the rod.
Thread the Lim it Stop onto the cylinder and tighten it down with light pressure.
Use a wrench to tighten the rod back onto the clevis.
Note: Take care not to cross-thread the rod and clevis.
Pull the arm in to press the Posi-Stop into the Limit Stop.
Make sure all connections are completely tightened.
Adjust the Reed Switch accordingly. See Resetting the Cylinder Reed Switches later in this section.
Repeat the process on the other arm if necessary, to clear obstructions.