5•Service
Doc. 065051-03 1/08 133
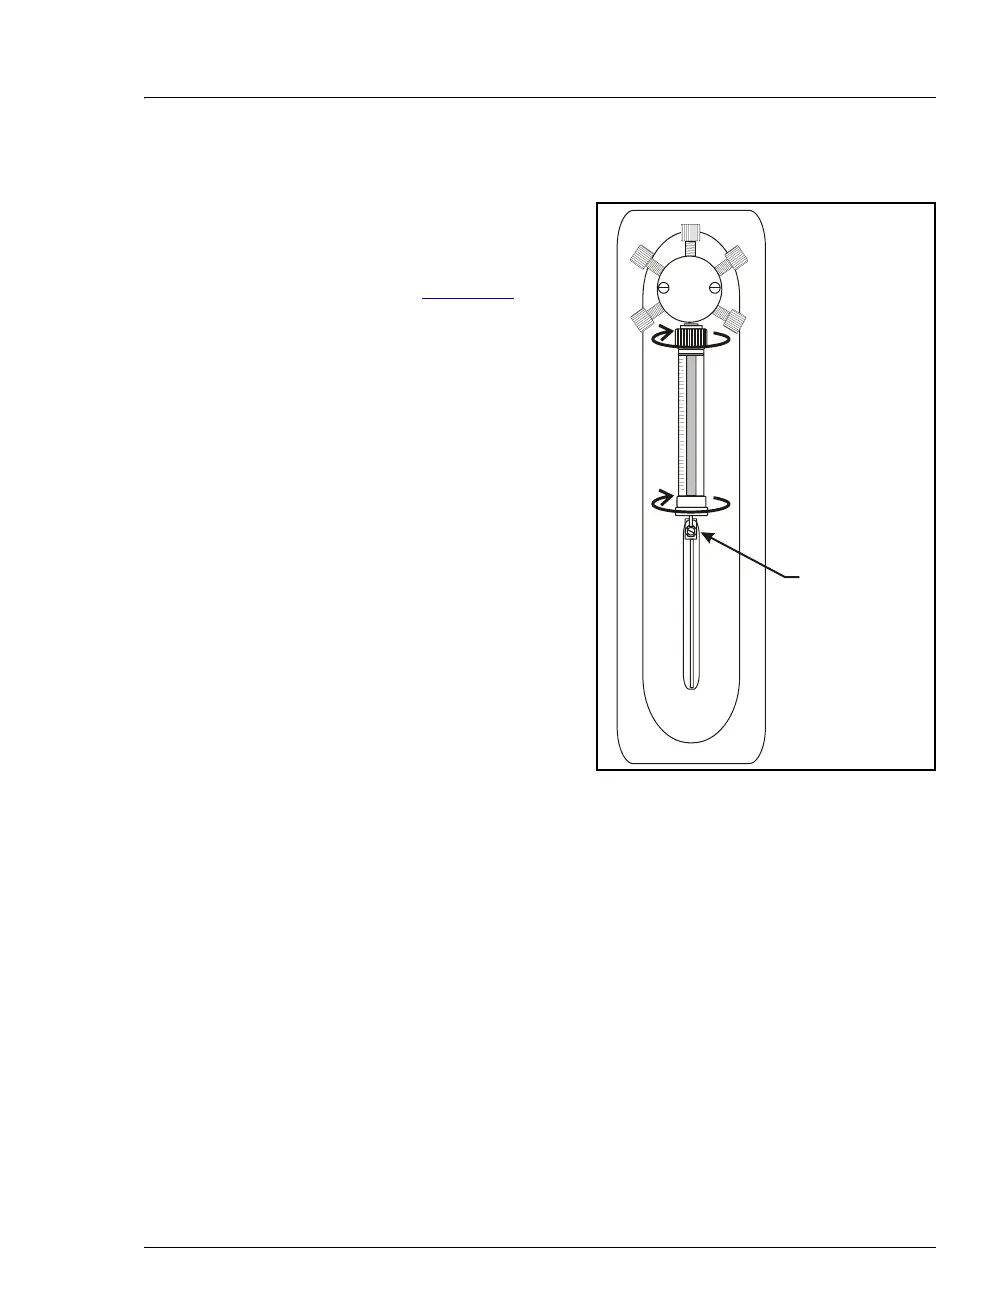
5.3.1 Removing the Existing Syringe
1. Using a flathead screwdriver,
unscrew and remove the
syringe drive connecting
screw (see Figure 5-4
).
2. Hold the syringe at the top
and bottom and unscrew it
from the valve.
3. Remove the white Teflon
washer from the syringe
valve port. Note: To remove
the washer, push a piece of
0.8-mm (0.031-in) OD PEEK
tubing into the center of the
washer and twist to dislodge
the washer.
4. Install a new white Teflon
washer (P/N 061315) into the
new syringe.
Figure 5-4. Removing the Syringe
Syringe Drive
Connecting
Screw (Remove)