5•Service
Doc. 065051-03 1/08 165
5.13 Replacing the Sample Syringe Valve
1. Disconnect the liquid lines from the existing valve.
2. Remove the existing valve (see Section 5.12
).
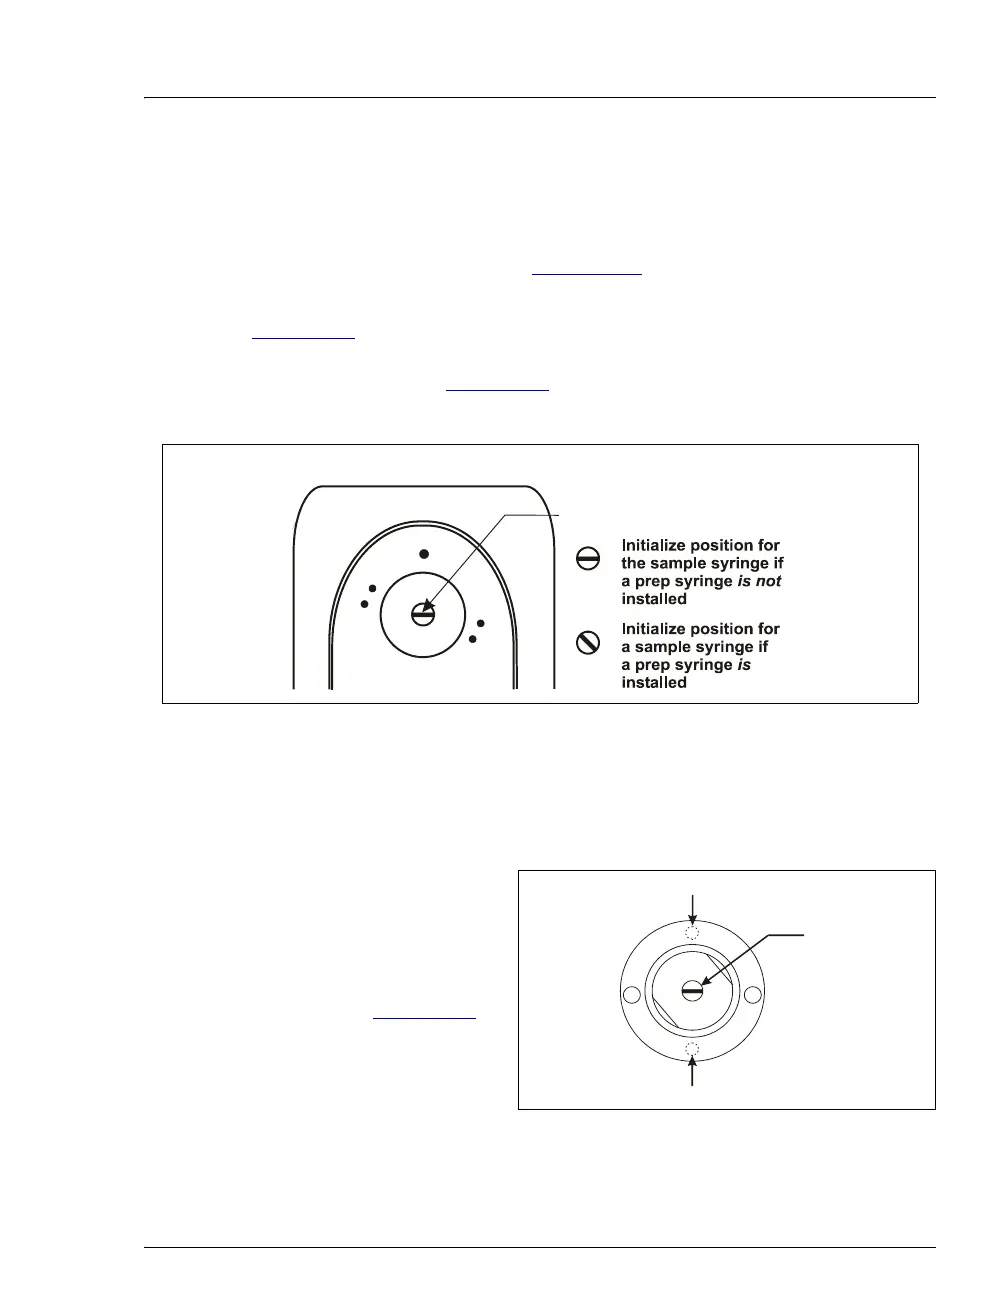
3. When the valve is removed, the syringe drive shaft is visible (see
Figure 5-32
). When the syringe is in the INITIALIZE position (the position
selected when the valve was removed), the slot in the drive shaft should be in
the position shown in Figure 5-32
. The position depends on whether a prep
syringe is installed.
If the slot in the drive shaft is not in the correct position, the syringe drive may
need replacing. Contact Dionex for assistance. Do not attempt to manually
turn the drive shaft.
4. Check the back of the new
sample syringe valve
(P/N 054242). The valve
drive shaft should be
perpendicular to valve ports
A and D (see Figure 5-33
).
If it is not, rotate the valve
rotor until the drive shaft is
in the correct position.
Figure 5-33. Sample Syringe Valve Drive Shaft
Initial Position
Figure 5-32. Sample Syringe Drive Shaft Initial Positions
Sample Syringe
Drive Shaft
Front View o
ample Valve
Drive Shaft
(Initial Position
Port A (On Front)
Port D
On Front
Back View
of Valve