AS Autosampler Operator’s Manual
148 Doc. 065051-03 1/08
5.7 Replacing the Needle Seal Assembly
Replace the needle seal assembly after about 4,200 cycles of use (the cycle count
increments each time the needle is inserted into the inject port). When the AS is
operating under Chromeleon or Chromeleon Xpress control, a reminder message
is displayed in the Audit Trail when the number of cycles reaches this usage limit.
When the AS is operating under front panel control, the
USAGE LOG SCREEN (see
Section C.9.6
) displays the number of cycles performed since the assembly was
last replaced.
Follow these instructions to install any of the three needle seal assembly versions:
1. Remove the drip tray (see Section 5.5
).
2. Disconnect the needle seal line fitting from port S (5) on the injection valve.
Using a 5/16-in wrench, turn the fitting counterclockwise to loosen it and then
complete the removal with your fingers.
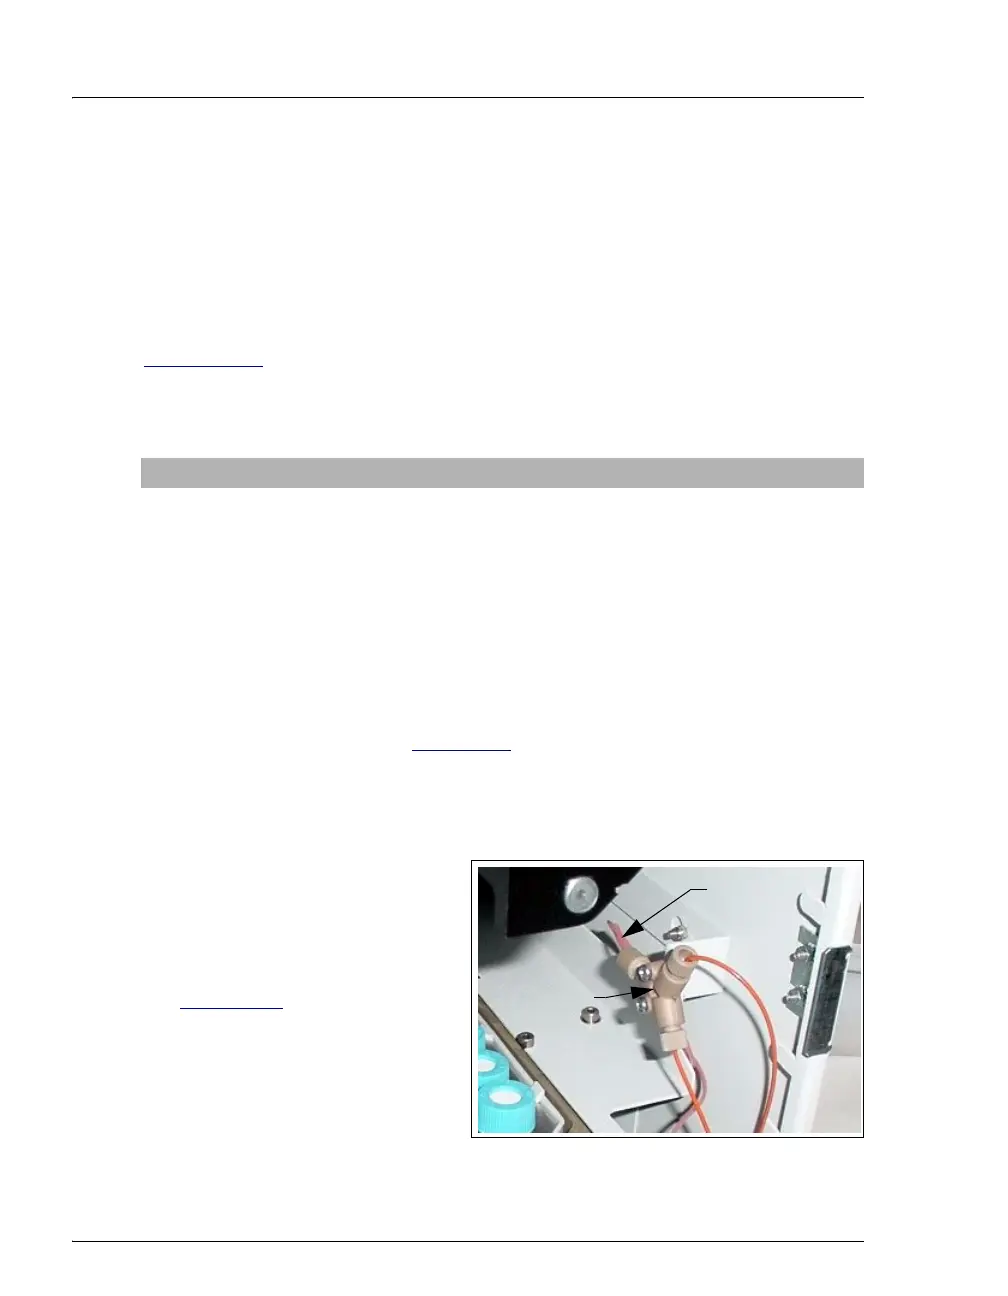
If the AS is equipped with the
simultaneous injection option,
disconnect the needle seal line
from the Y-connector in the
autosampler compartment (see
Figure 5-19
).
Figure 5-19. Simultaneous Injection Option:
Disconnecting the Needle Seal Line
Needle Seal Assembly Part Number Use For
18-in needle seal assembly,
with 10-32 ferrule fitting
057301 Connecting the AS inject port to
the injection valve
18-in needle seal assembly,
without 10-32 ferrule fitting
061290 Connecting the AS inject port to
two injection valves for
simultaneous injections
24-in needle seal assembly
with 10-32 ferrule fitting
062564 Use for connecting the inject port
of a second AS to injection valve
#2 in a dual-ICS-3000 system
Disconnect
this line
Y-Connector