B • Installation
Doc. 065051-03 1/08 187
B.3.3 Connecting the Syringes and Drain Line
1. Remove the acorn nut from the fitting on the sampling needle
assembly, which extends from the AS rear panel. Gently pull the line
out the rear panel until there is enough free tubing (about 45 cm
(18 in)) to route the line to the front of the sample syringe.
2. Remove the 1/4-28 plug from port C on the sample syringe valve.
Make sure the white Teflon washer remains installed inside the port.
3. Connect the sampling needle assembly line to port C (see
Figure B-19
).
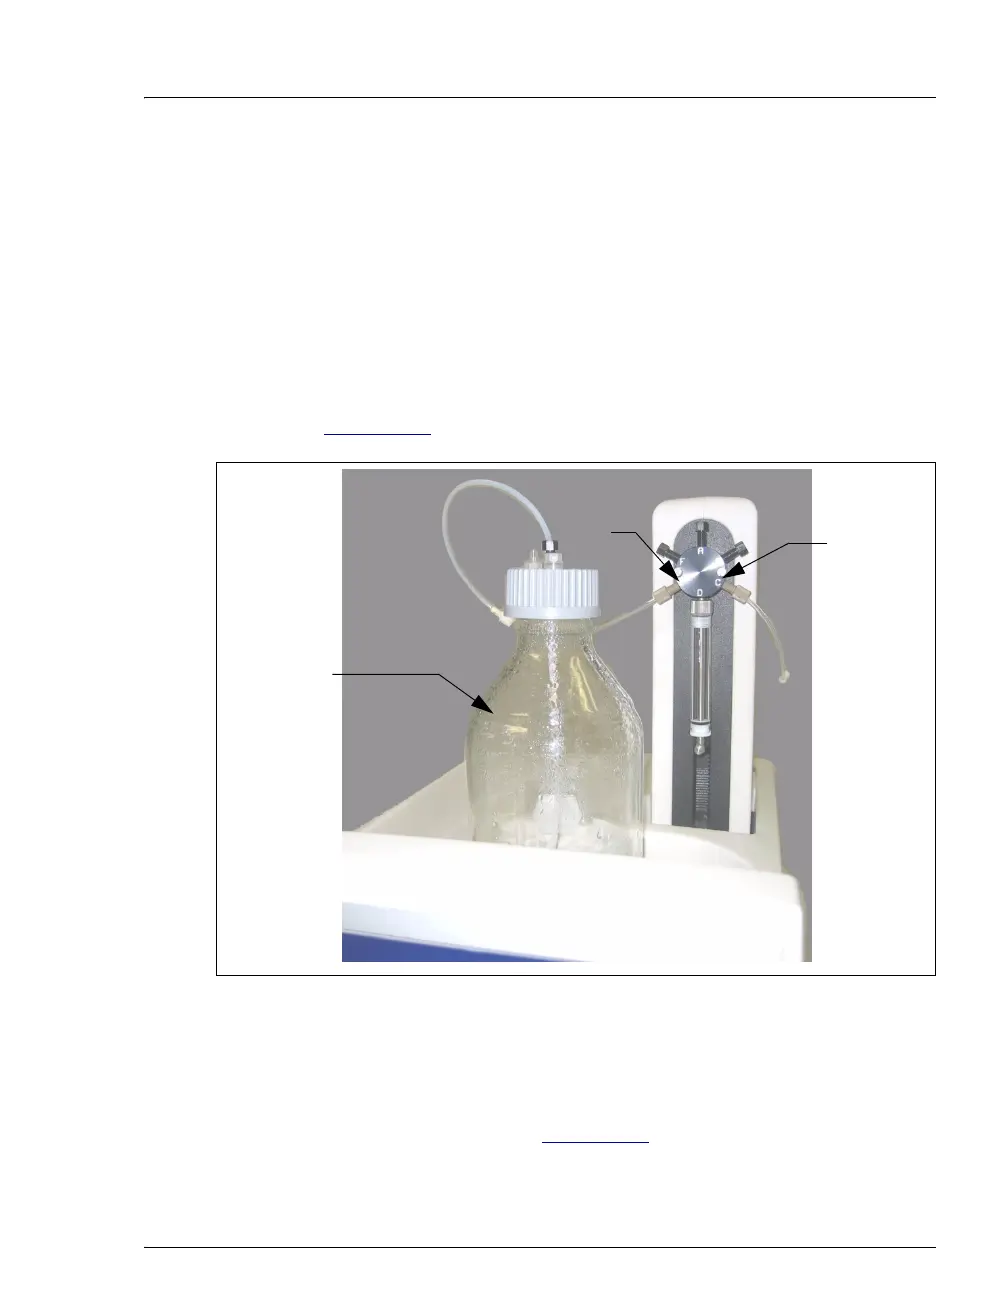
Figure B-19. Syringe Connections
4. Fill the flush reservoir (P/N 057408) with flush fluid (normally
deionized water) and place it in the organizer.
5. Connect the line that extends from the flush reservoir cap to the line
connected to port E (see Figure B-19
).
Flush
Reservoir
Sample Syringe
Port C
Port E