z DUPRINTER Installation Instructions
chap.5
254
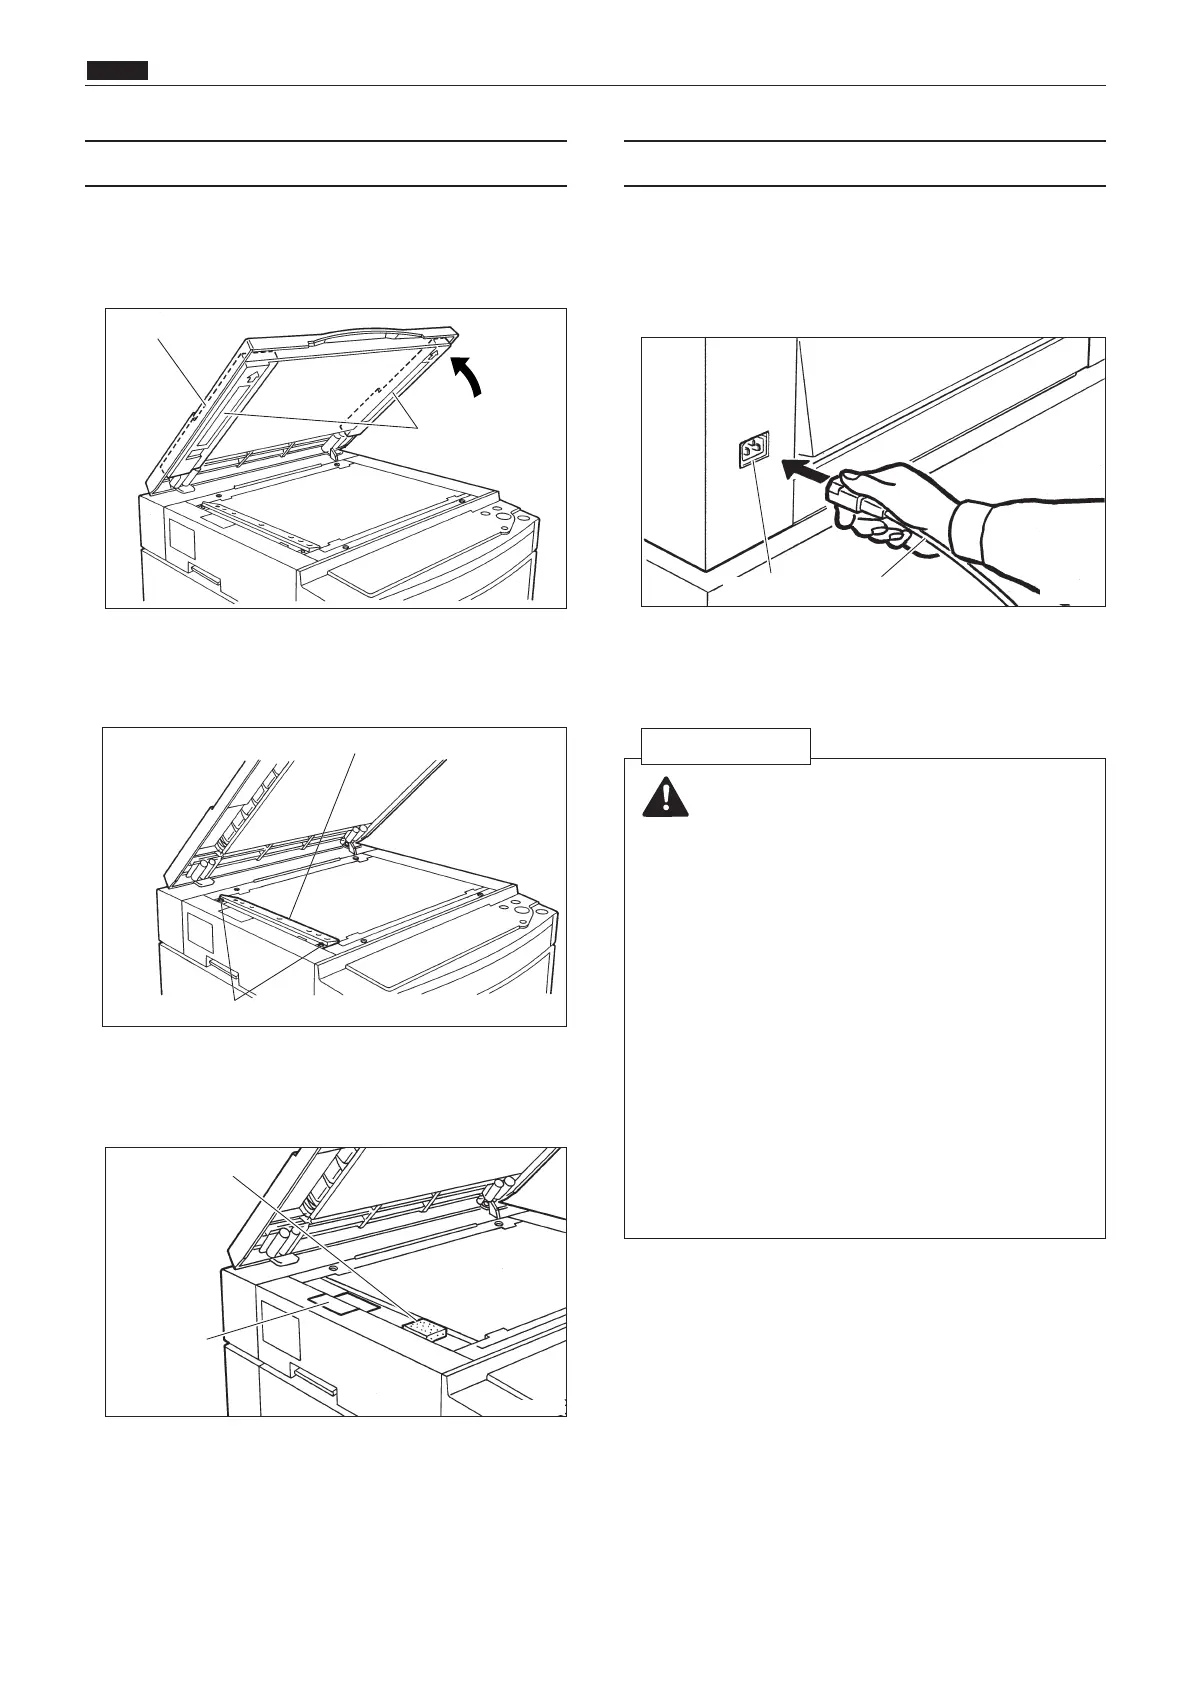
(3) Removal of Fixing Tape
r Remove all the remaining fixing tape.
q Gently lift up the original cover, and remove
shock-absorbent material on both sides of the
cover.
w Remove the 2 screws fastening the length scale,
and remove the length scale from the scanning
unit.
e Remove the sponge and fixing tape protecting
the optical components, and reattach the length
scale.
Screws
Shock-absorbent
material
Original cover
Length scale
Sponge
Fixing tape
63S0504
q Make sure that the power switch is OFF.
w Insert the plug on one end of the power cord (one
of the accessories) into the DUPRINTER's power
inlet.
e Insert the plug on the other end of the power
cord into the power outlet.
Power cordPower inlet
WARNING
¡Connect the DUPRINTER to an outlet providing a
60Hz, 15A power supply of at least 120V.
¡Insert the power cord's plug correctly into the
outlet, so that electrical connection is effected
completely.
¡Position the DUPRINTER close to the power outlet.
Do not connect multiple loads to a single outlet.
If use of an extension cord is necessary:
Extension cord should be of at least 130V, 15A
specification, conform to standard, and not
exceed 5m in length.
¡The power cord should never be stepped on, or
crushed between objects. If it is, accidents could
result.
120V AC model
63S0505
(4) Power switch ON