6/9
3. Mode
36080
36080
Printer Mechanical Adjustment
9. Attach the pressure guide to the exposure advance unit.
10. Check the pressure of the pressure rollers at the exit and inlet sides in the exposure advance unit.
See ☞ Checking (pressure roller at the exit side).
See
☞Checking (pressure roller at the inlet side).
11. Make a test print again by selecting Exposure Advance Pressure Inlet Roller Test Print (Paper
Magazine A, A2, B or C) in F:Functions.
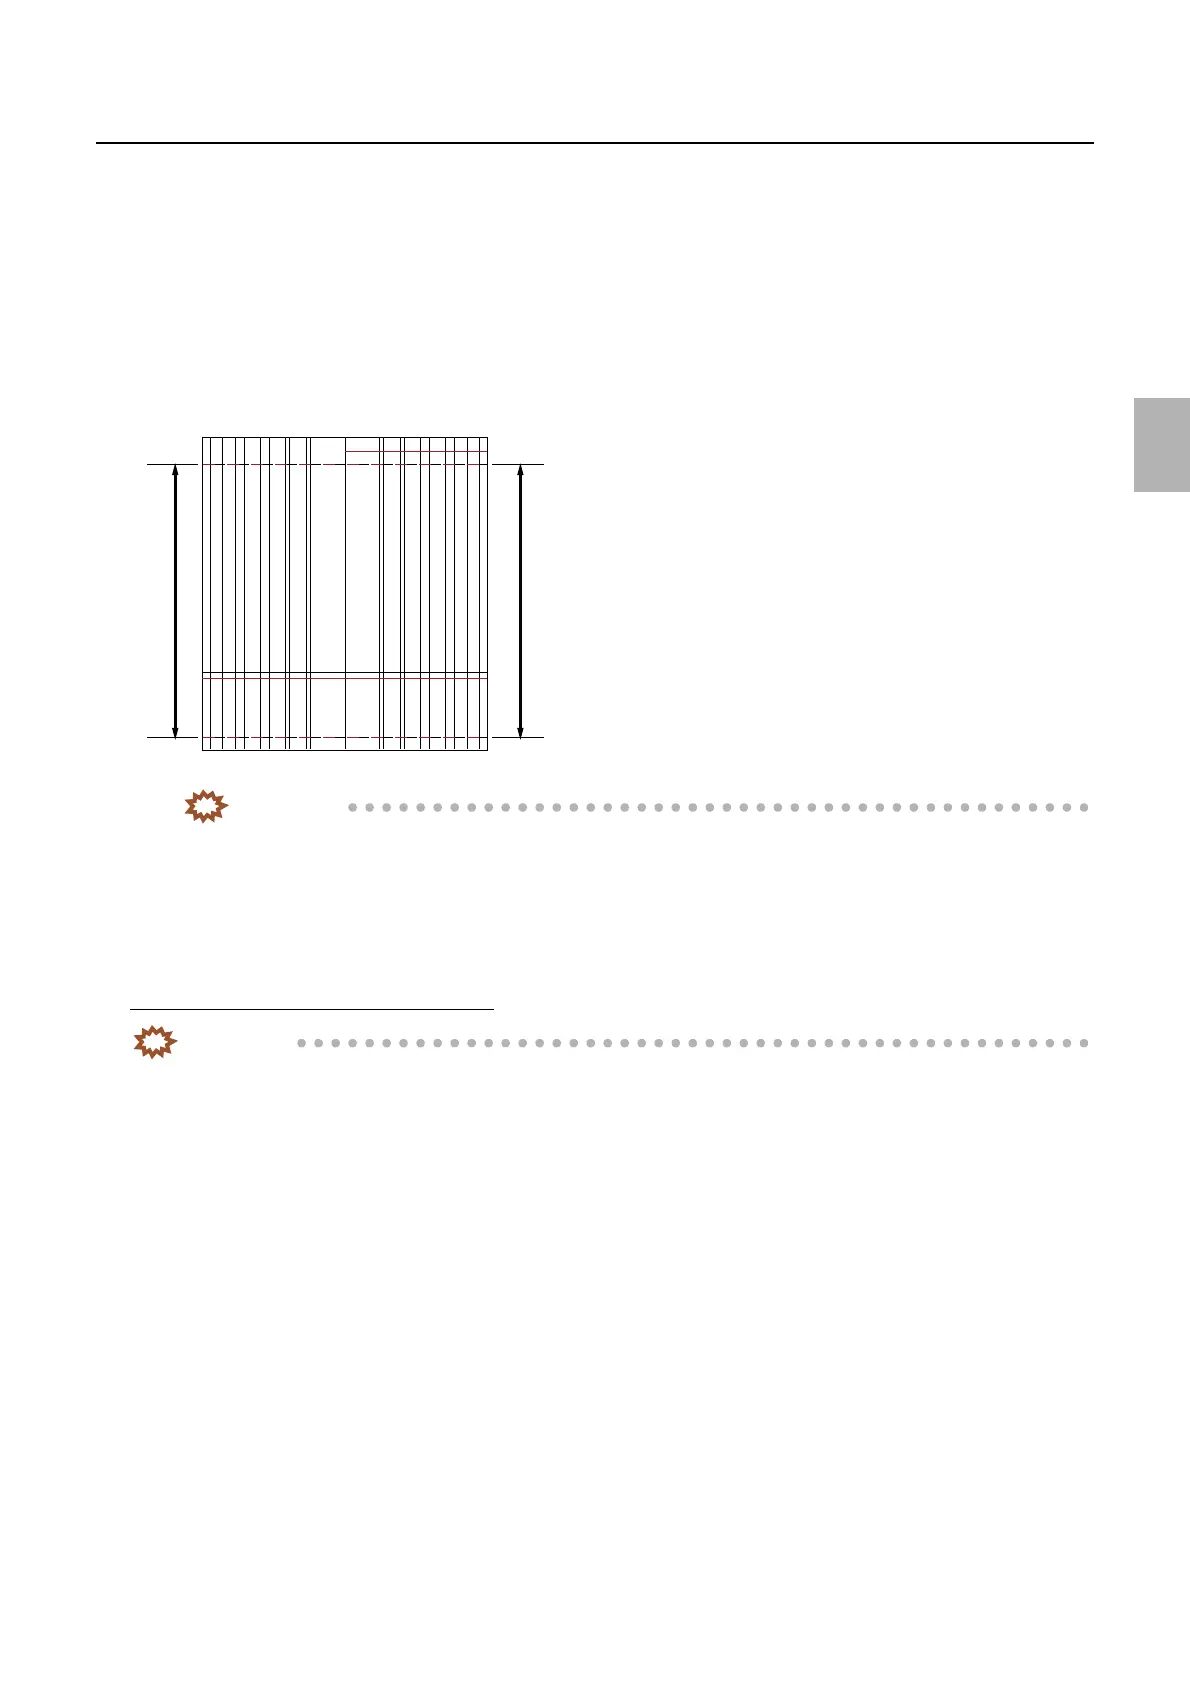
12. Measure the lengths between 0 mm-line and 254 mm-line of right and left edges of the test print and
check that the difference is within 0.2 mm.
IMPORTANT
• If the difference between the right and left measured values is ±0.2 mm or more, readjust from ☞6 of
Exposure Advance Unit Zigzagging Adjustment.
13. Adjust the exposure advance unit exit roller following the same procedure.
14. Check the Arm Unit 1 Zigzagging Correction.
☞36060
Checking (pressure roller at the exit side)
IMPORTANT
• When adjusting the pressure roller at the exit side in the exposure advance unit, check the followings since the
banding may be found at the area 32 mm from the paper leading end.
1. Turn the cam in the exposure advance unit to release the pressure of the pressure roller at the exit side
and set the paper.
A
Left Right
Rear end
Paper advance direction
G068467
Distributed by: minilablaser.com