FUSELAGE AND VERTICAL TAIL / FUSELAGE AND VERTICAL TAIL GENERAL MAINTENANCE 11-5
CHANGE C1 ICON A5 / MAINTENANCE MANUAL
Aircraft System and Number
08—Fuselage and Vertical Tail
Consumables
None
1. Remove the left and right instrument panel top panels. (See “Left Instrument Panel Top Panel
Removal” on page 8-19.)(See “Right Instrument Panel Top Panel Removal” on page 8-17.)
2. Move the canopy hinge weldment into the canopy-raised position.
3. Support and locate the canopy into position so that the attachment holes in the weldment line up
with the bolt holes in the canopy frame.
4. Use a 7/16 wrench to loosely install the eight AN4C6A bolts and 9150A029 washers that secure
the ICA005811 canopy hinge weldment to the canopy frame. Coat the bolts with Tef-Gel
®
prior
to installation.
5. Tighten the bolts just enough that the canopy can be moved on the frame with some effort.
6. Have a helper with a 7/16 wrench get in the cockpit and close and latch the canopy.
7. Press inward on the canopy frame to align it. If moved too far, have the helper press outward on
the canopy frame as needed. Working in this fashion, align the canopy flush with the surrounding
fuselage surfaces.
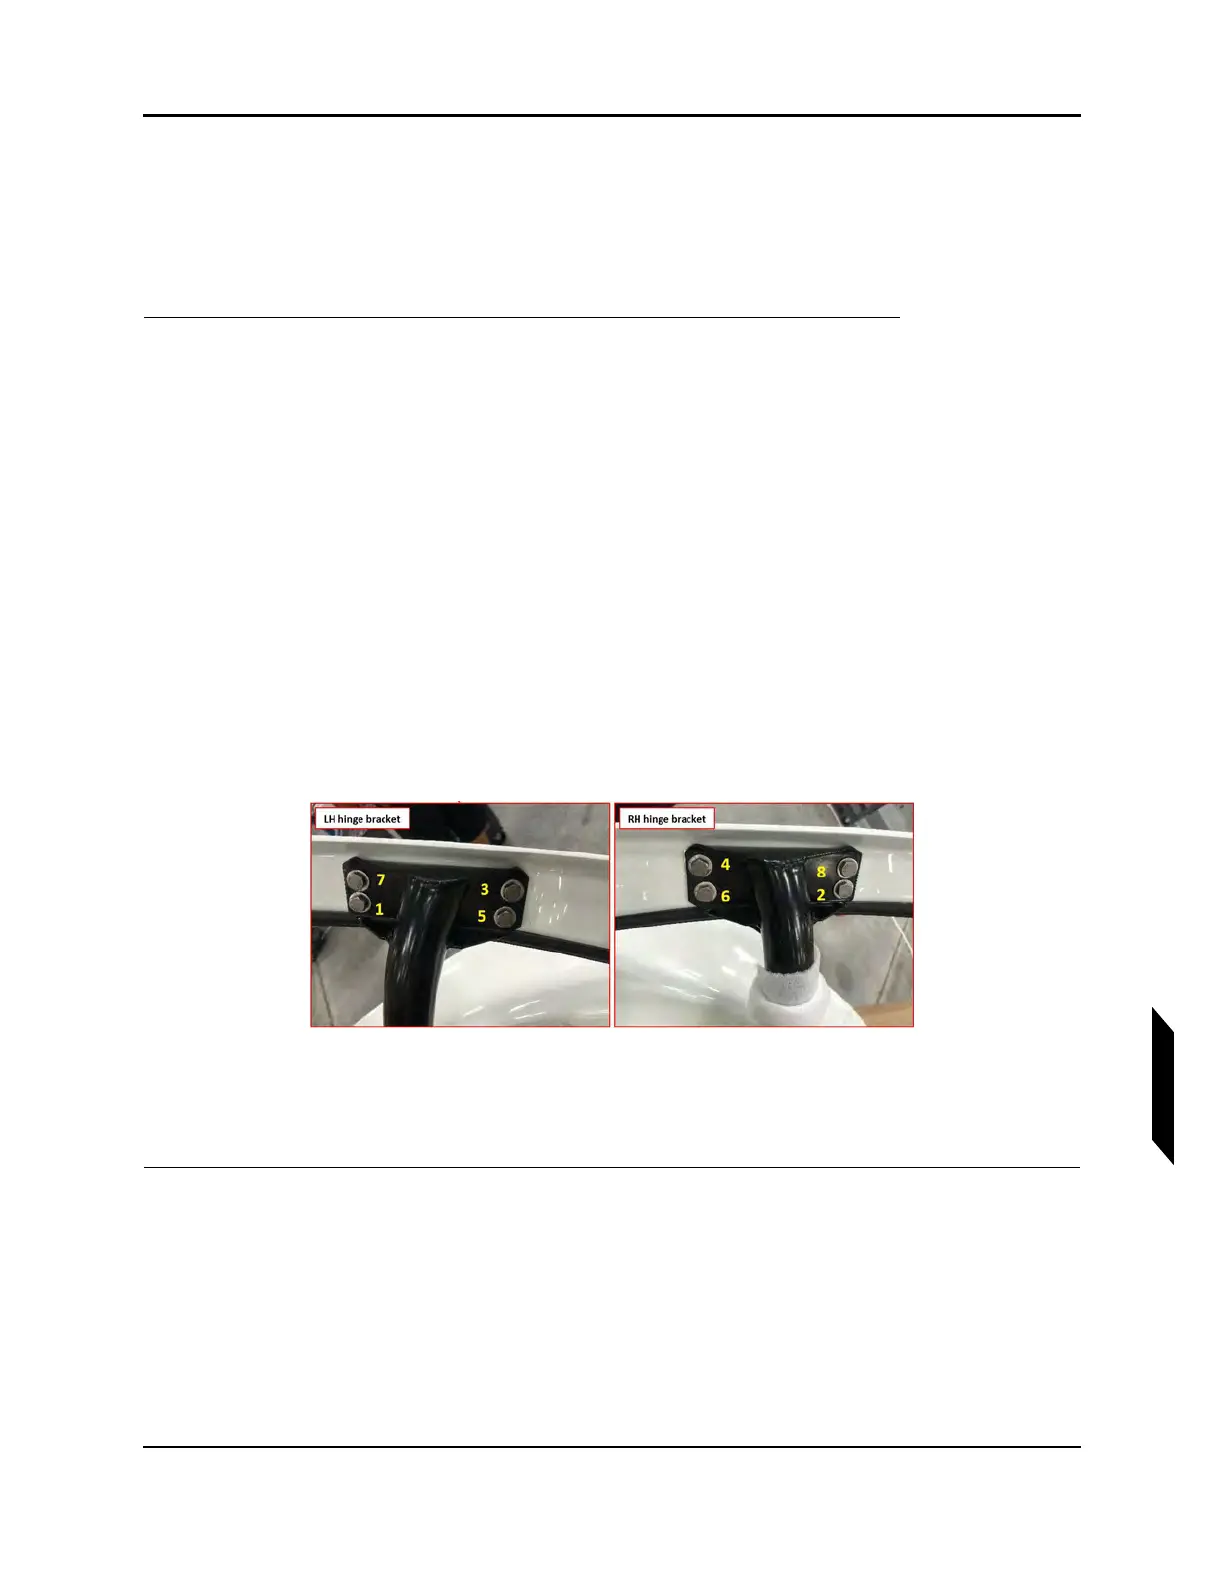
8. Have a helper torque all eight attachment bolts to 42 in-lb
f
using the sequence shown in Figure
11-2.
FIGURE 11-2
TORQUE ATTACHMENT BOLTS
9. Install left and right instrument panel top panels. (See “Left Instrument Panel Top Panel Installa-
tion” on page 8-21.)(See “Right Instrument Panel Top Panel Installation” on page 8-18.)
VERIFICATION METHOD:
Open and close the canopy several times, ensuring correct operation and fitment.