Remote RMX-3200 Version 5.2x Configuration Guide
Configuring Modules: Configuring Modules Using Web Interface
24-18
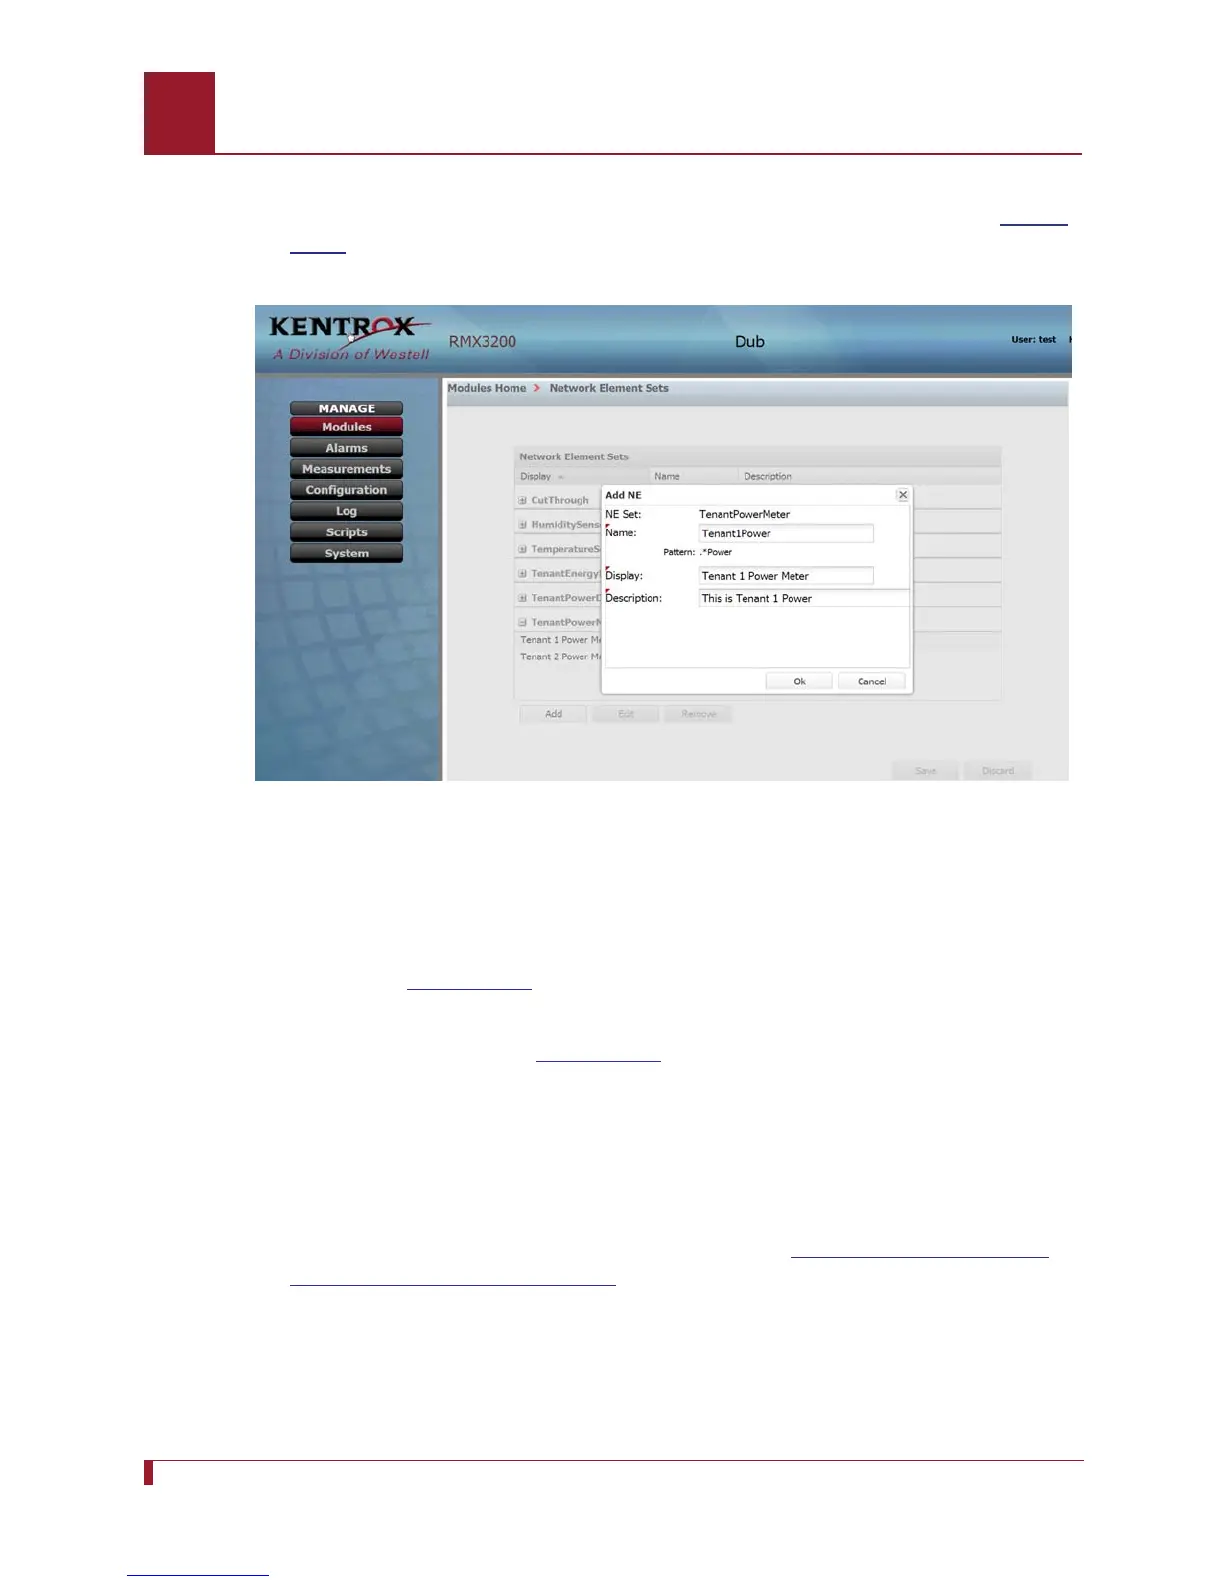
2. Expand TenantPowerMeter and click the Add button below the display column.
The box “Add NE” will appear.Type Tenant1Power in the Name box. See
Figure
24-10.
Figure 24-10 The Add NE window prompts the user for a name, display, and
description of the NE being added.
Note: The name must conform to the pattern specified below the name box.
When this is shown as *Power, the name must end with the word “Power.”
See
Figure 24-10.
3. Type “Tenant 1 Power Meter” in the Display box and “This is Tenant 1 Power” in
the Description box. See
Figure 24-10. Click Ok.
4. Click Add. The Add NE box will appear.
5. Type “Tenant2Power” in the name box, “Tenant 2 Power Meter” in the Display
box, and “This is Tenant 2 Power” in the Description box. Click Ok.
6. Click Save.
7. Realize the added NEs using the steps specified in
Realizing and Configuring
Network Elements on page 24-14.