Registering Destinations (Recipients) for Network Scanning
3
IC-402 3-6
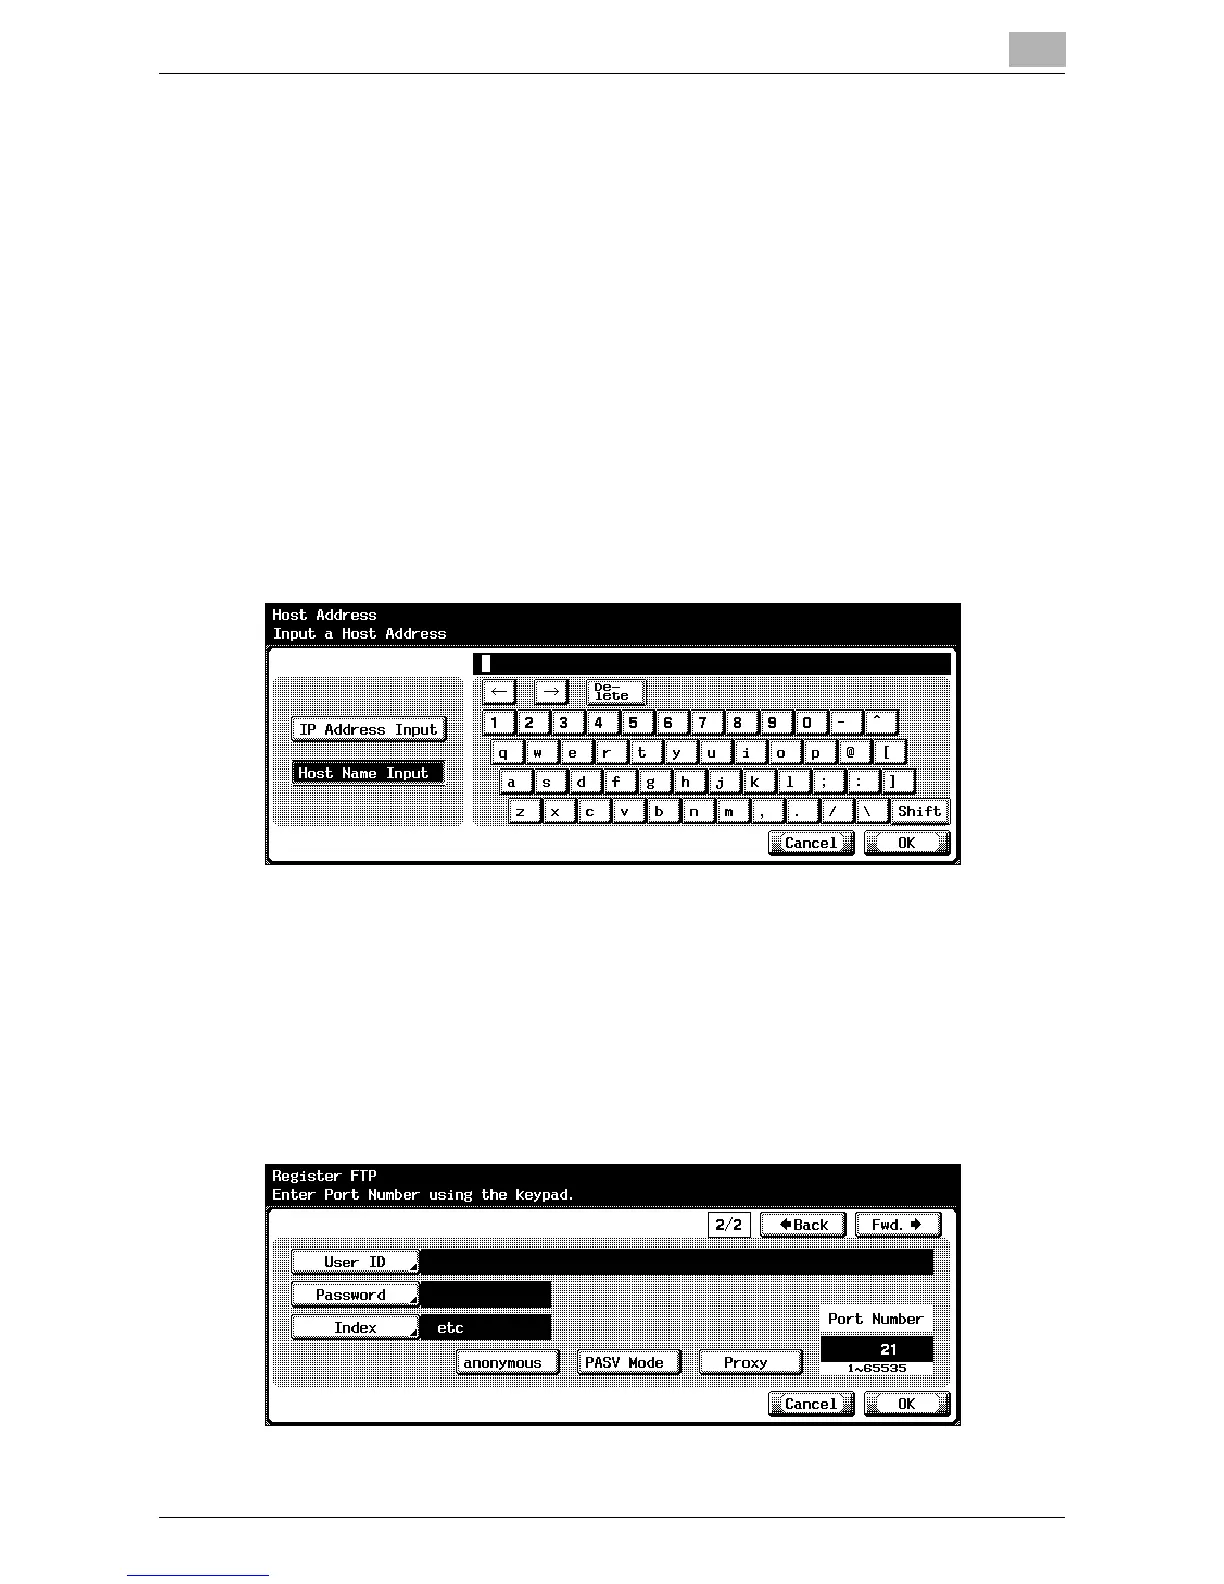
– To enter the IP address, touch [IP Address Input], and then enter
the value. If the value was incorrectly entered, press the [C] (clear)
key to erase the value, and then use the keypad to type in the cor-
rect value. To change an entered value, touch [←] and [→] to move
the cursor to the desired position, and then type in the desired val-
ue.
– If [IP Address Input] is touched after entering the host name, the
host name is cleared.
– If the IP address is entered first, then [Host Name Input] is touched,
the IP address that was entered is displayed in the text box.
– In order to specify an FTP destination as a host name, the DNS set-
ting must have been specified in the image controller’s setup
screen. In the setup screen for the image controller, select [Network
Setup] – [Protocol Setup] – [TCP/IP Setup] – [DNS Setup] to specify
the setting. For details on displaying the image controller’s setup
screen, refer to “Displaying the Setup Screen” on page 5-4.
7 Touch [OK].
8 Touch [File Path] and type in the file path using the keyboard that ap-
pears on the screen.
9 Touch [OK].
10 Touch [←Back] or [Fwd.→].