2-8 Service Manual
5026
3x through 8x attendance messages
31 Defective or Missing
<color> Cartridge
• Reseat the specified toner cartridge.
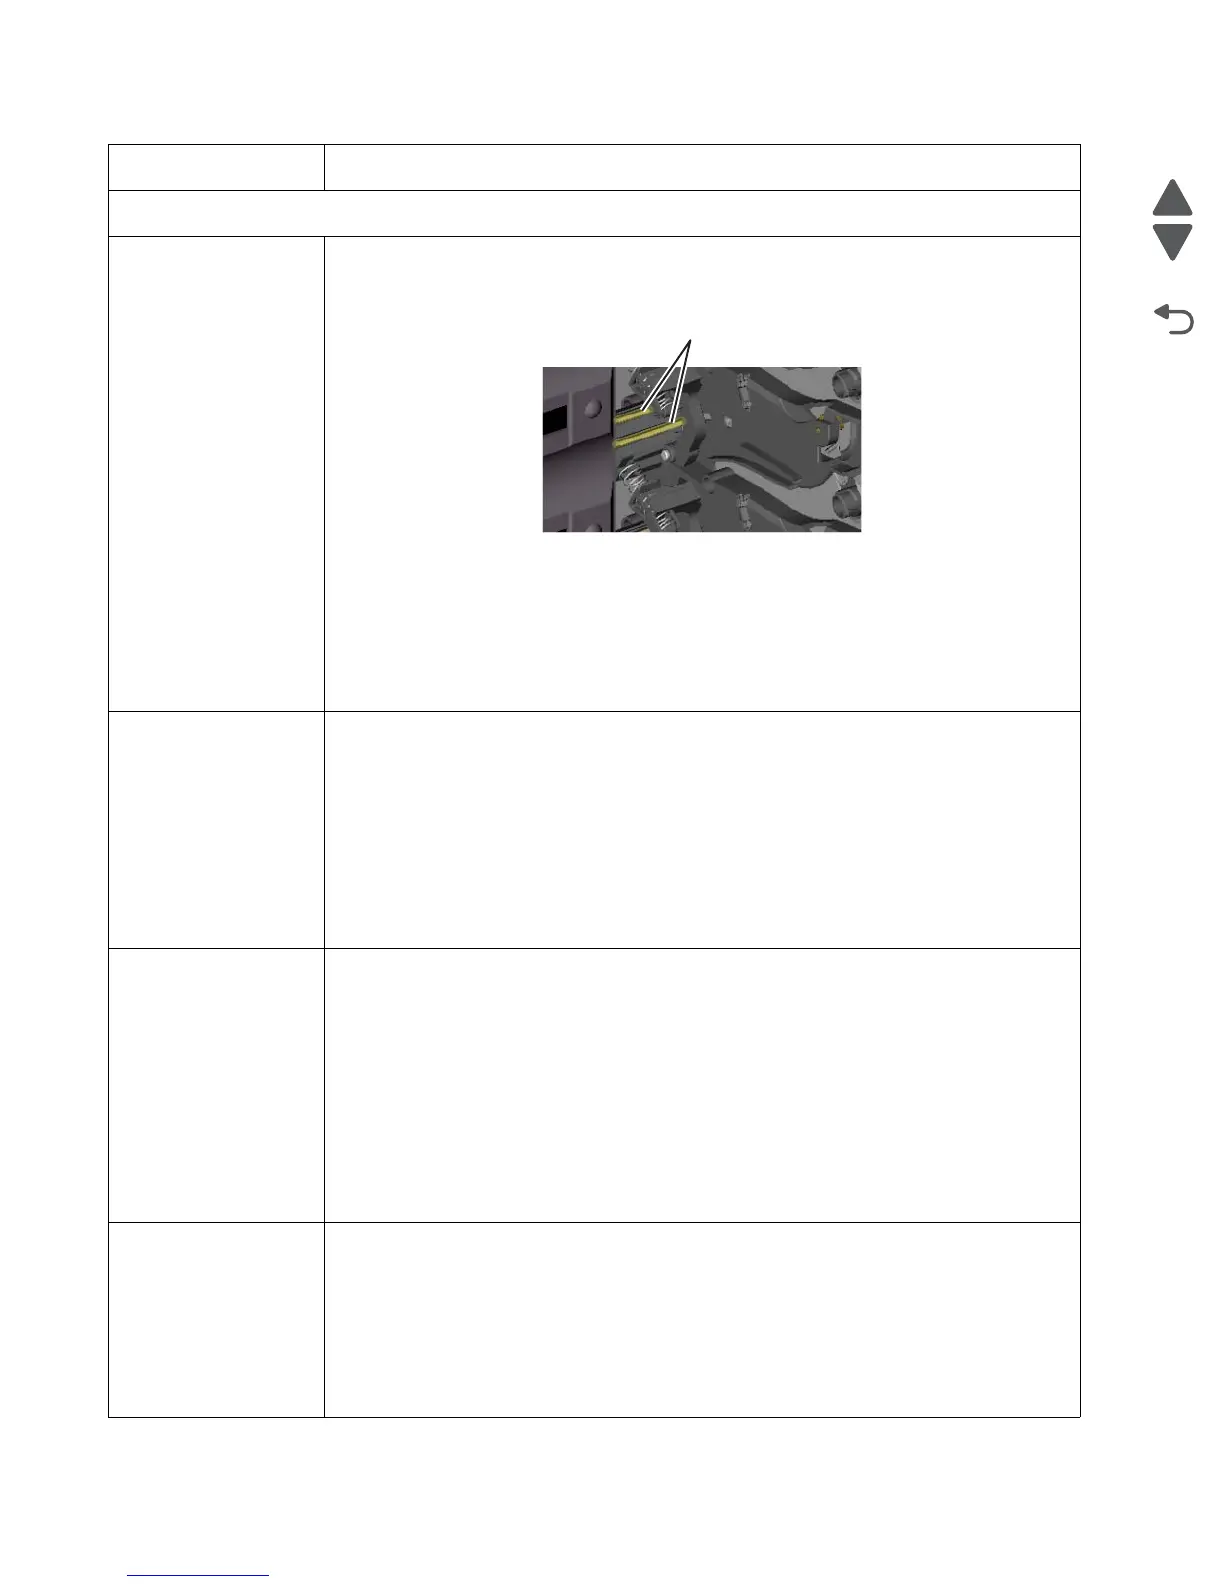
• Inspect the smart chip card contacts (A) for damage, contamination or positioning error. If
damaged, contact your next level of service.
• Inspect the toner cartridge contacts for damage/contamination. Replace the toner
cartridge if defective.
• Inspect the JSBTN1 cable connection. Properly connect the cable if not connected
properly. Replace the cable if damaged.
• Replace the indicated cartridge.
• If the problem still exists, replace the system board. See “System board removal” on
page 4-153.
32 Unsupported
Cartridge
• Check to see if the toner cartridge is a supported cartridge.
Note: Once the cartridge shipped with the printer is exhausted, it must be replaced by a
supply cartridge (refer to the User’s Guide for part numbers.)
If the specified toner cartridge is a supported cartridge, reseat the cartridge.
• Inspect the toner cartridge contacts for damage or contamination. Replace the toner
cartridge if defective.
• Inspect JSBTN1 cable connection. Properly connect the cable if not connected properly.
Replace the cable if damaged.
• If the problem still exists, replace the system board. See “System board removal” on
page 4-153.
34 Short Paper • Select Continue to clear the message and continue printing.
Note: The printer does not automatically reprint the page that prompted the message.
• Check the tray length and width guides to ensure the media is properly fitted.
• Make sure the print job is requesting the correct size of media.
• Adjust the Paper Size setting for the media size being used.
• If the MP Feeder Size is set to Universal, make sure the media is large enough for the
formatted data.
• Cancel the current job. Replace the paper pick mechanism. See “Paper pick
mechanism assembly removal” on page 4-127.
• If the problem still exists, replace the system board. See “System board removal” on
page 4-153.
35 Insufficient memory
to support Resource
Save feature
• Select Continue to disable Resource Save and continue printing.
• To enable Resource Save after receiving this message:
- Make sure the link buffers are set to Auto, then exit the menus to activate the link
buffer changes.
- When Ready is displayed, enable Resource Save.
• Install additional memory.
• If this does not fix the problem, replace the system board. See “System board removal”
on page 4-153.
Error code Action