Issue 2.2
Feature Description and Operation Manual
57
1. Press the [TRANS/PGM] button.
2. Dial 5 2.
3. Enter the message using the character chart below, up to 24 characters.
4. Press the [HOLD/SAVE] button and confirmation tone should be heard.
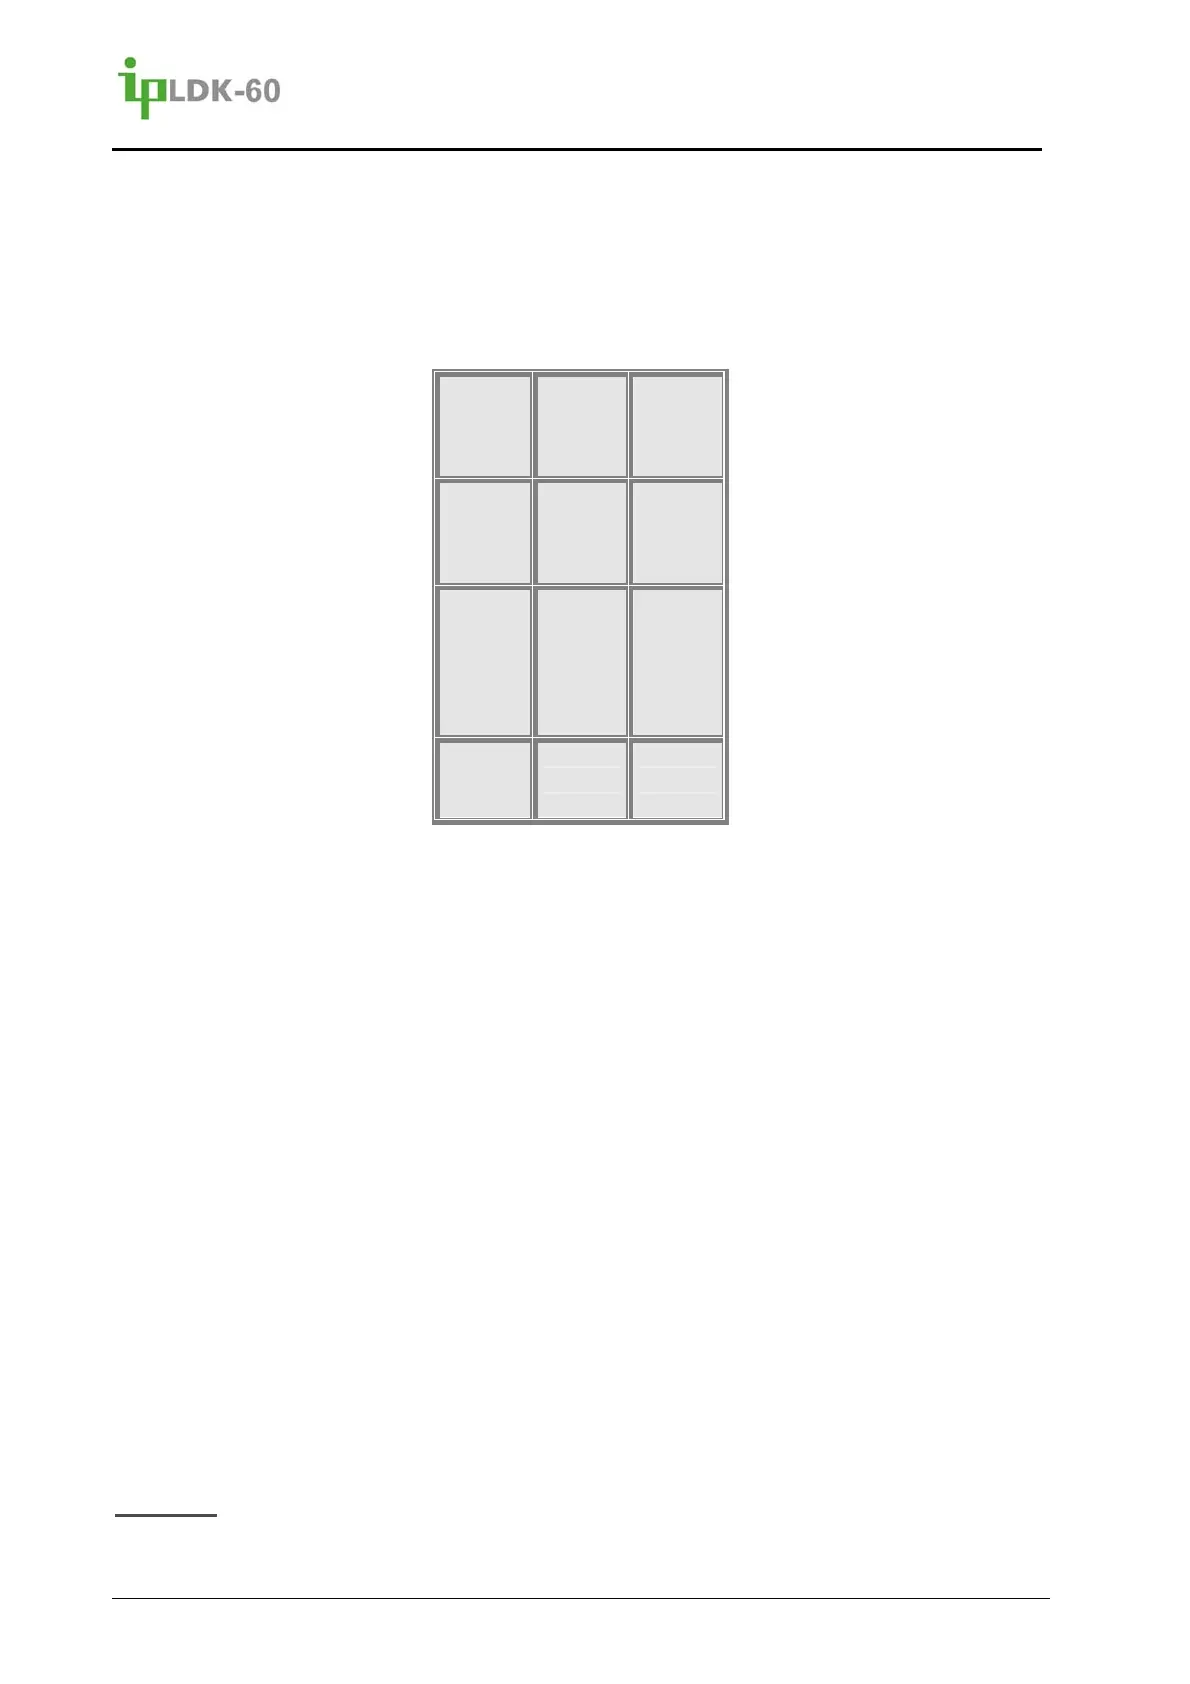
Digit Map Chart
Q – 11
Z – 12
. – 13
1 – 10
A - 21
B - 22
C - 23
2 - 20
D - 31
E - 32
F - 33
3 - 30
G – 41
H - 42
I - 43
4 – 40
J - 51
K - 52
L - 53
5 - 50
M - 61
N - 62
O - 63
6 - 60
P - 71
Q - 72
R - 73
S - 74
7 – 70
T - 81
U - 82
V - 83
8 - 80
W - 91
X - 92
Y - 93
Z - 94
9 - 90
*1 - Blank
*2 - :
*3 - ,
0-00
To program Custom Messages 11 - 20 from the System Attendant,
1. Press the [TRANS/PGM] button.
2. Dial 0 5 3 and the message number (11-20).
3. Enter the message; refer to the Digit Map above, up to 24 characters.
4. Press the [HOLD/SAVE] button and confirmation tone is heard.
To activate LCD Messages,
1. Press the [TRANS/PGM] button.
2. Dial 5 1.
3. Dial the 2-digit message code 00 - 20.
4. Press the [HOLD/SAVE] button.
To cancel LCD Messages,
1. Press the flashing [DND/FOR] button.
To cancel LCD Messages (Custom/Pre-selected) from the System Attendant,
1. Press the [TRANS/PGM] button.
2. Dial 0 5 2.
3. Dial the desired station range.
4. Press the [HOLD/SAVE] button.
Reference
Attendant Positions