OILDYNE TRIM PUMP
SERVICE MANUAL NUMBER 28
90-863160 MAY 2000 Page 5A-55
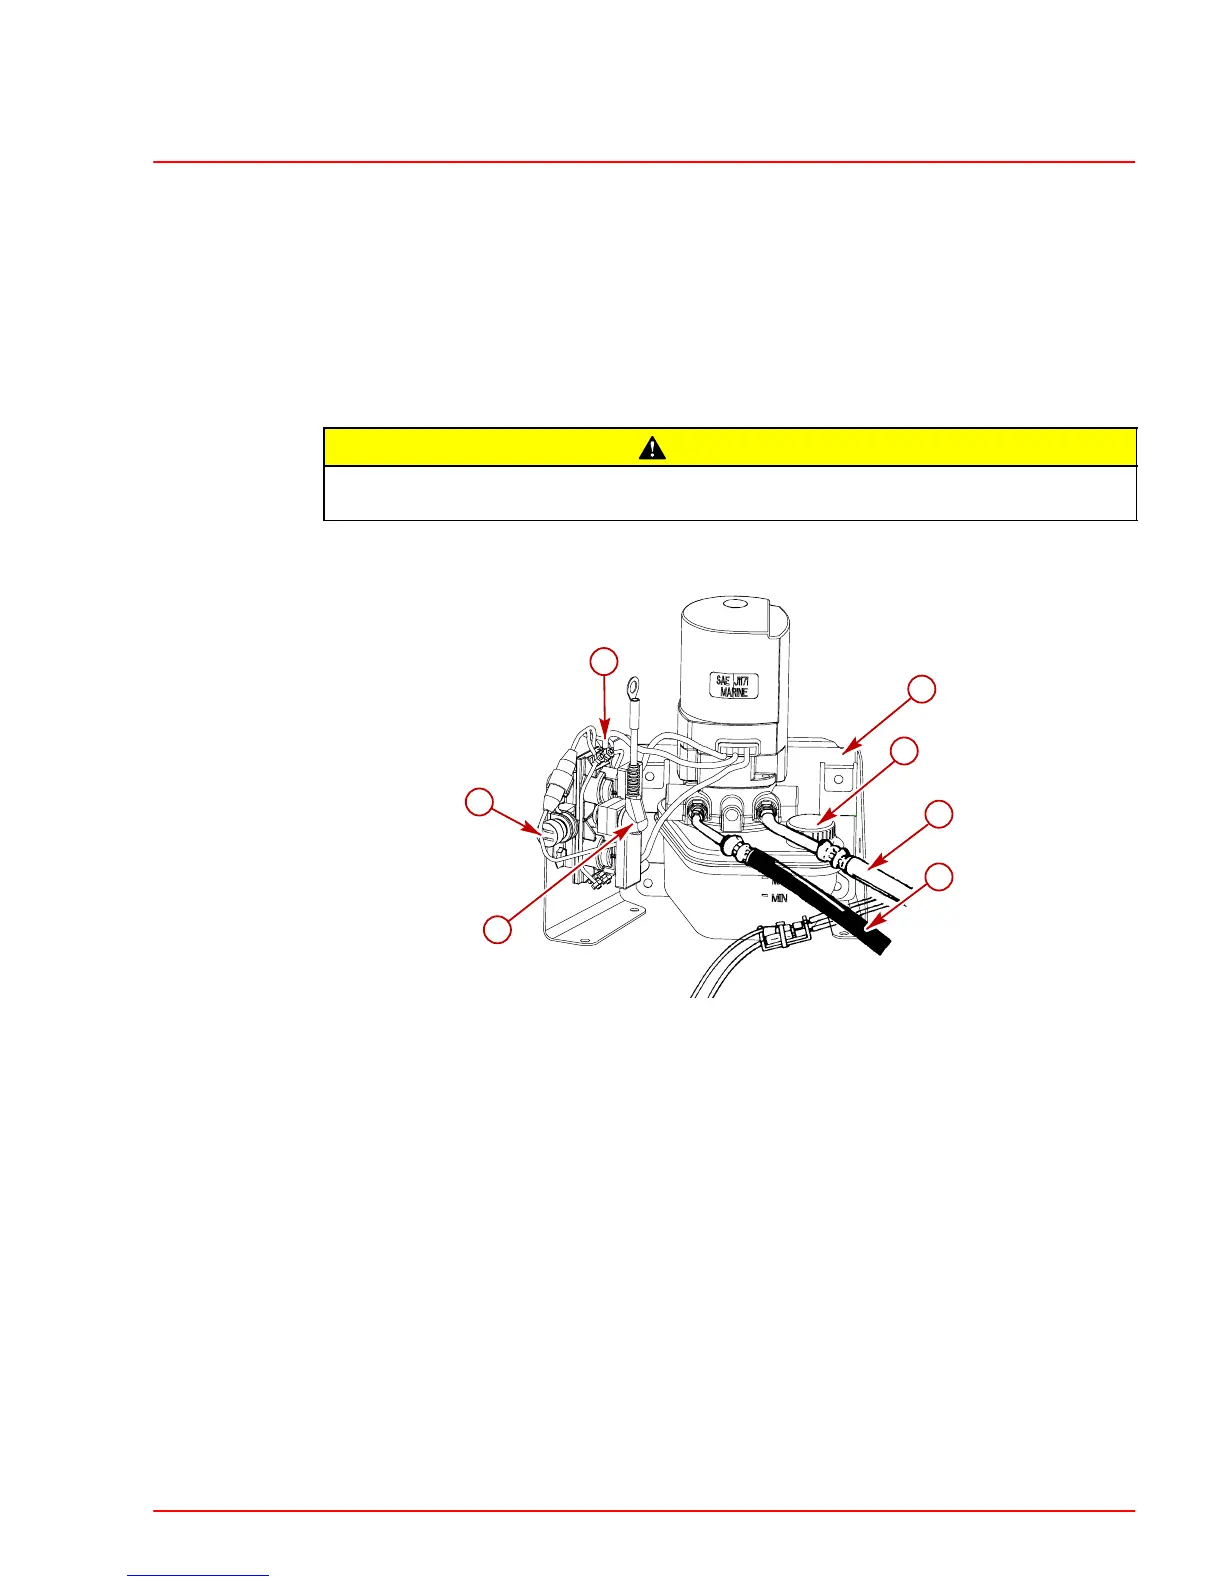
Trim Pump Installation
1. Secure the pump and mounting bracket to the boat using lag bolts and washers.
2. Reconnect the trim hoses to the pump; black hose to the left connection, gray hose to
the right connection. DO NOT cross-thread or overtighten the hose fittings. Torque the
fittings to 110 lb-in. (12 Nm).
3. Reconnect the trim harness connector to the trim pump.
4. Reconnect trim pump leads to power source.
CAUTION
Fill cap is vented. Be sure to remove “Caplug” (fill neck seal) from fill neck on new
replacement pumps. Failure to do this can damage pump, when operated.
5. Check the fluid level and fill if necessary. (Refer to “Maintaining Power Trim Pump Oil
Level” in this section).
a
b
c
d
e
f
g
a-Positive Battery Lead
b-Negative Battery Lead
c-Harness Connector
d-Black Hydraulic Hose (UP Hose)
e-Gray Hydraulic Hose (DOWN Hose)
f-Vented Fill Cap
g-Dual Mount Trim Pump Bracket
 Loading...