133
Settin
Checkers
Cha
ter 6
6.11.3 Setting Procedure
1. Proceed up to “Configure the setting for preprocessing” at the third step following section 6.2.
2. Select “Area”.
The menu names and basic operations are the same as the ones described in the sections 4.4.3 and 0.,
but the ways of drawing an inspection area and of setting a mask area are different between flaw detection
checker and other checkers.
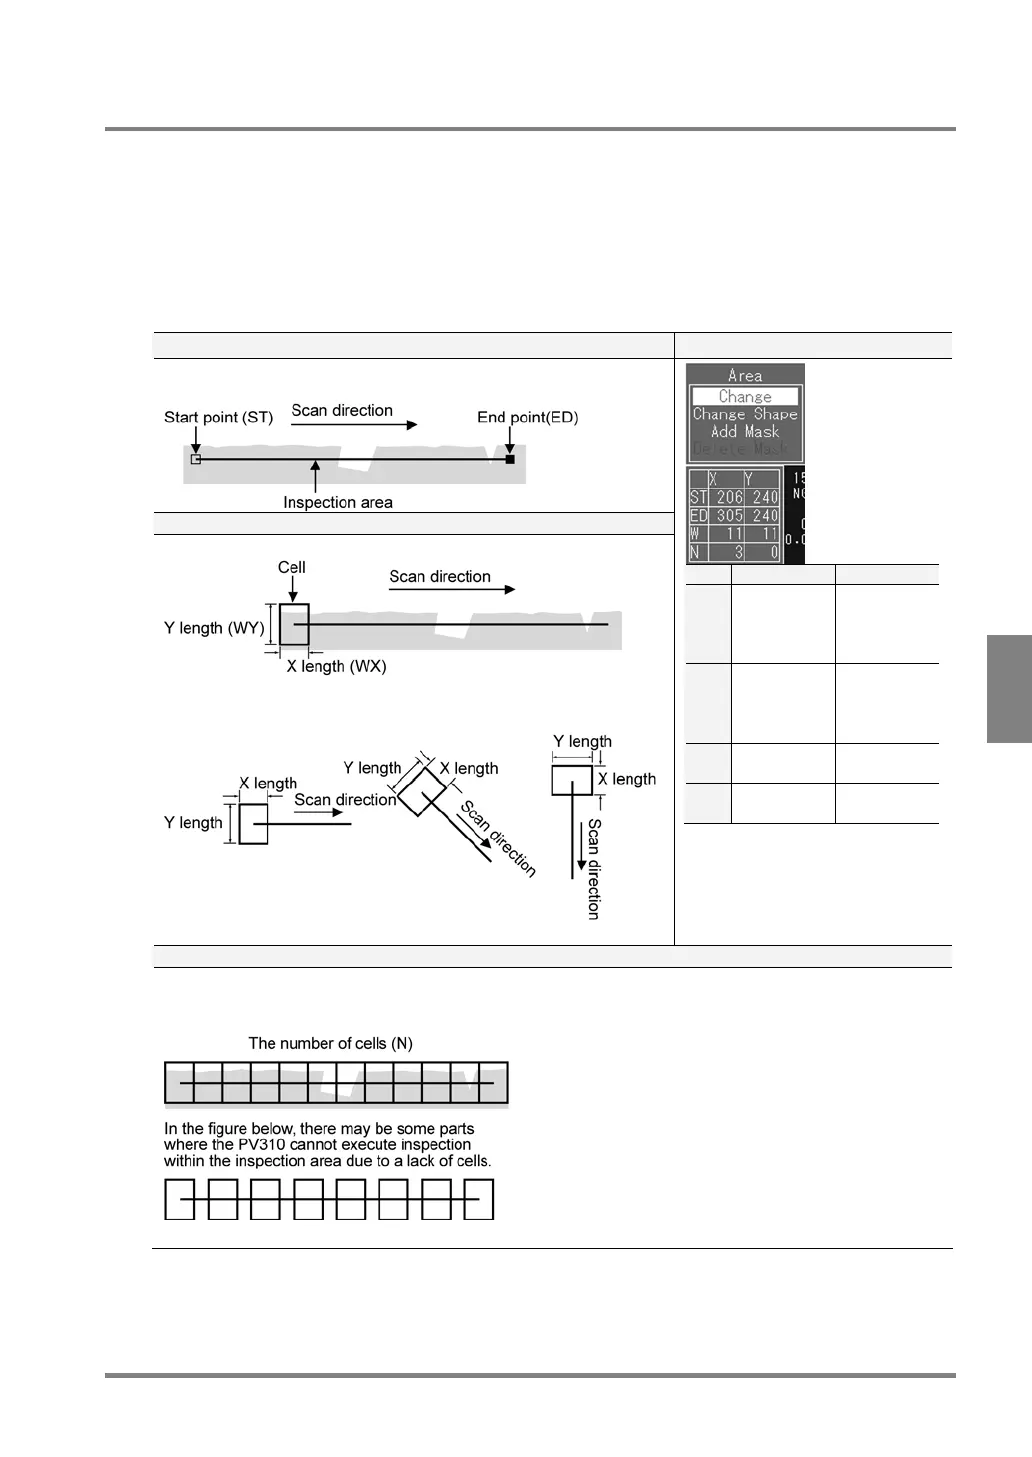
If Area Shape = “Line”
To set a start point (ST) and an end point (ED) Setting Dialog
Set start and end points. You can set an area in the vertical and oblique
directions as well as in the horizontal direction.
To set the size of a cell (WX, WY)
Set the size of a cell to calculate the average brightness of the cells.
The widths in X and Y directions of a cell are defined as the figures
shown below.
X Y
ST X
coordinate
of start
point
Y
coordinate
of start
point
ED X
coordinate
of end
point
Y
coordinate
of end
point
W Width of
cell X
Width of
cell Y
N Number of
cells
0 (fixed)
To set the number of cells
Set the number of cells aligned from start point to end point in an area properly as the figure shown below. If
the cells are fully or partly covered with other cells, the PV310 repeatedly scans the parts where the cells are
covered with other cells, resulting in increasing inspection time.
For the Area Size Adjustment function, the
number of cells in the inspection area does not
depend on its size. Therefore, specify enough
cells for executing inspection throughout even a
bigger area.