206
Cha
ter 8
TOOL
8.5.1 Selecting an Display Image
There are three types available for displaying images.
No. Settings Setting Item
1 To select a memory image to display
Memory 1 (C1), Memory 2 (C2), Memory 1+2
2 To select live image or memory image
(A live image is a current image. The image changes in real time. For
example, if you covered the lens surface with your hands, a blacken
image is captured.)
Display Camera Image
3 To select gray image or binary image (groups A through H) Display Gray Value/Binary
Only the last saved image can be also displayed when inspection is executed. Refer to page 229 for details.
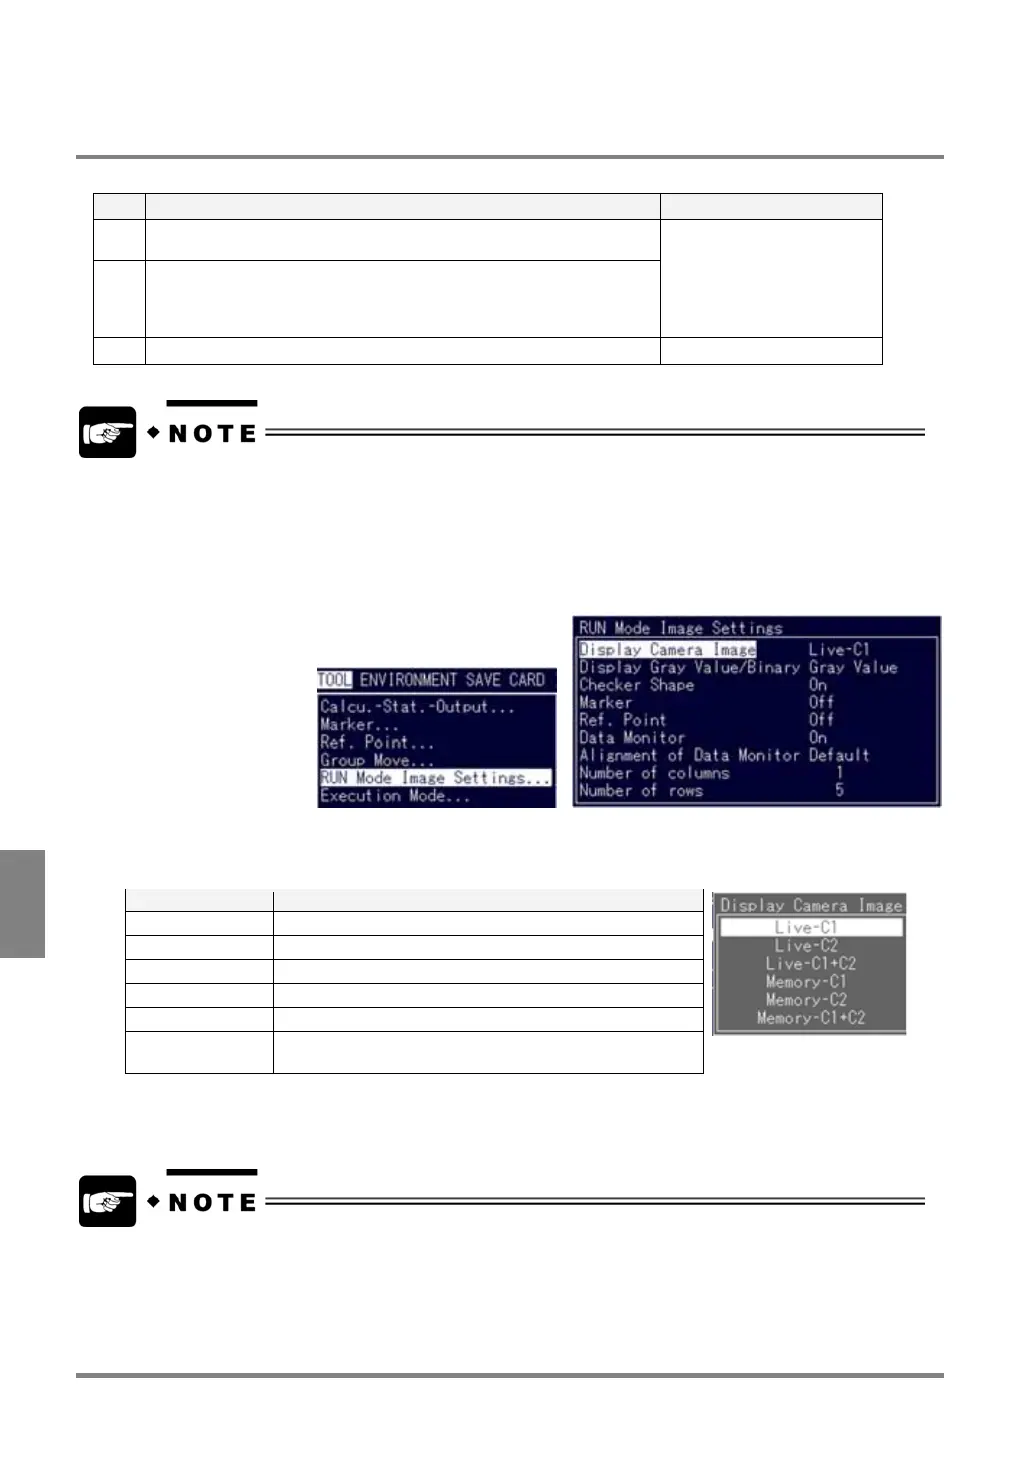
Switching the Display Camera Image
1. Select “TOOL” > “RUN Mode Image Settings”.
2. Select “Display Camera Image”.
The Display Camera Image menu is displayed.
Option Image to be displayed
Live
C1 Live ima
e of Camera 1
real-time ima
e
Live
C2 Live ima
e of Camera 2
real-time ima
e
Live-C1+C2 Live ima
e of Camera 1 and Camera 2
real-time ima
e
Memor
-C1 Memor
ima
e of Camera 1
still ima
e for ins
ection
Memor
-C2 Memor
ima
e of Camera 2
still ima
e for ins
ection
Memory-C1+C2 Camera 1 and Camera 2 (still image for inspection
execution)
3. Move the cursor to the image to be changed and press the ENTER key.
• When you display a live image, it takes longer time to capture an image. It is advisable to display the
memory image(s) of Memory 1 and/or Memory2 when you executing inspection.
• When inspection is executed using the image save function while the last saved image is displayed," select
Memory-C1 or Memory-C2.