72
Settin
Checkers
Cha
ter 6
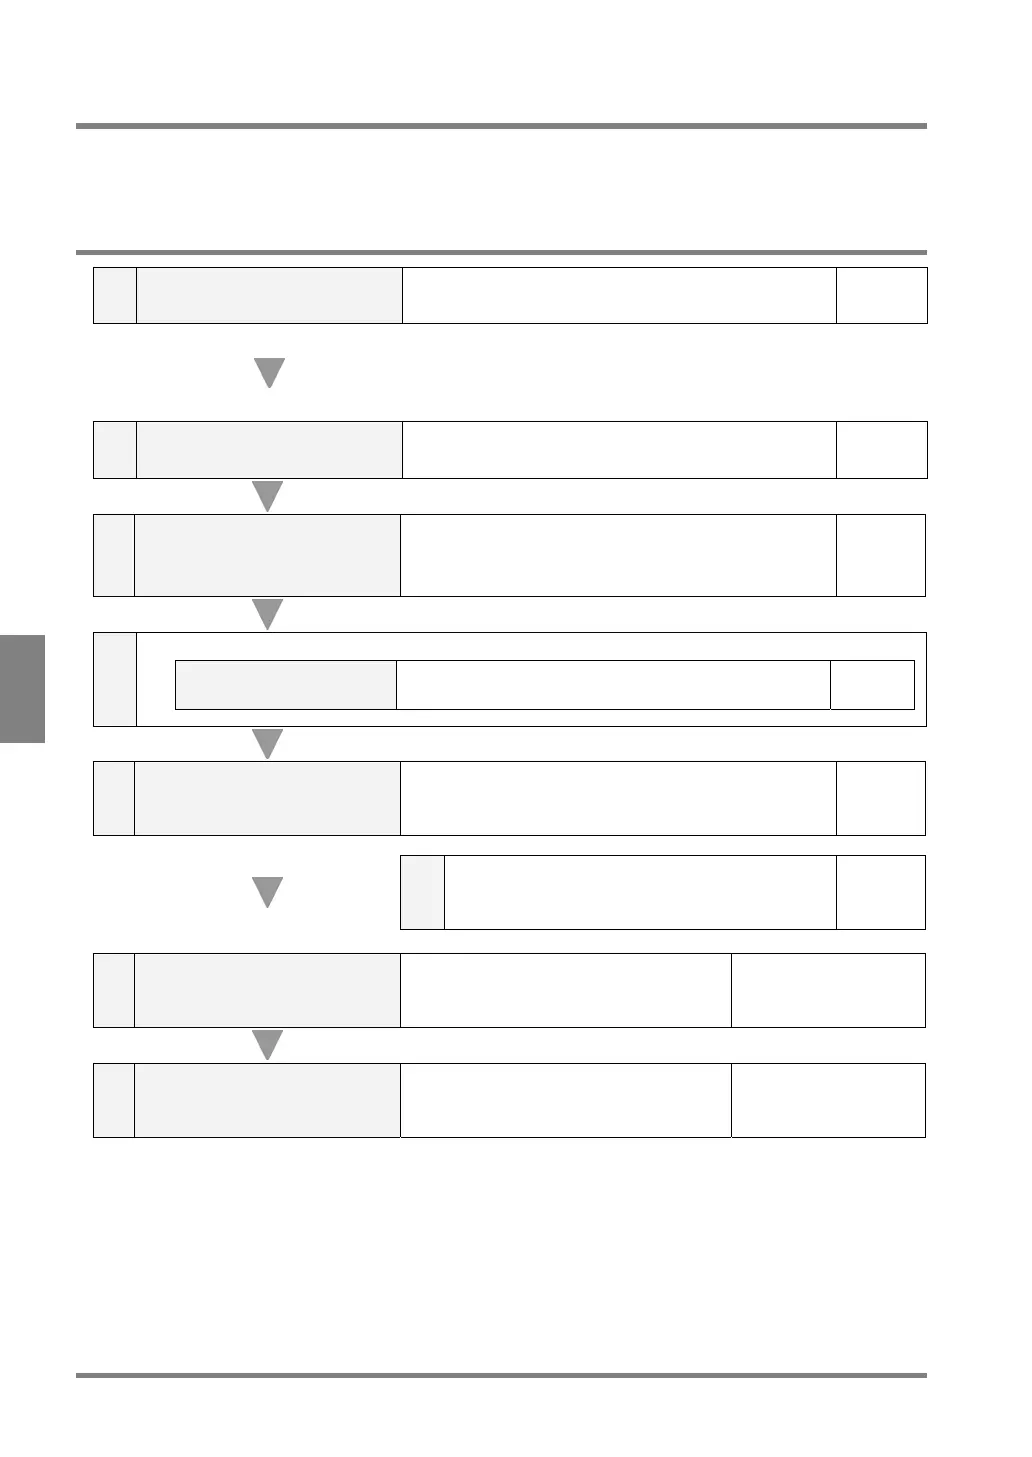
6.2 Basic Settings of Checkers
Since each checker executes inspection in different ways, some of the provided parameters differ depending on
the checker. In this section, a common setting procedure is described.
6.2.1 Basic Procedure for Setting Checkers
1
Select a checker number and
checker.
Specify a checker number from the checkers 1 to 99 and
select a checker.
Page 73
We recommend that you assign 11 or larger numbers to
the checkers used for inspection and the numbers 1 to 10
to the checkers for adjustment and automatic adjustment
of an inspection area.
2 Choose a camera image.
Select which camera image you want to use, Camera 1 or
Camera 2.
Page 75
3
Configure the setting for
preprocessing
Preprocess the captured image for easy execution of the
desired inspection. 13 types of preprocessing are available.
You can combine up to 5 preprocesses, and save up to 5
groups for each product type.
Page 76
4
When selecting binary window, binary edge or feature extraction,
Setting of a slice level
Select one of the preprocess groups A to H and set upper
and lower values of a slice level.
Page 80
5 Set an area
Set an inspection area or “Mask” area, where the PV310
does not inspect, according to the inspection area as
necessary.
Page 82
5-a
Configure the settings for the Area Size Adjustment
function, which can change an inspection area to fit
the object as necessary.
Page 85
6
Set the conditions for each
checker
Set the items provided to each checker.
Refer to the appropriate
pages for each checker.
7 Implement a test
Confirm whether or not inspection is
performed as expected.
Refer to the appropriate
pages for each checker.