293
Cha
ter 12
Ethernet Communication
12.2 Communication Methods
12.2.1 Communicating between one PV310 and one Computer
TCP/IP Settings and Connection
1. Check the IP address of the computer to communicate with the PV310.
2. Alter the IP address of the PV310.
Specify a value that allows the computer to communicate with the PV310 using IP address confirmed at the
previous step. Select “INFO” > “IP Address”. Refer to page 310 for more information.
3. Save the data that have been changed by selecting “SAVE” > “Save” from the menu bar.
4. When you changed the IP address that is allocated to the PV310 at the step 2, remove power from the
PV310.
5. Connect between the PV310 and the PC with a cross and category 5E Ethernet cable (available on the
market) and activate the PV310.
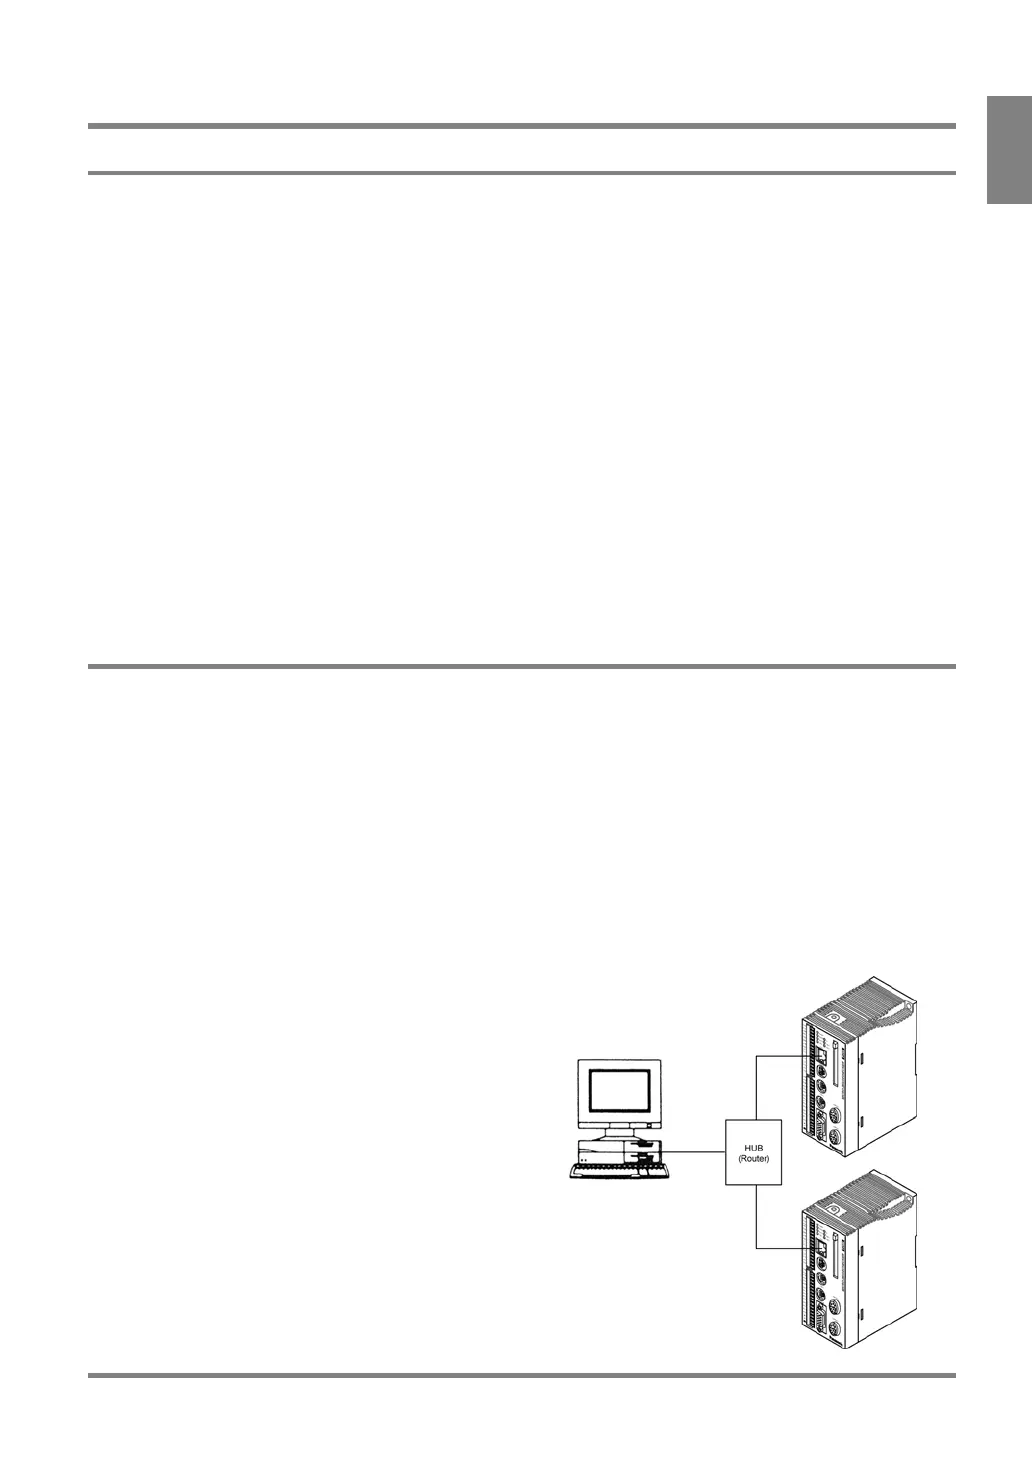
12.2.2 Communicating between a Computer and Multiple PV310s
TCP/IP Setting
Follow the same steps used for communicating between PV310 and a computer.
Assign different IP address to each computer and PV310.
Correct Example:
The first PV310: 192.168.1.254
The second PV310: 192.168.1.253
The computer: 192.168.1.100
Connection with Multiple PV310s
When communicating between a computer and
multiple PV310s, you need to use a hub or rooter for
100BASE-TX or 10BASE -T. Connect between the
PV310 and a hub/router, and between a hub/router and
the computer with a straight cable (category 5E).