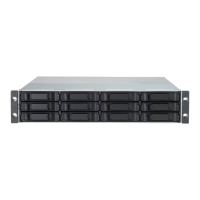
VessRAID 1000i Series Product Manual
228
Managing Spare Drives
Spare Drive Management on the LCD includes:
• Viewing Spare Drive Information (page 228)
• Creating a Spare Drive (page 228)
• Deleting a Spare Drive (page 229)
• Locating a Spare Drive (page 229)
For other spare drive functions, see “Managing Spare Drives” on page 133 or
“Managing Spare Drives” on page 169.
Viewing Spare Drive Information
To view spare drive information:
1. Press the or button until the display says Spare Drive Management.
2. Press the button and the display a list of spare drives by ID number.
3. Press the or button to scroll through the list of spare drives.
4. Press the button choose a spare drive.
5. Press the or button to scroll through the list of items:
• Spare Drive ID Number
• Physical Drive ID Number*
•Capacity
• Revertible – See “Transition” on page 273 for more information.
• Type – Global (all disk arrays) or Dedicated (to specified disk arrays)
•Status
* Press the button to view physical drive information from this point.
Spare Drive Status
• OK – The normal state of a spare drive.
• Offline – Not available for use as a spare. Requires corrective action. See
“Physical Drive Problems” on page 306.
Other status conditions involve functions not supported by the LCD panel.
Creating a Spare Drive
Only unconfigured physical drives can be used to make spares. The spare drive
must be the same type of drive, HDD or SSD, as the other drives in disk array.
To create a spare drive:
1. Press the or button until the display says Array Configure.

 Loading...