Chapter 7: Maintenance
241
4. Lay the RAID Controller on a non-static surface and remove the cover
attaching screws, one on each side, then remove the cover.
See page 239, Figure 3.
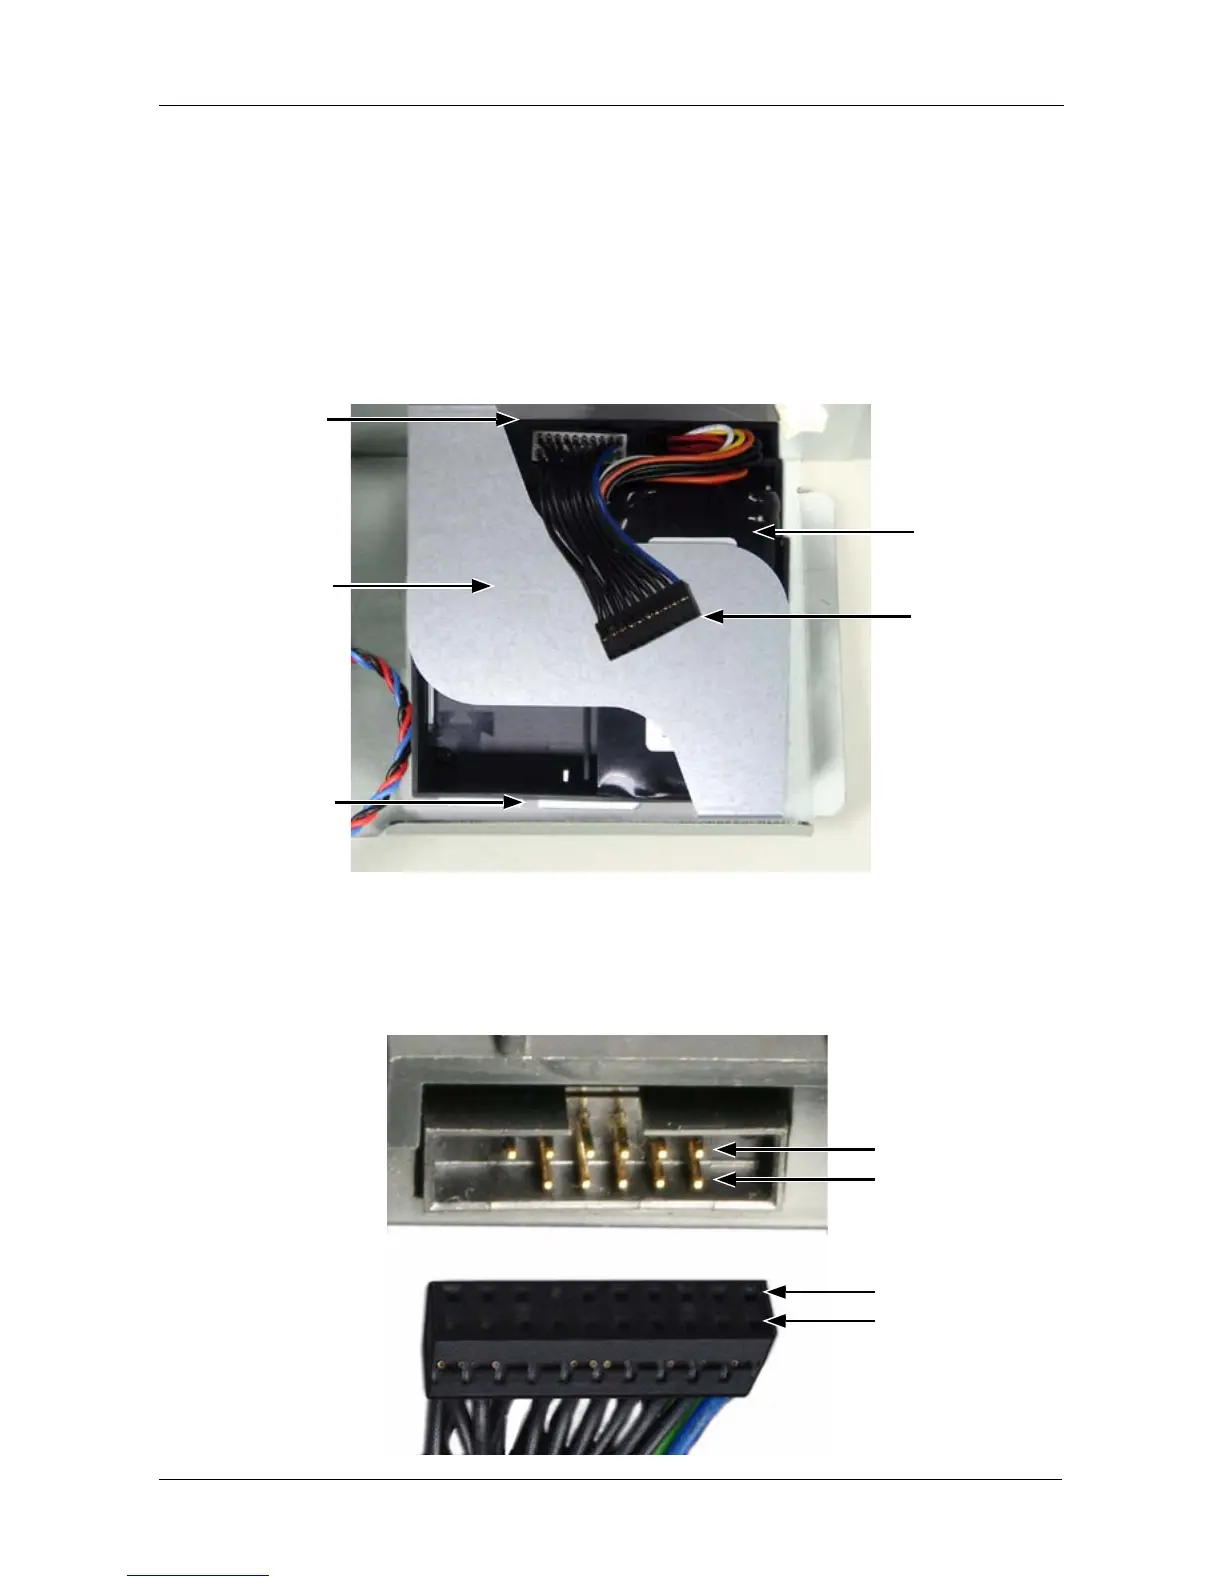
5. Remove the battery assembly attaching screw on the outside of the RAID
controller housing.
6. Detach the battery connector and remove the battery assembly.
Figure 6. RAID Controller cache battery
7. Attach the connector of the new battery assembly.
Be careful to line-up the connector pins correctly. See Figure 7.
Figure 7. Battery connector pins
Slot
Attaching
screw (on
controller
housing)
Connector
Battery
assembly
Battery
Row A
Row B
Row B
Row A
 Loading...