Fusing
D117/D118 4-90 SM
*2: If there is no fuse for new unit detection (such as in the fusing unit that comes with the machine
from the factory), install a fuse.
Never use a damaged fusing unit.
Inspect the entire fusing unit carefully if you will continue to use this unit.
New Fusing Unit Detection Fuse Replacement and Installation
The new fusing unit detection fuse should be replaced (or installed, such as in the fusing unit that
comes with the machine from the factory) if you continue to use the fusing unit. The fuse
replacement and installation procedure is as follows.
1. Fusing upper cover (
p.4-77).
2. Fusing lower cover (
p.4-77)
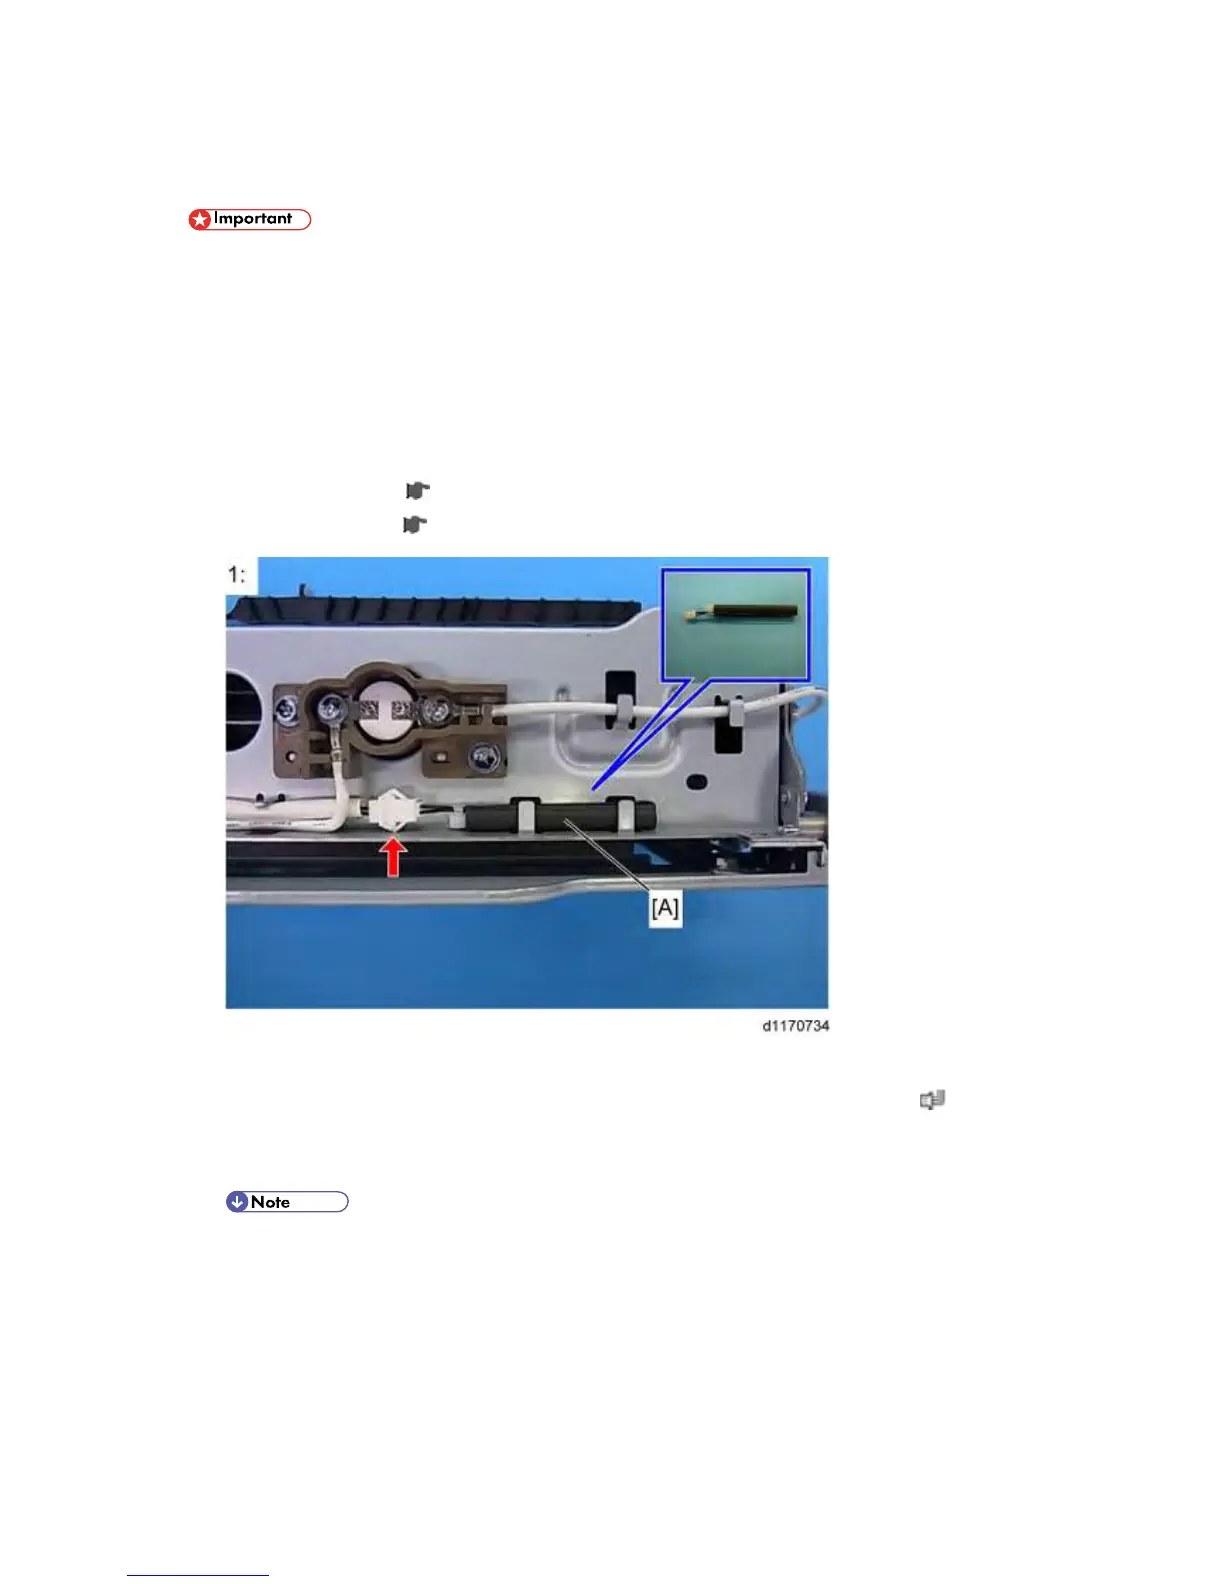
1: Rear
3. Remove the new fusing unit detection fuse [A] if the old blown fuse is attached (
x 1).
4. Connect the fuse connector, and insert the fuse into place from the upper side.
5. Reassemble the fusing unit.
Ask your supervisor to obtain the new fusing unit detection fuse.
 Loading...


