8 System Setup
DX100 8.13 Setting the Controller Clock
8-97
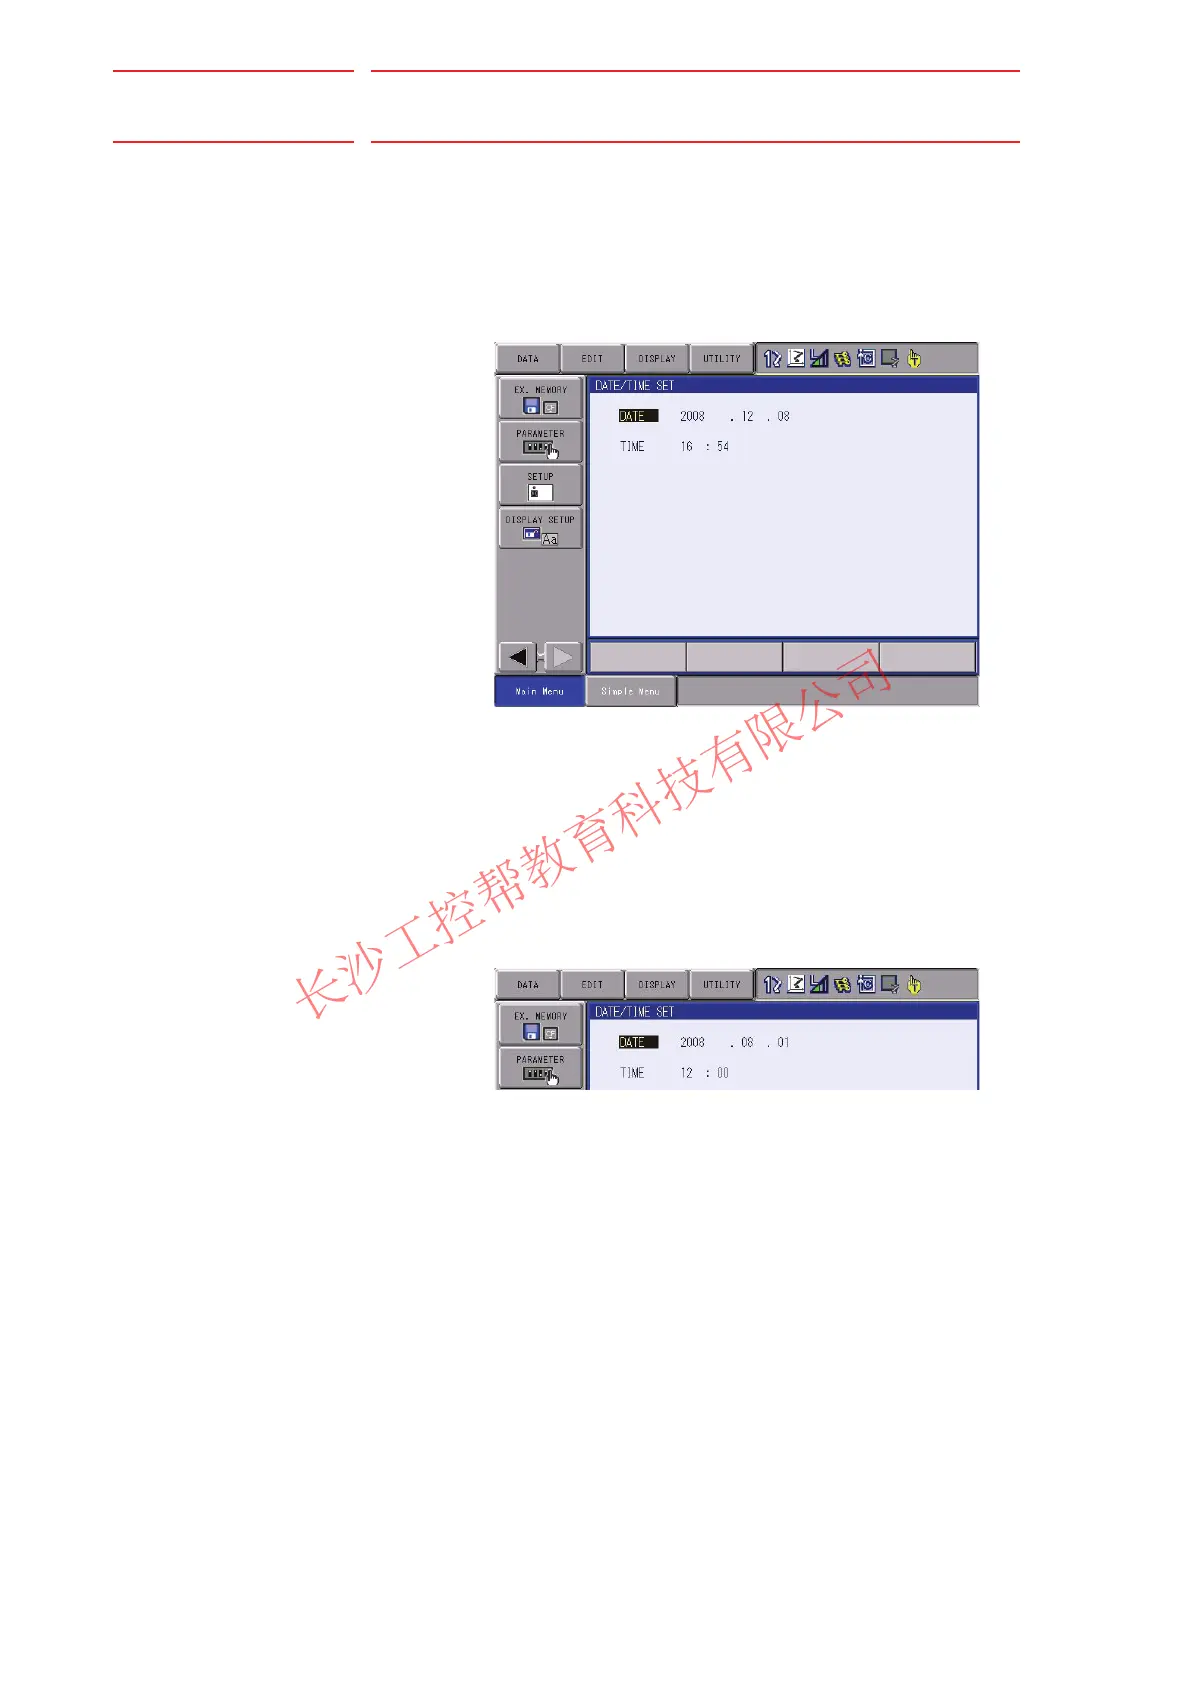
8.13 Setting the Controller Clock
The clock inside the DX100 controller can be set as follows.
1. Select {SETUP} under the main menu.
2. Select {DATE/TIME}.
– The DATE/CLOCK SET window appears.
3. Select “DATE” or “CLOCK.
– ”The input buffer line appears.
4. Input the new date/time.
– For instance, to set the date to August 1, 2008, input "2008.8.1". To
set the time at twelve o’clock, enter "12.00".
5. Press [ENTER].
– The date/time is changed.

 Loading...